Advanced WordPress
Adding an item to your navigation is a quick and easy thing to do; it is just a little hidden away in the dashboard.
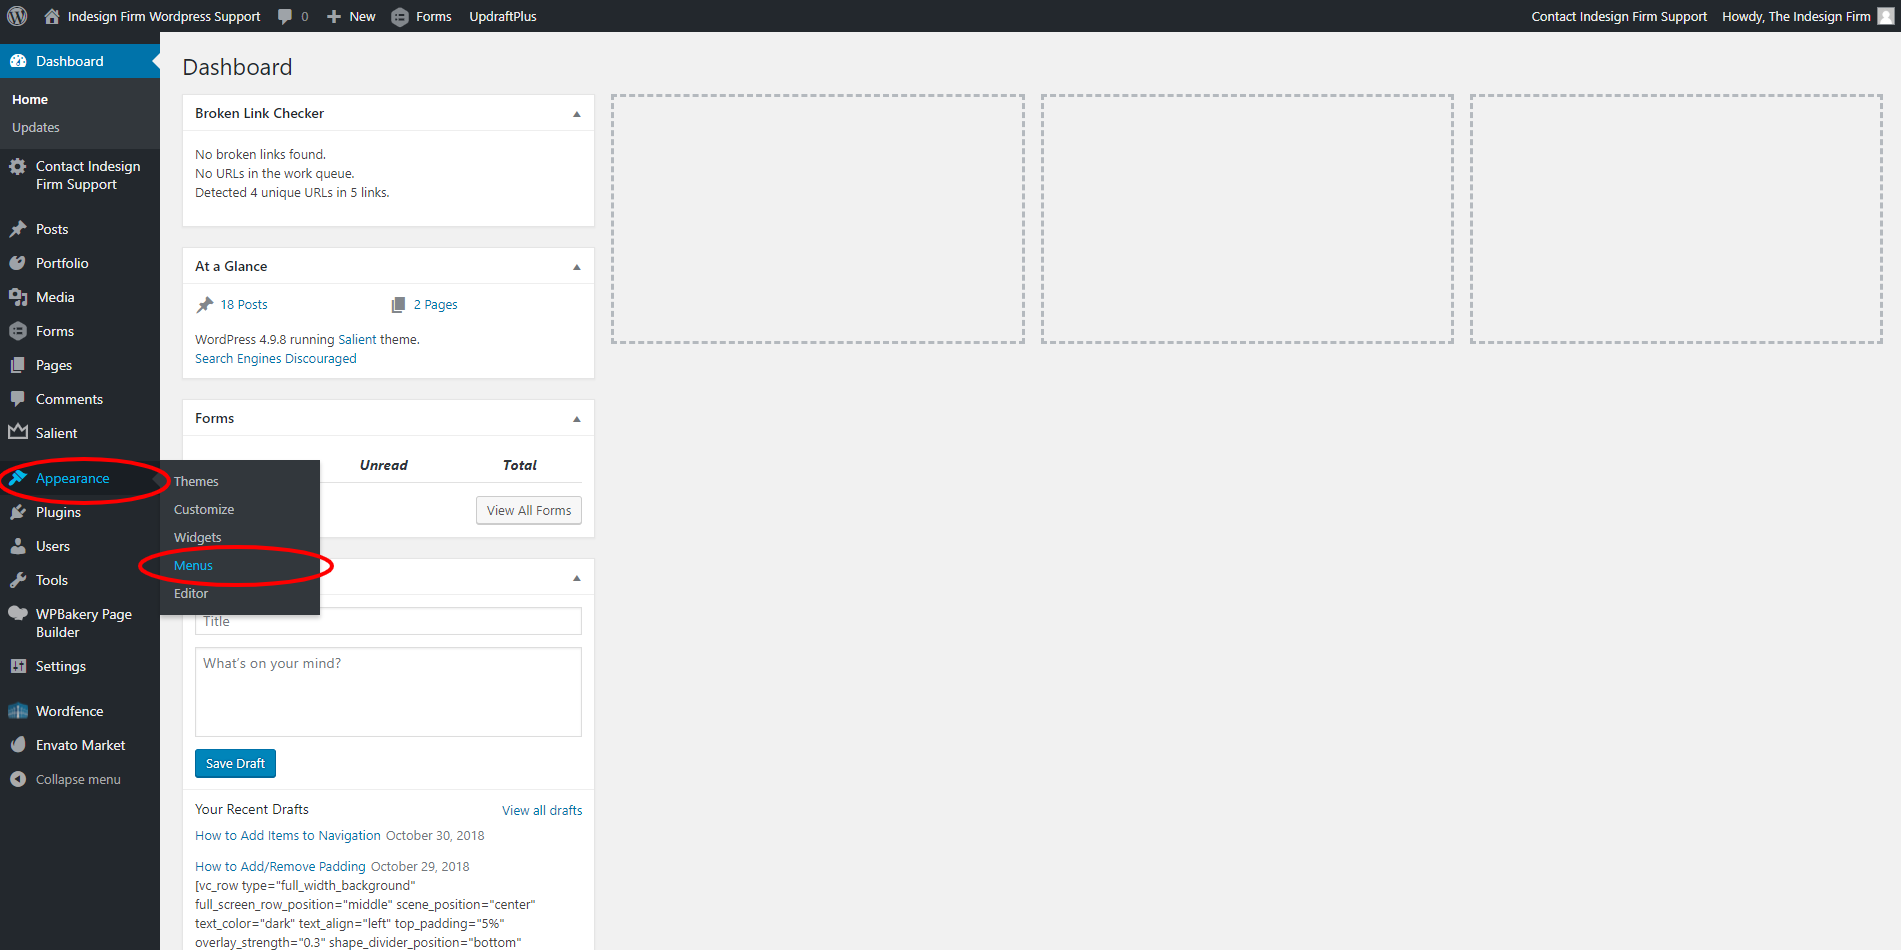
To navigate to the “Menus” section, hover over “Appearance” in the left side bar. Then hover over into the box that appeared to the right and click “Menus.” (shown in the example image)
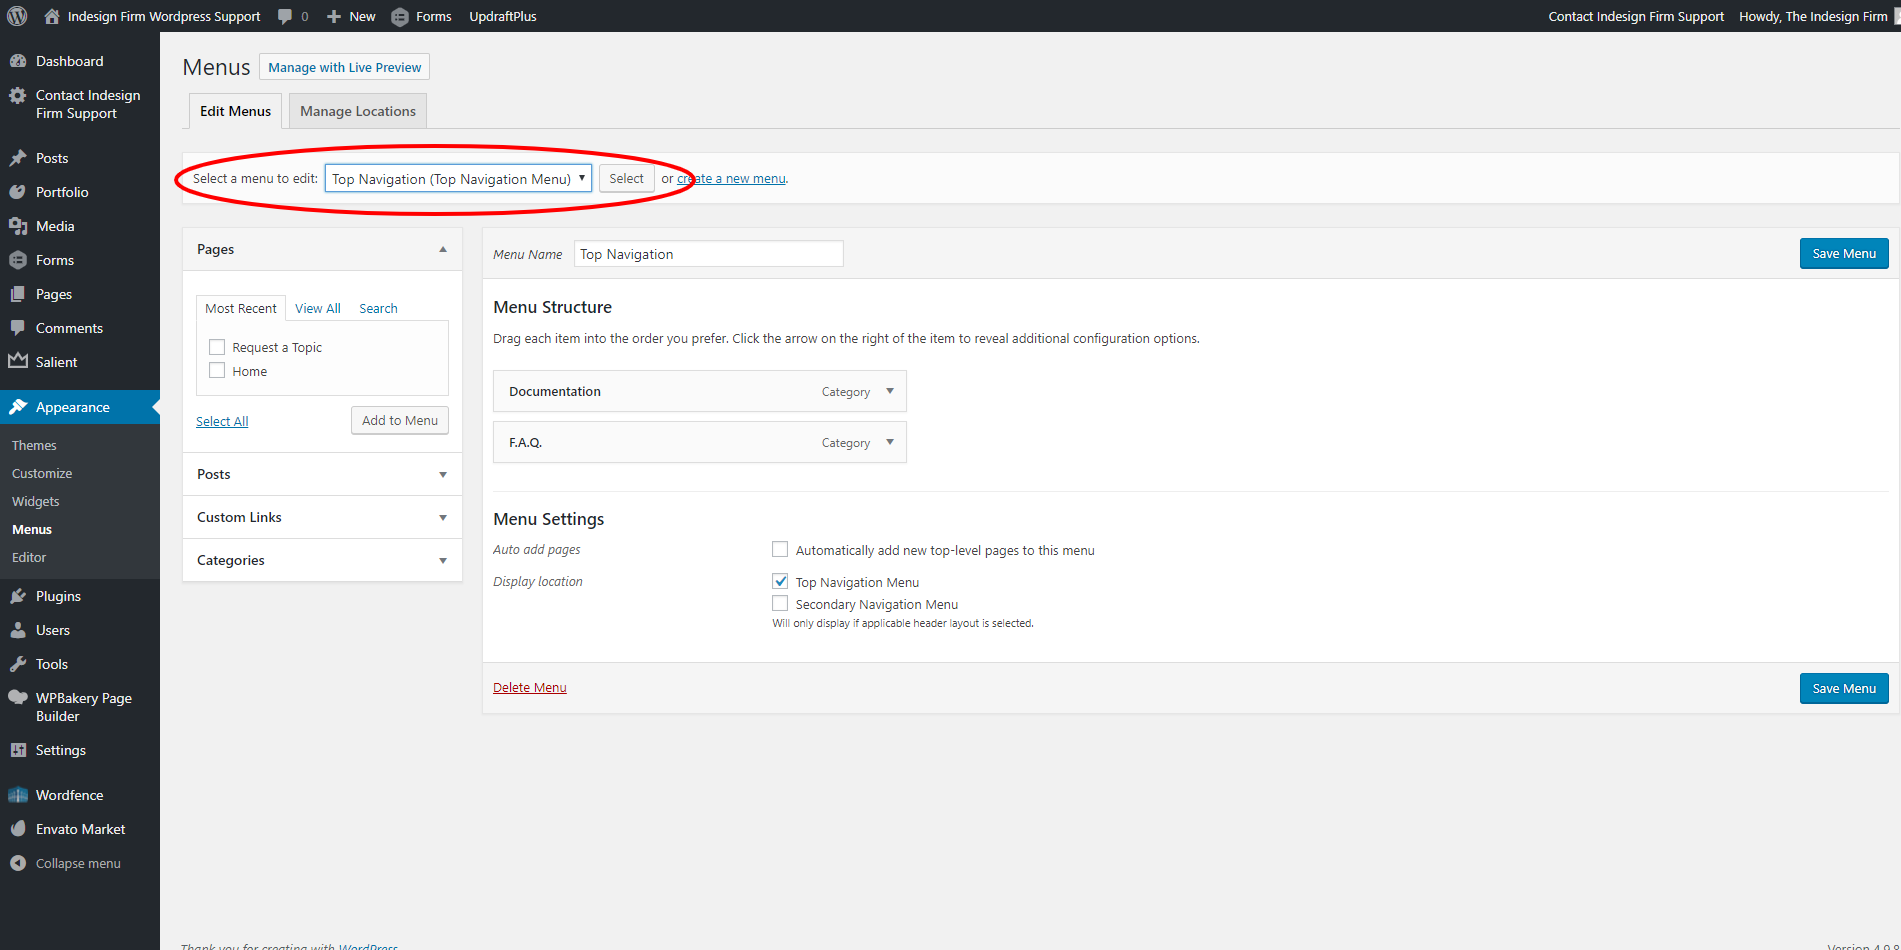
After navigating to the “Menus” page, ensure that you have the correct menu, that you wish to edit, selected.
If you want to edit the main navigation that is at the top of your website, select the dropdown option that is followed by “(Top Navigation Menu).” Shown in the example image.
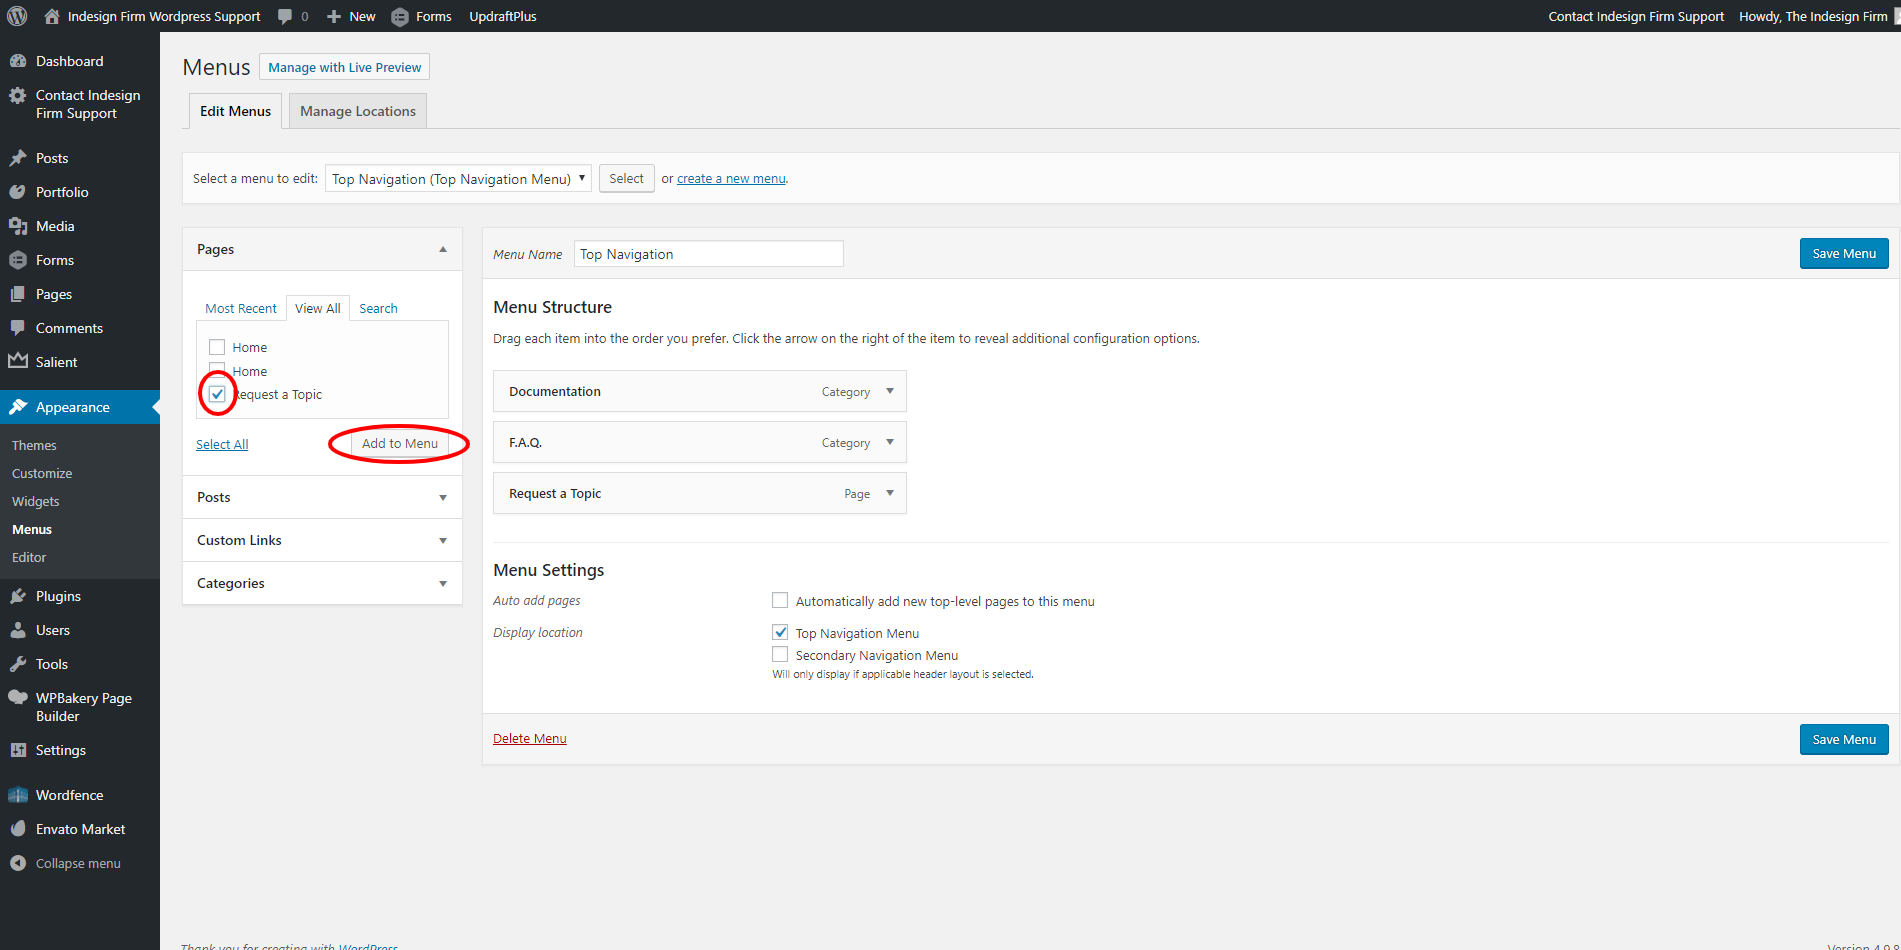
To add a page to your menu, click “View All” under “Pages,” and select the checkbox for all pages you wish to add to the menu. Then click the “Add to Menu” and arrange them in the order that you wish. Click the blue “Save Menu” button when you are finished.
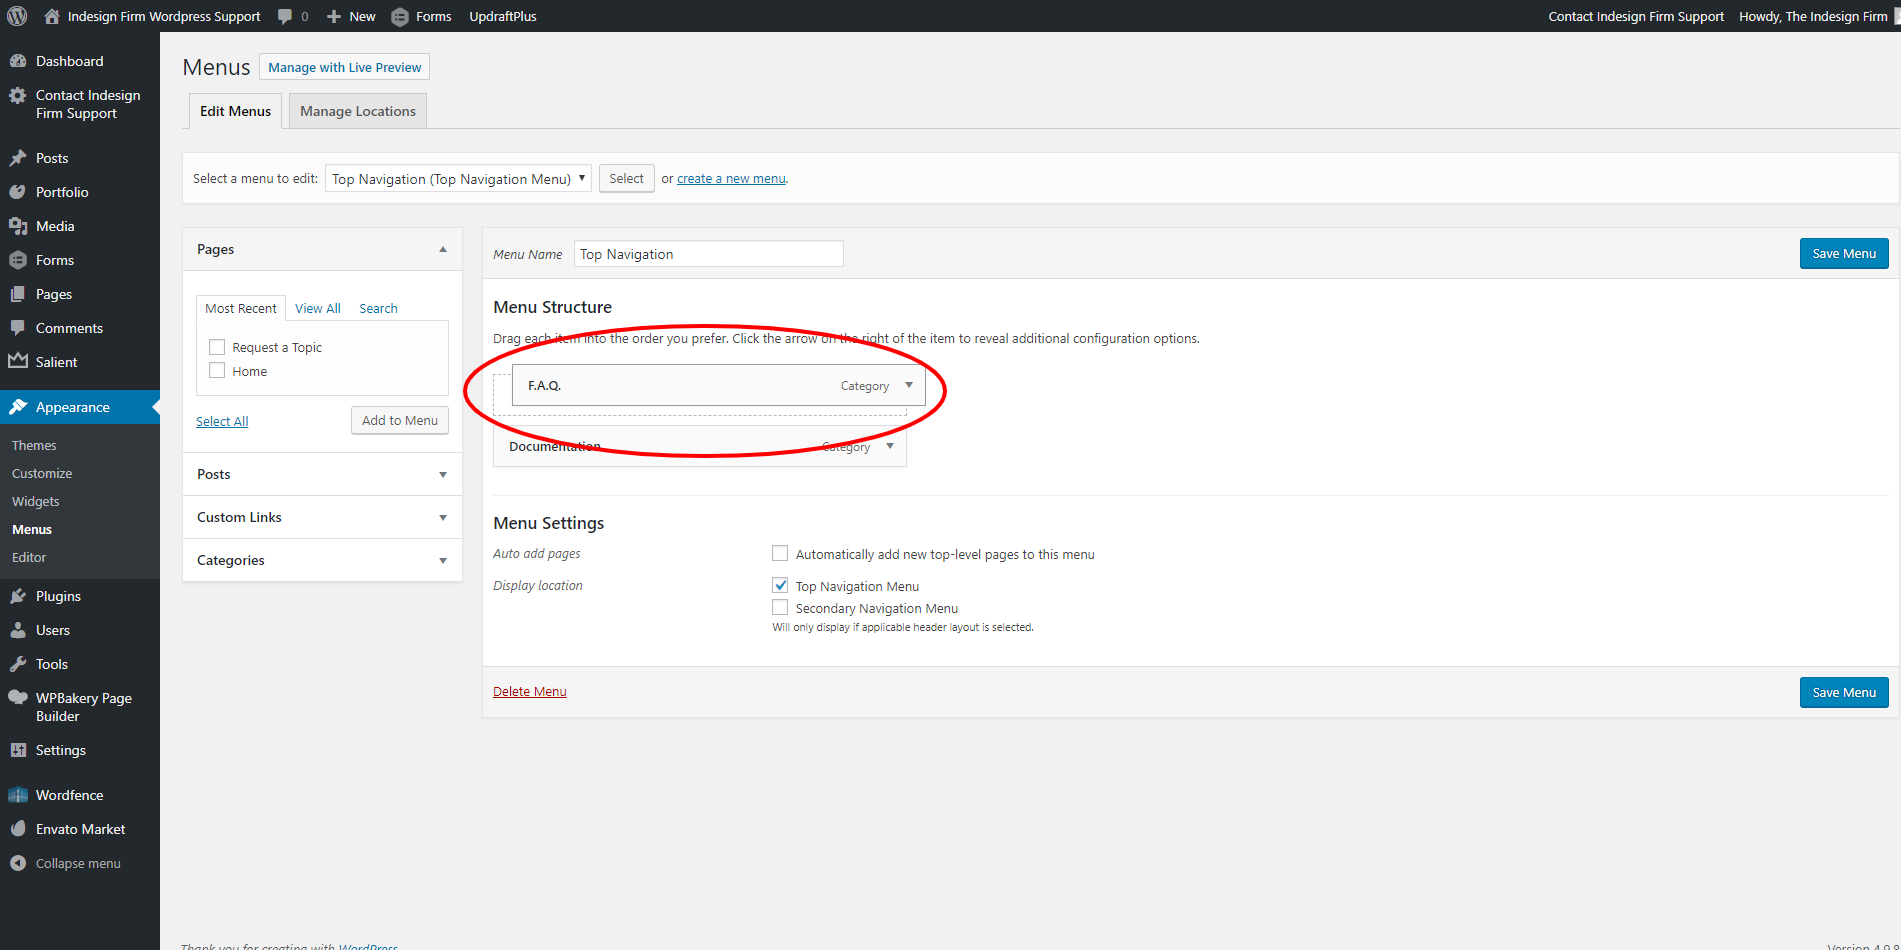
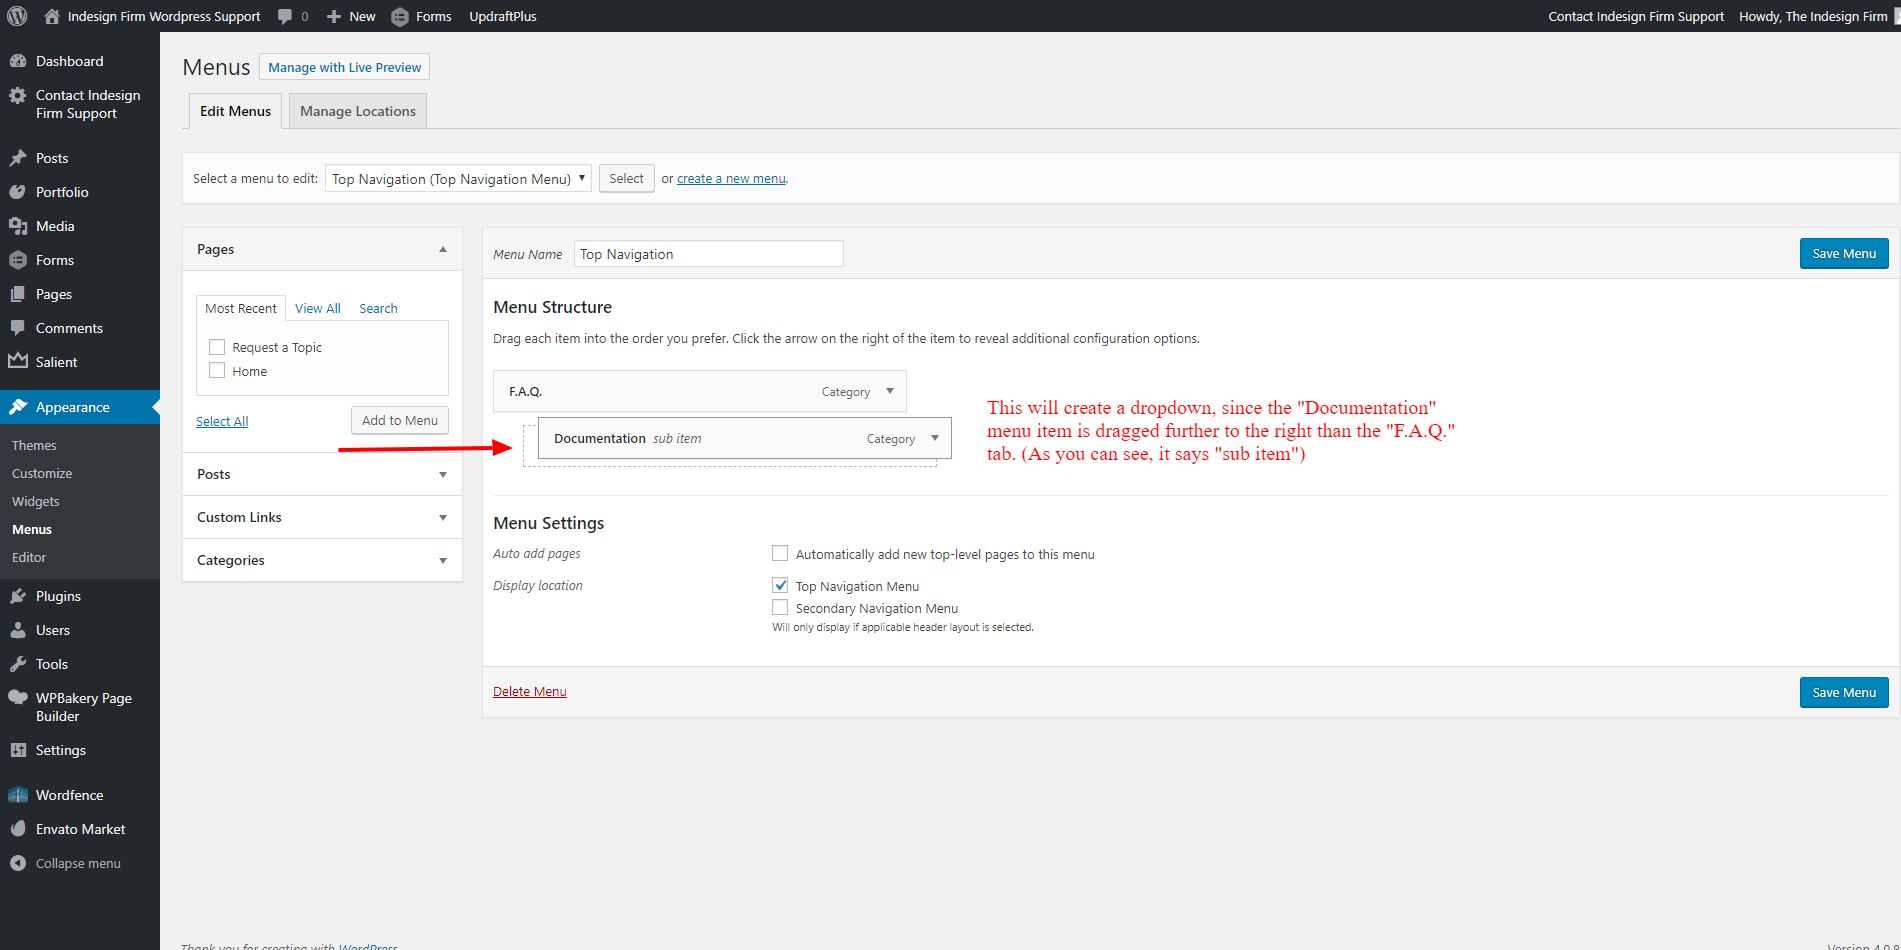
To rearrange your menu items, simply hover over the menu item you wish to move. Click and drag the menu item where you wish to place it. Click the blue “Save Menu” button once you are finished with your changes.
TIP: You can create a dropdown item simply by dragging the menu item to the right.
Adding an image to your page is a great way to freshen up a page. To do so, click on the “+” in the row you created. In the pop up box, search for “Single Image” in the search bar located in the top right. Click “Single Image,” then click upload a new image or select an image you’ve already uploaded.
Watch the video for a visual step-by-step on this process.
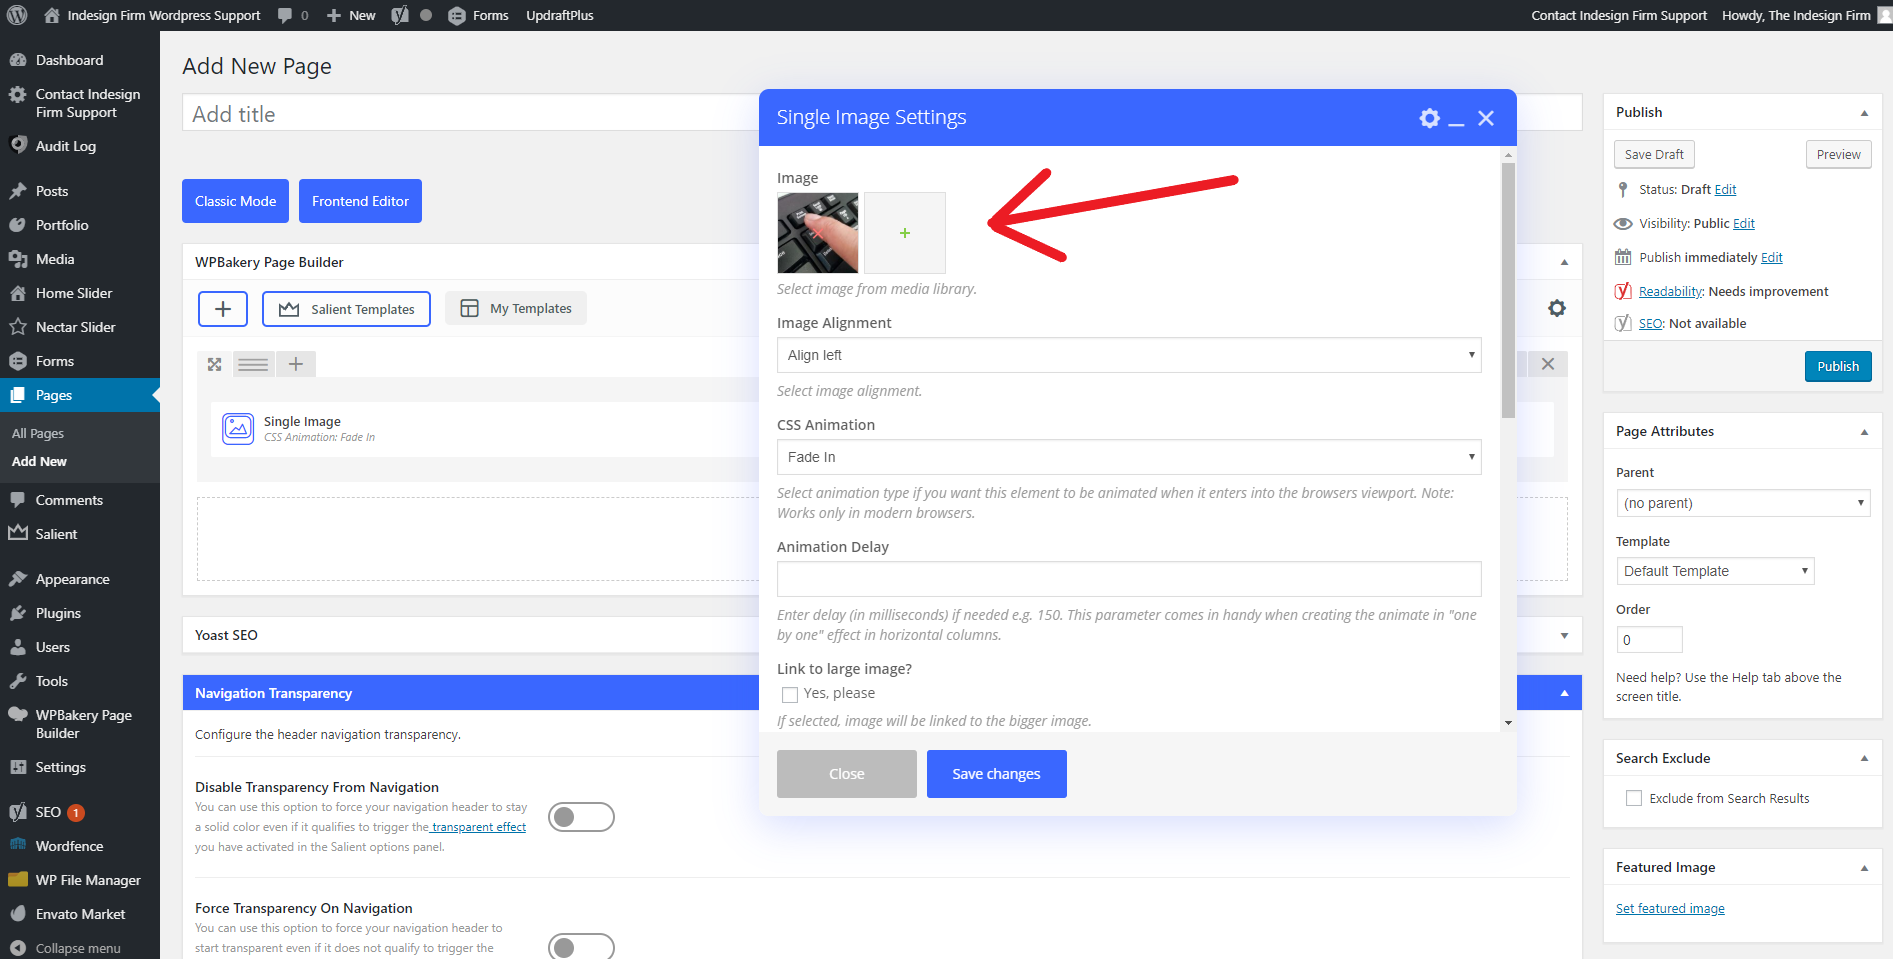
If you want to change an image that is already on a page, hover over the image and click on the pencil icon to bring up the image settings. Press the green plus icon next to the current image, and then select the image you want to replace the current image. Hit “Set Image” in the bottom right and then click “Save Changes” at the bottom of the image settings.

To add a background image to a row, click on the pencil icon to open the row settings menu.
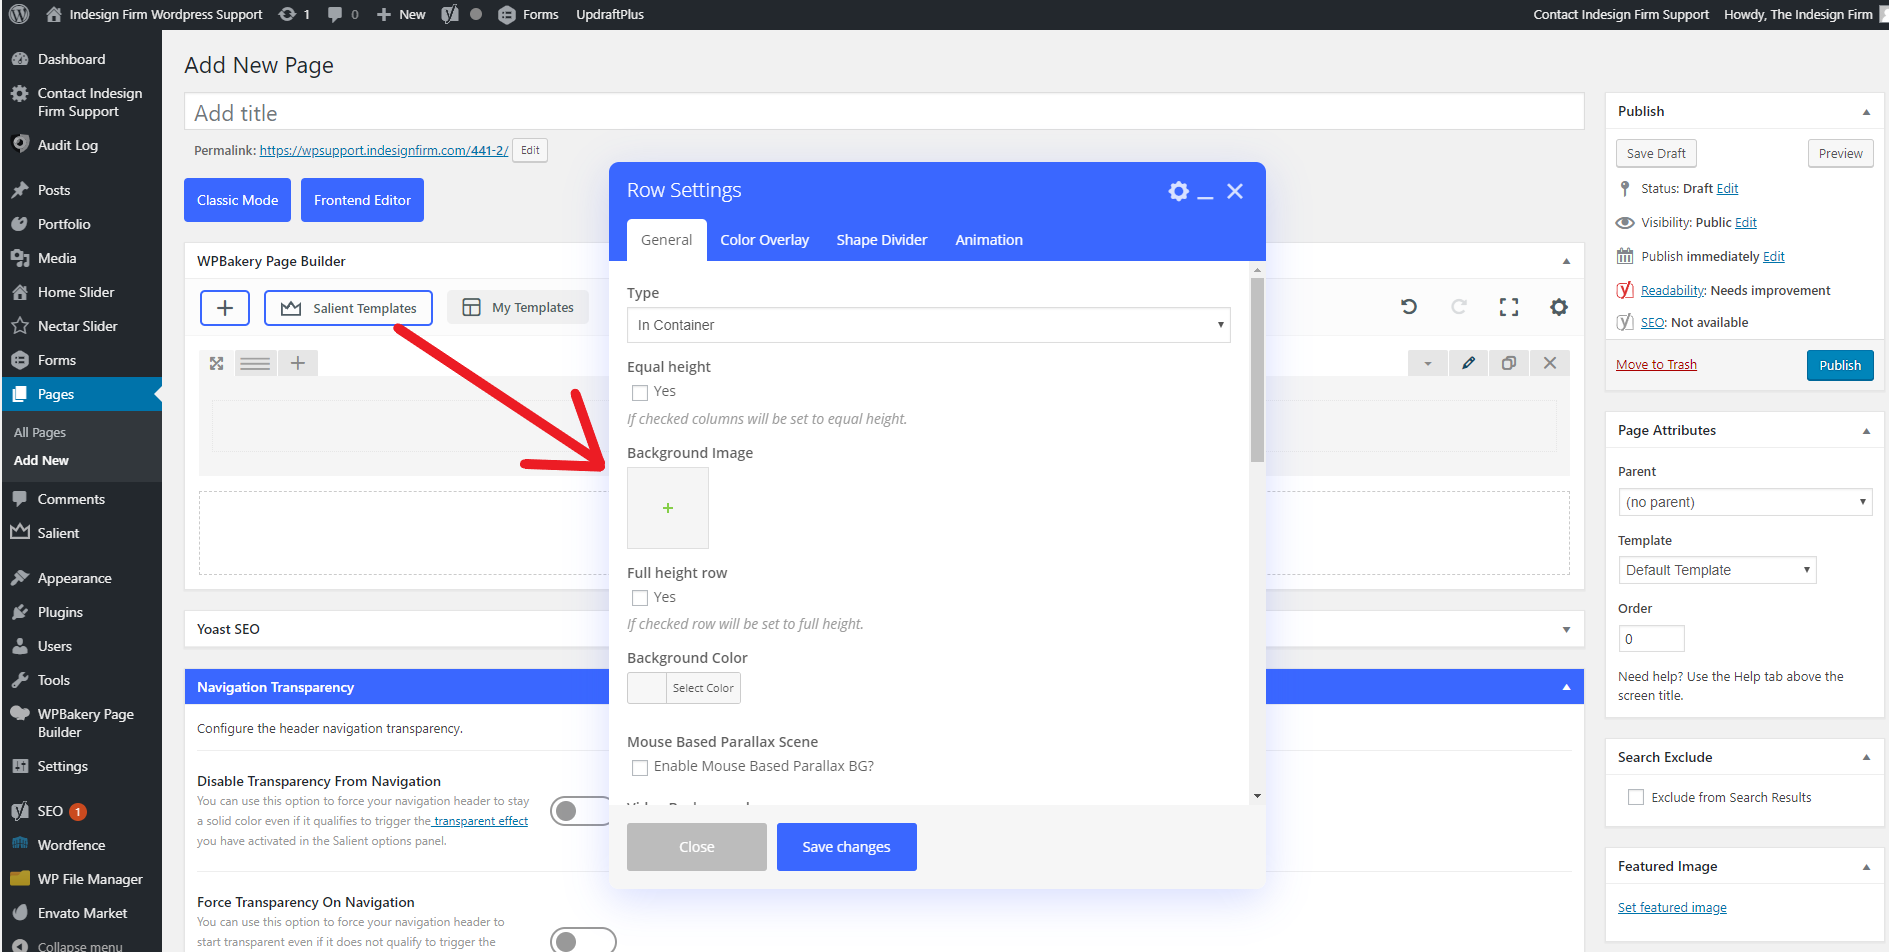
Click on the box below the heading “Background Image”. This will open a window with all the pictures that have been uploaded into the media section of the WordPress site. If you can’t find the image you want, make sure it has been uploaded into the media files of the WordPress site you are editing.
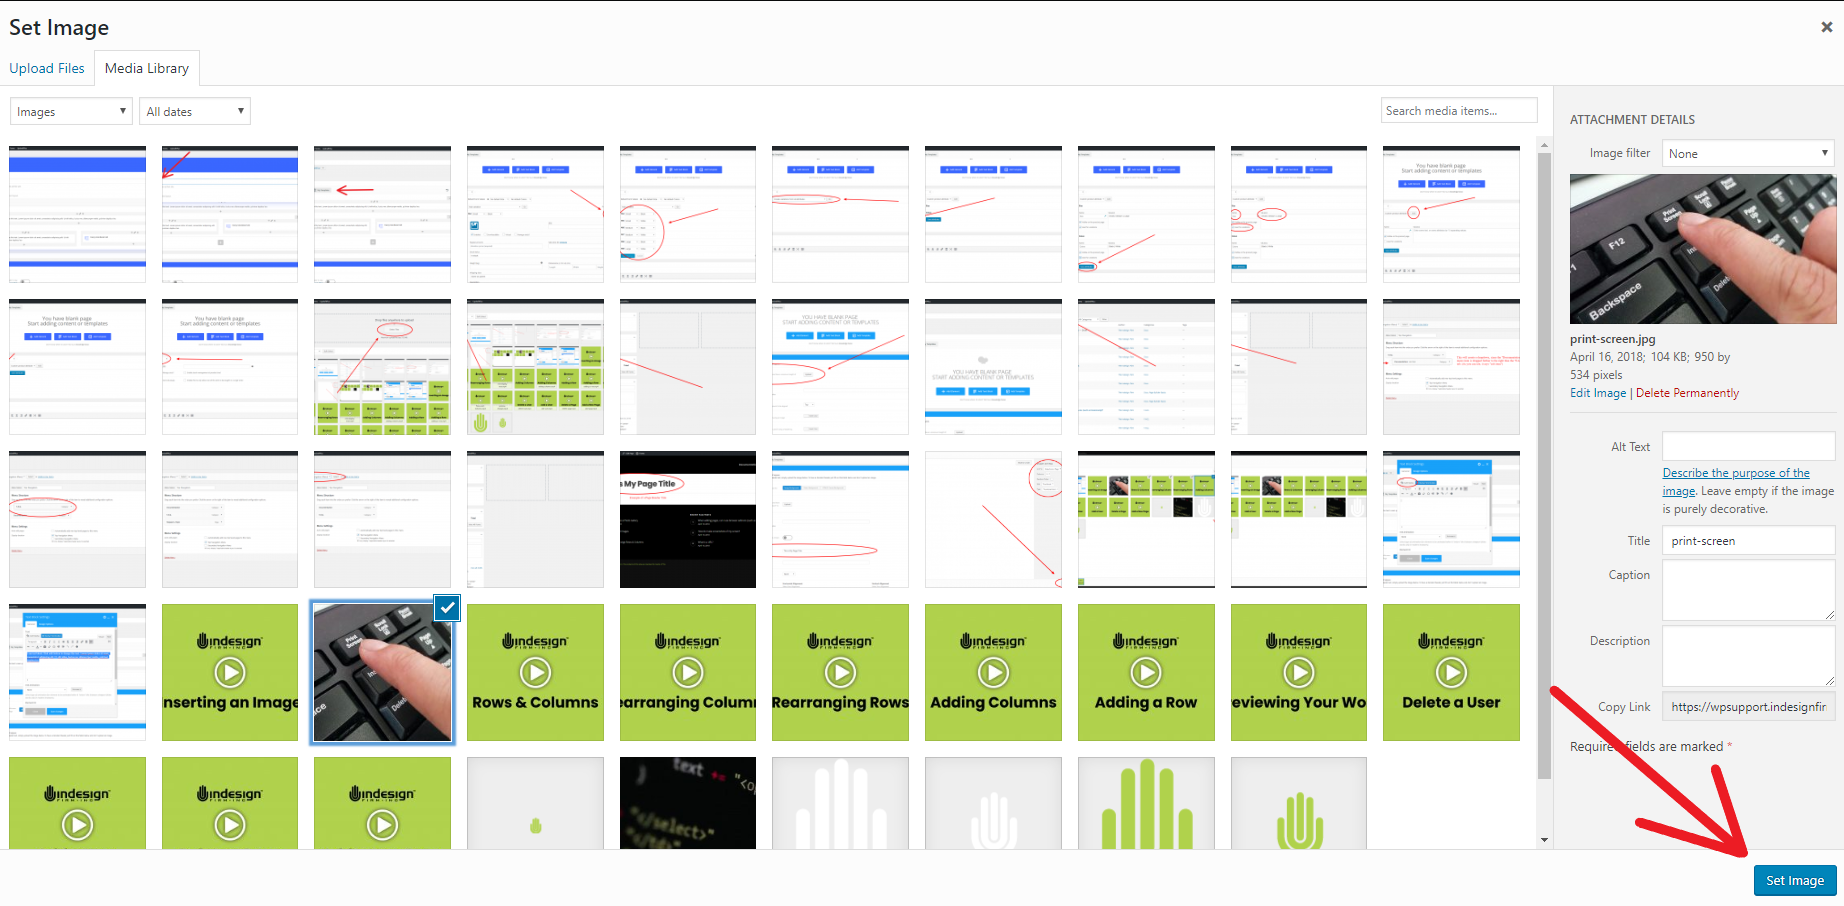
Find the image you want to set as the background, select it, and then press “Set Image” in the bottom right hand corner. You can also set a background image in a column, in which case you would open the column editor instead of the row editor, and then follow the rest of the steps the same.
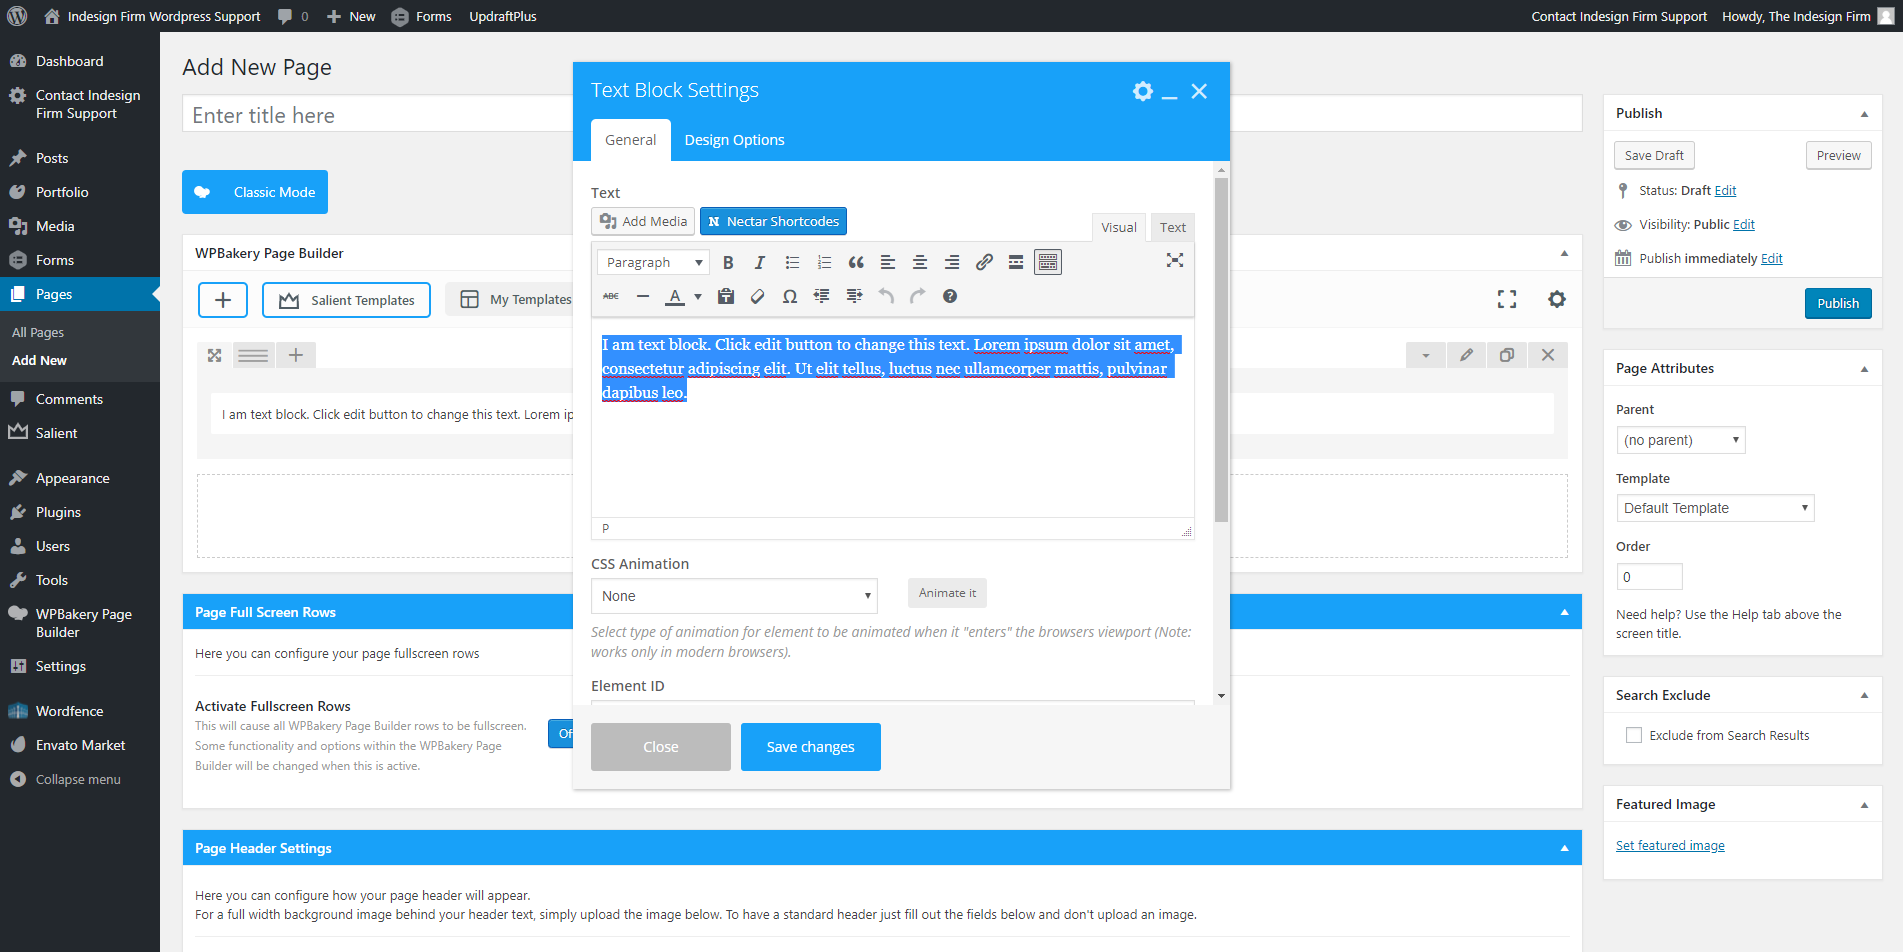
In the Page Builder, insert a text block and delete all preloaded text.
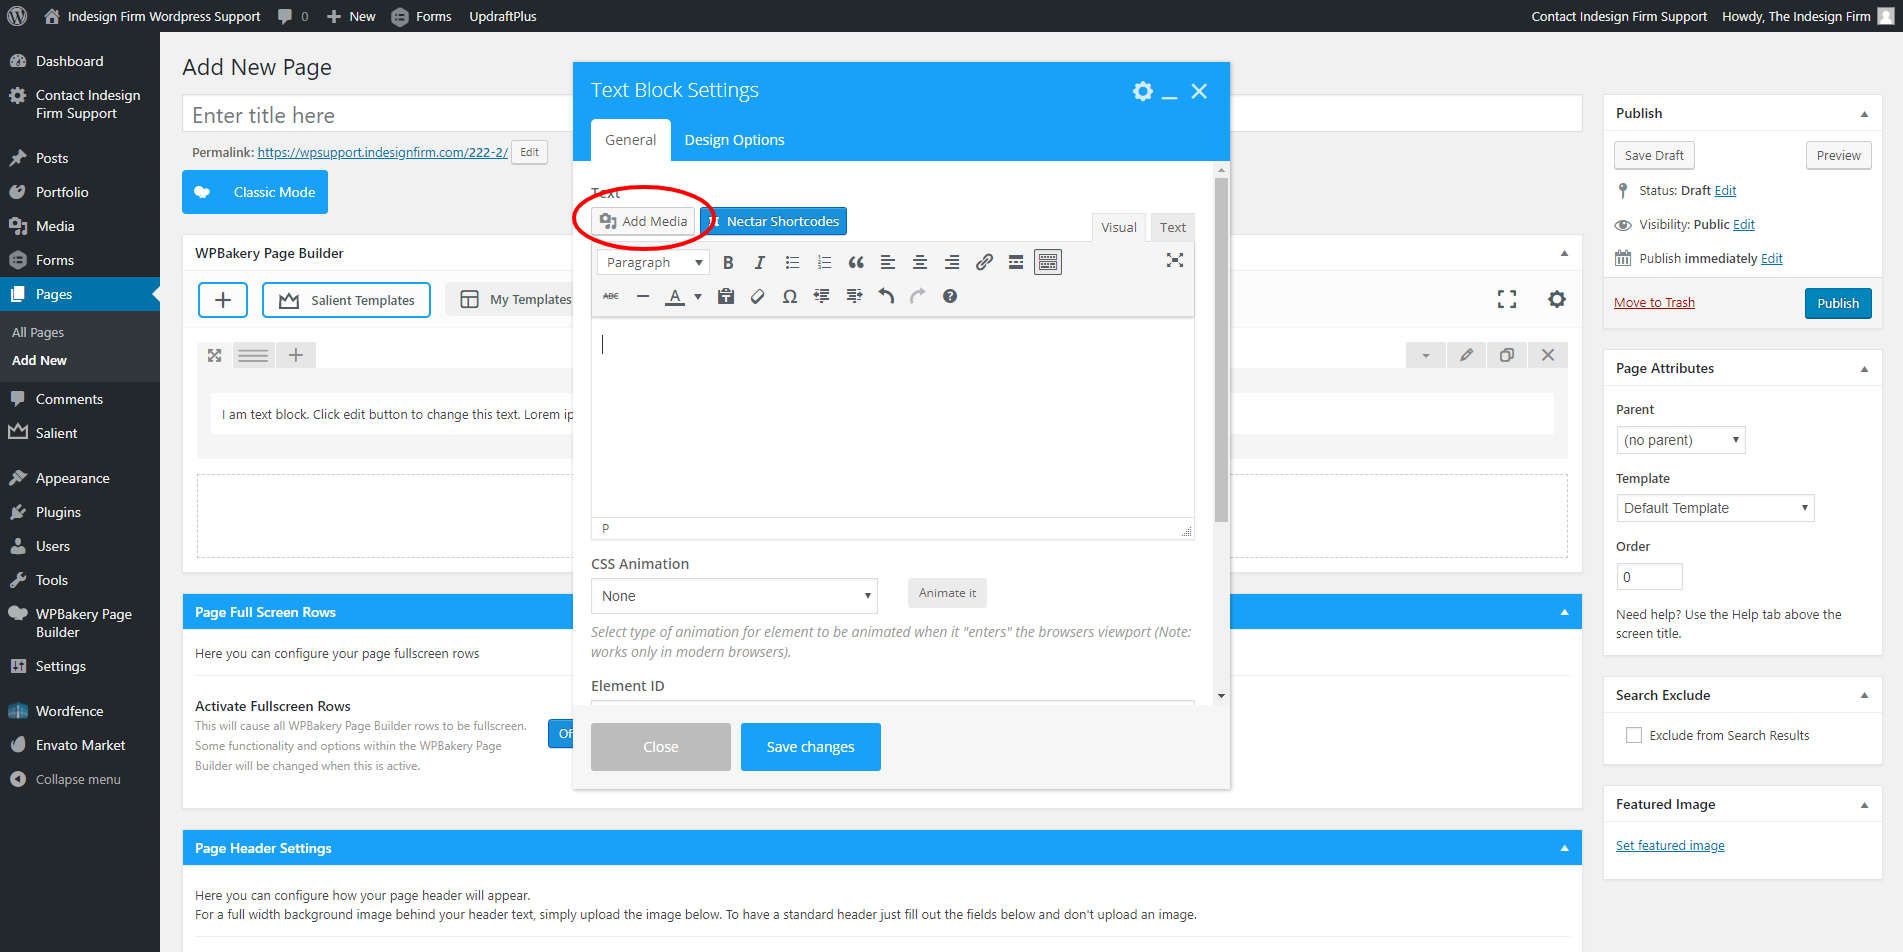
Click “Add Media” in the top left of the popup (see example image)
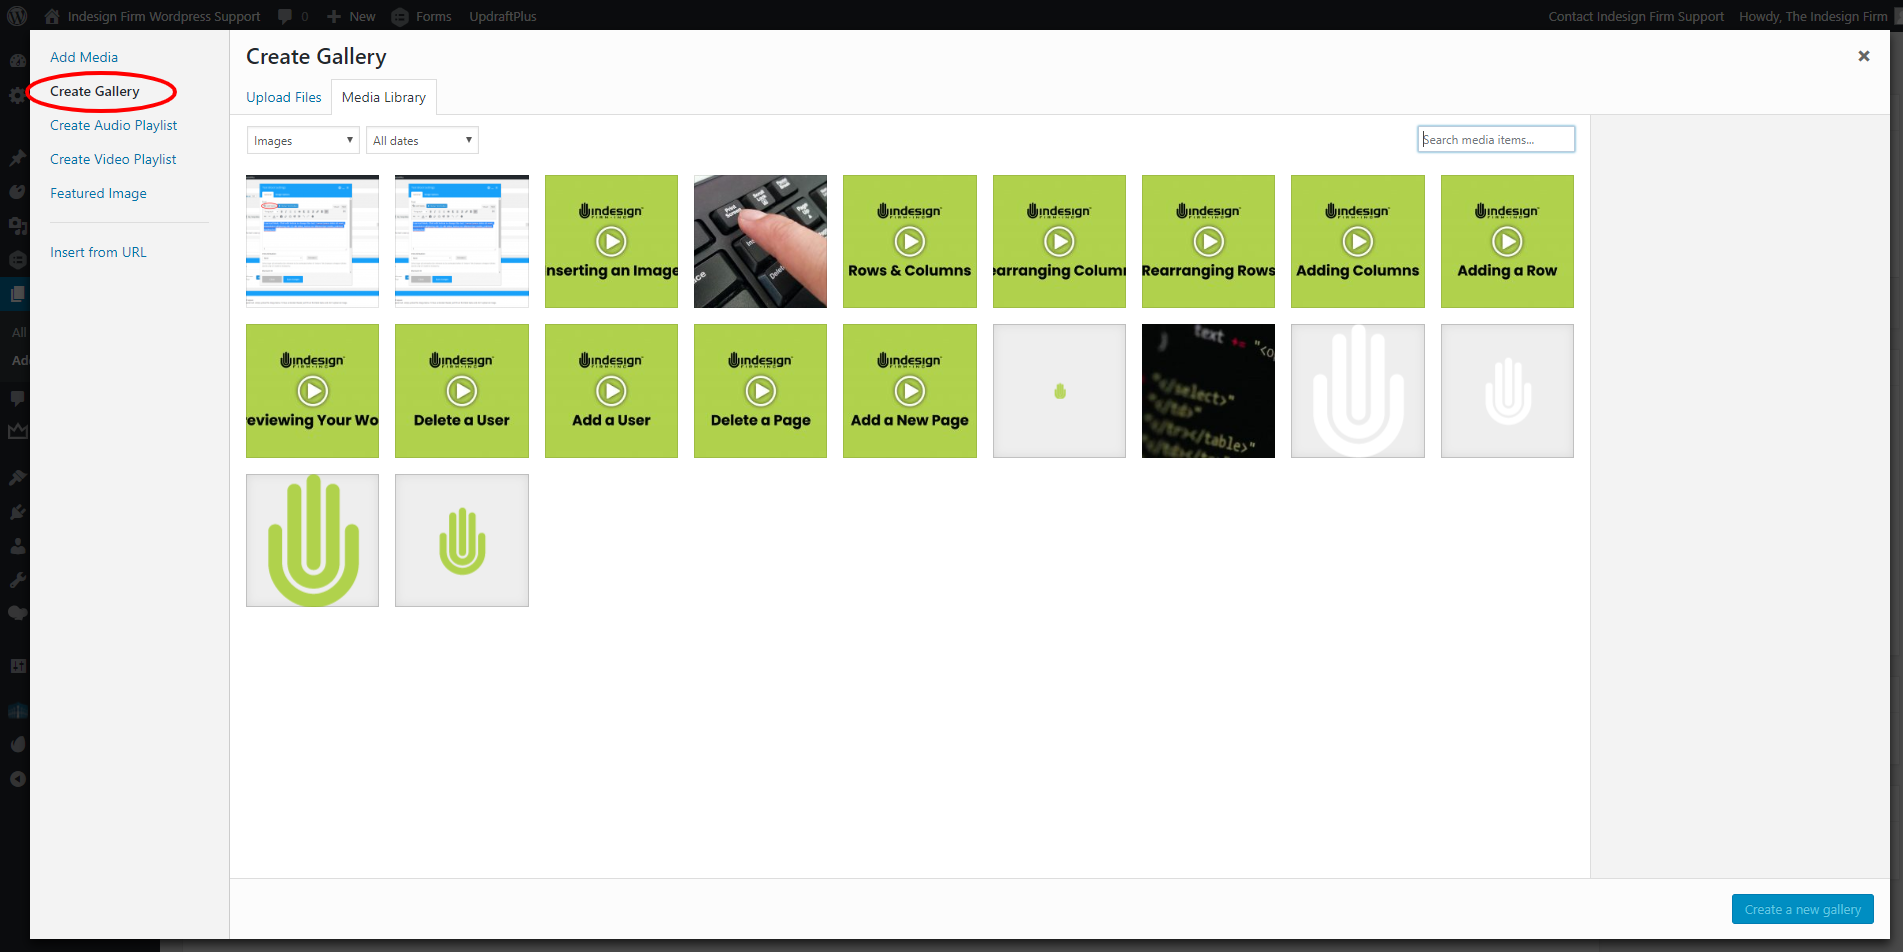
Click “Create Gallery” on the left side (see example image)
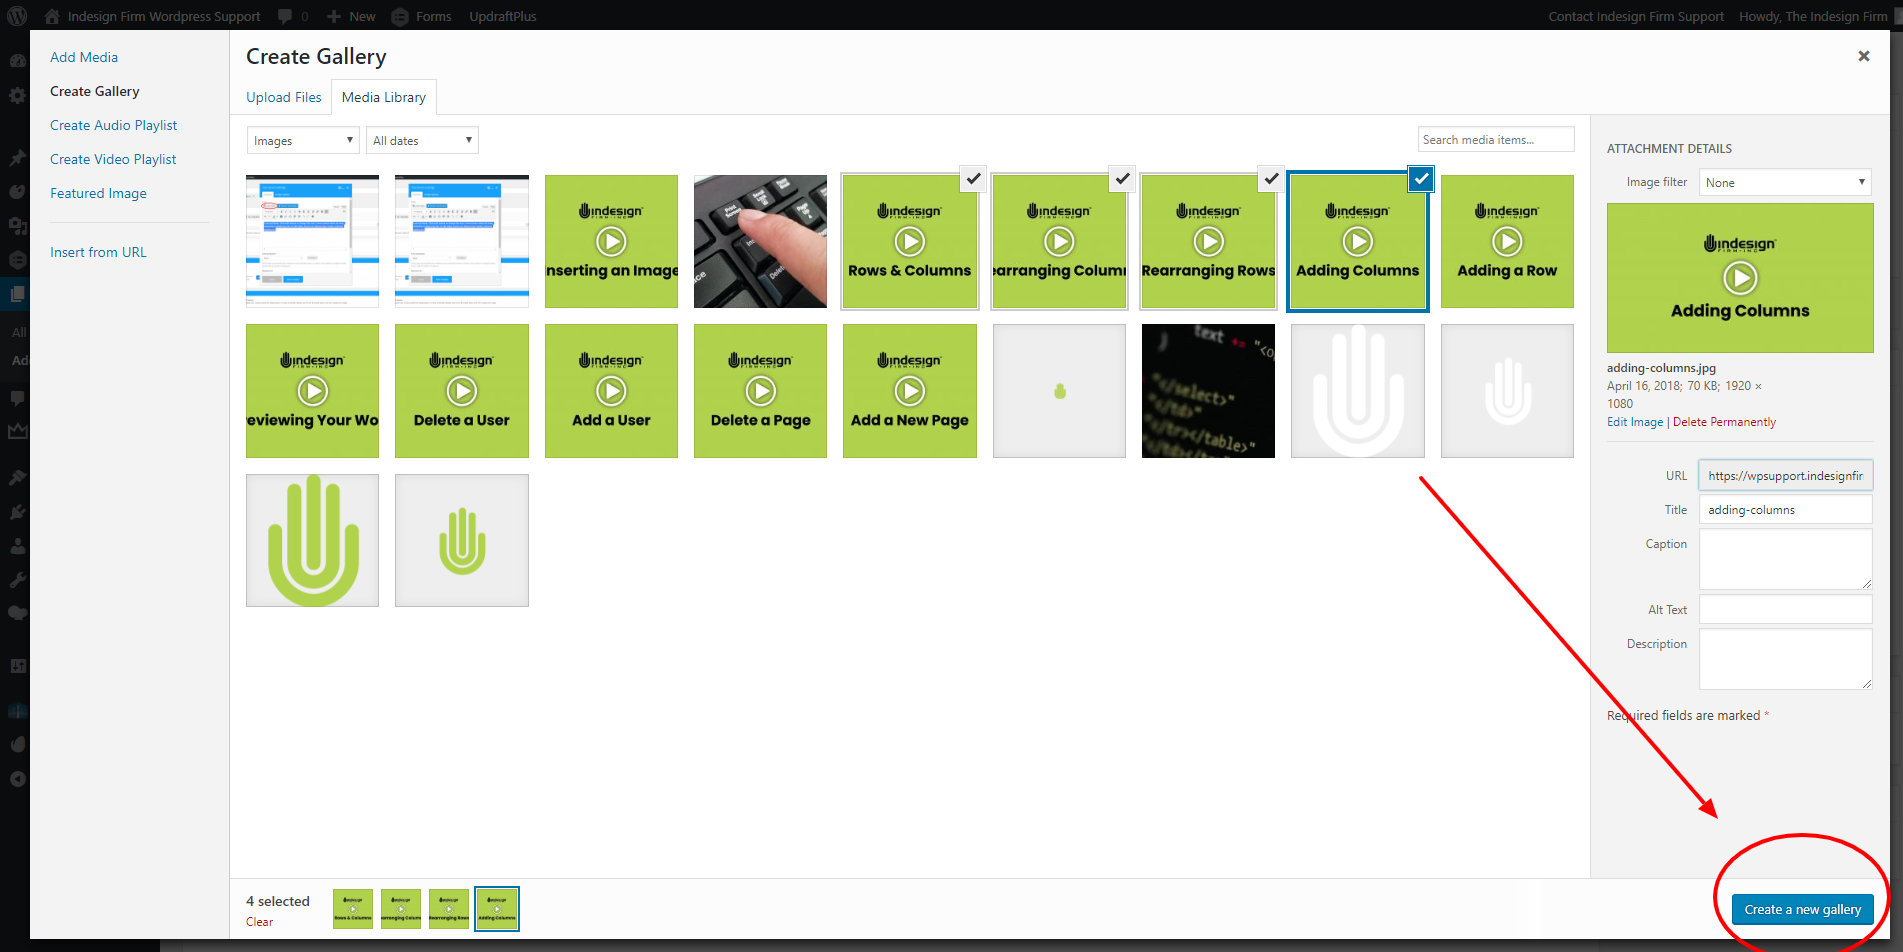
Select or upload all images you wish to include in the gallery. Click “Create a new gallery,” after you have selected or uploaded all of your images.
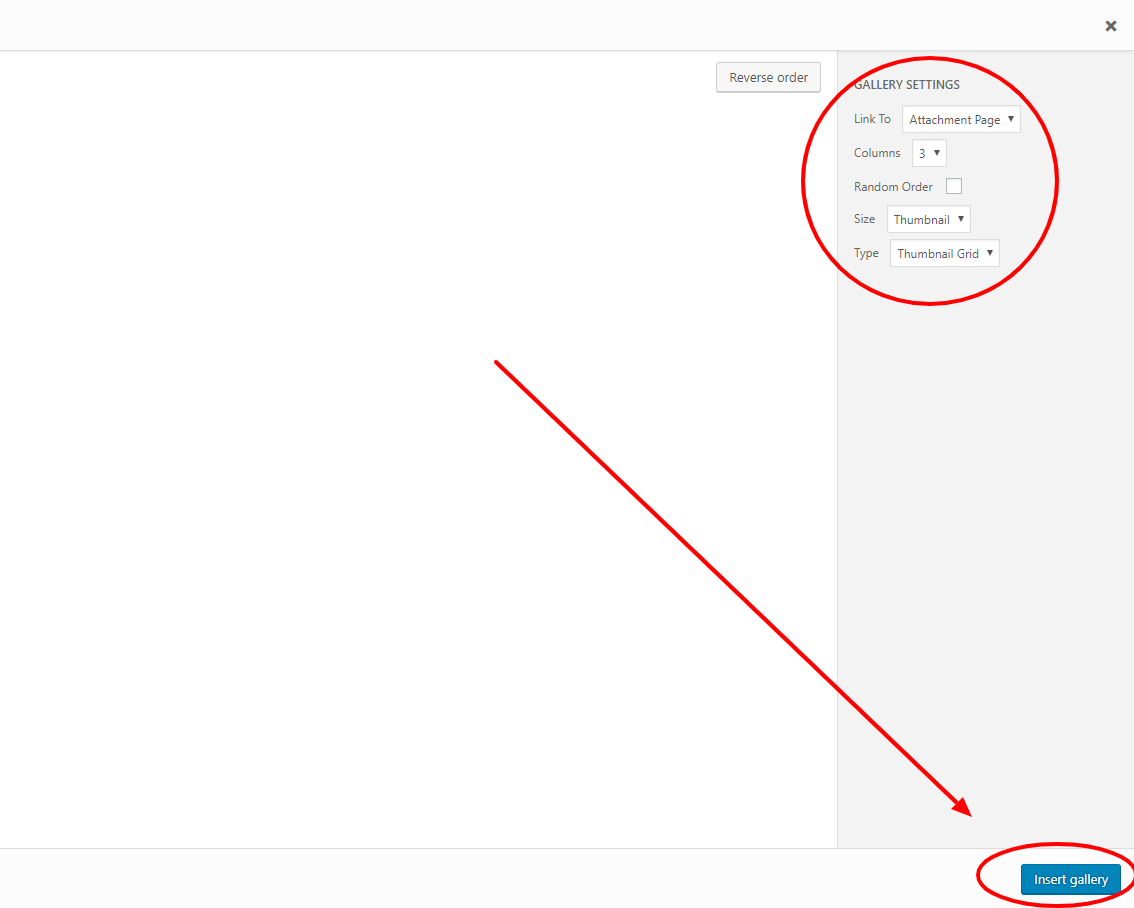
Adjust the settings on the right side of the screen. Change “Link to” to “None,” and set “Type” to either “Thumbnail Grid” (this will show a grid of the images you uploaded) or “Slideshow” (this will show a slideshow of the images you uploaded). Then click “Insert Gallery” in the bottom right.
If you choose Thumbnail Grid, feel free to play around with the number of columns in your grid.
From the dashboard, click the “Posts” button in the left side navigation bar.
(If your website was not developed with a blog section on your site, we recommend contacting The Indesign Firm support)
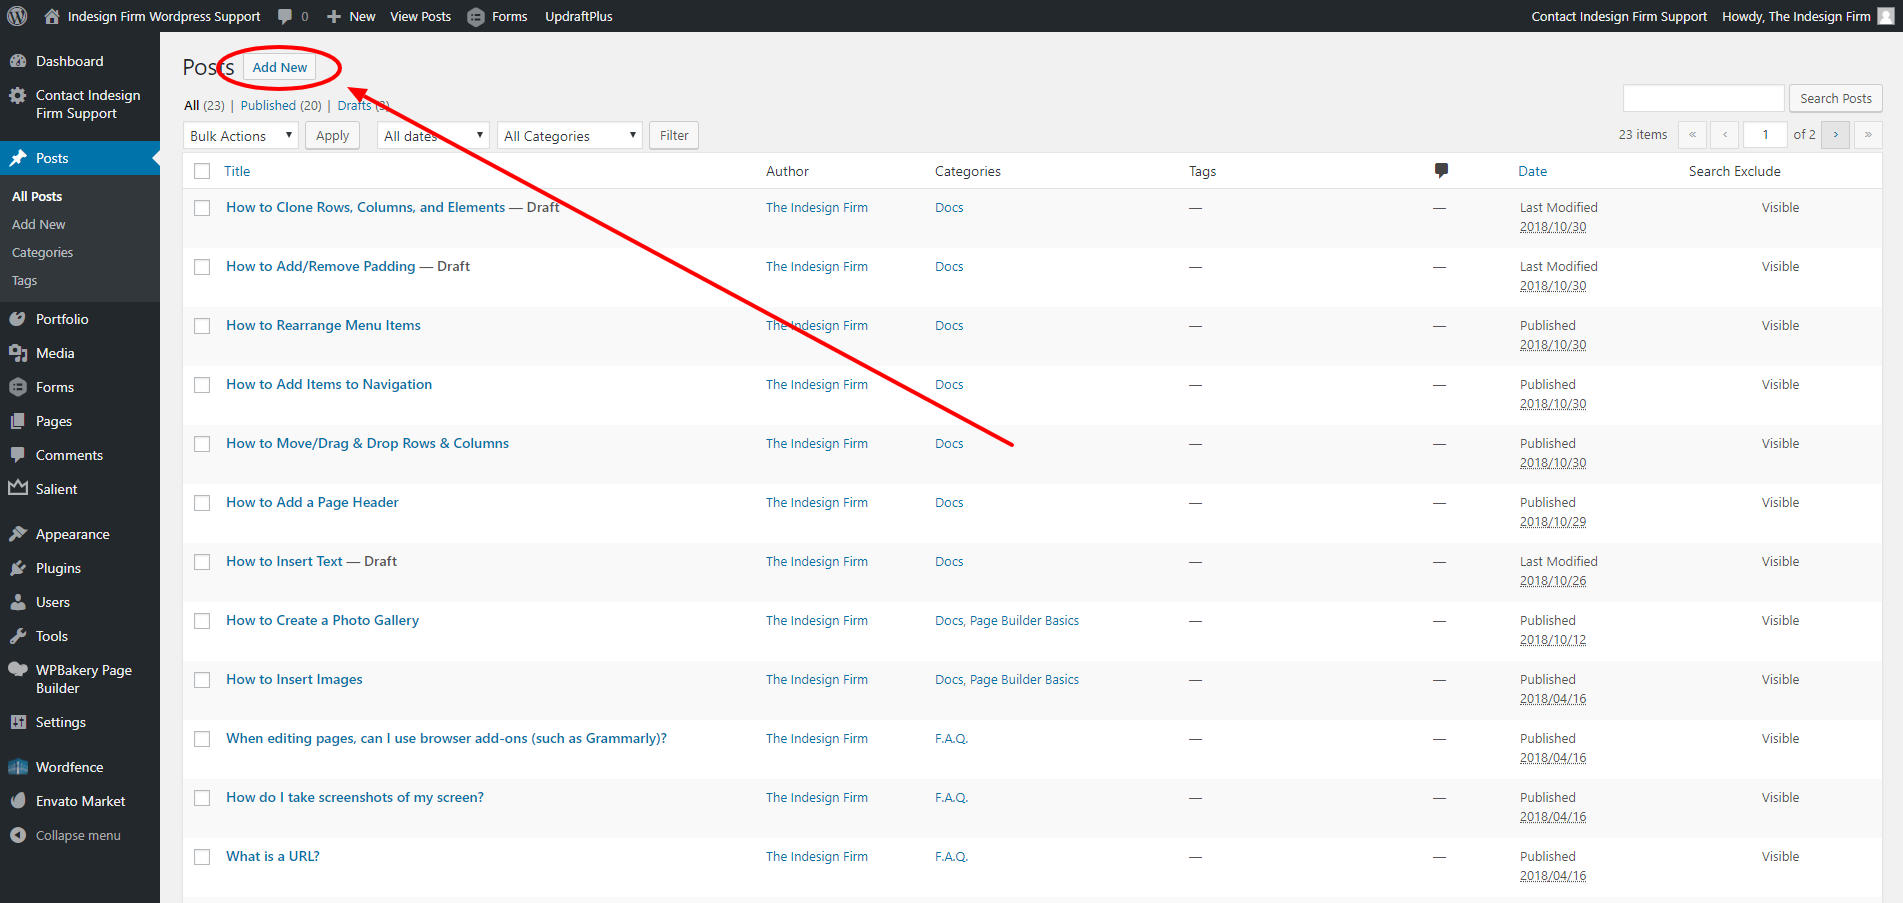
Once the “Posts” page appears, this is where any blog posts on your website will appear. Click the “Add New” button at the top of the page to create a new blog post.
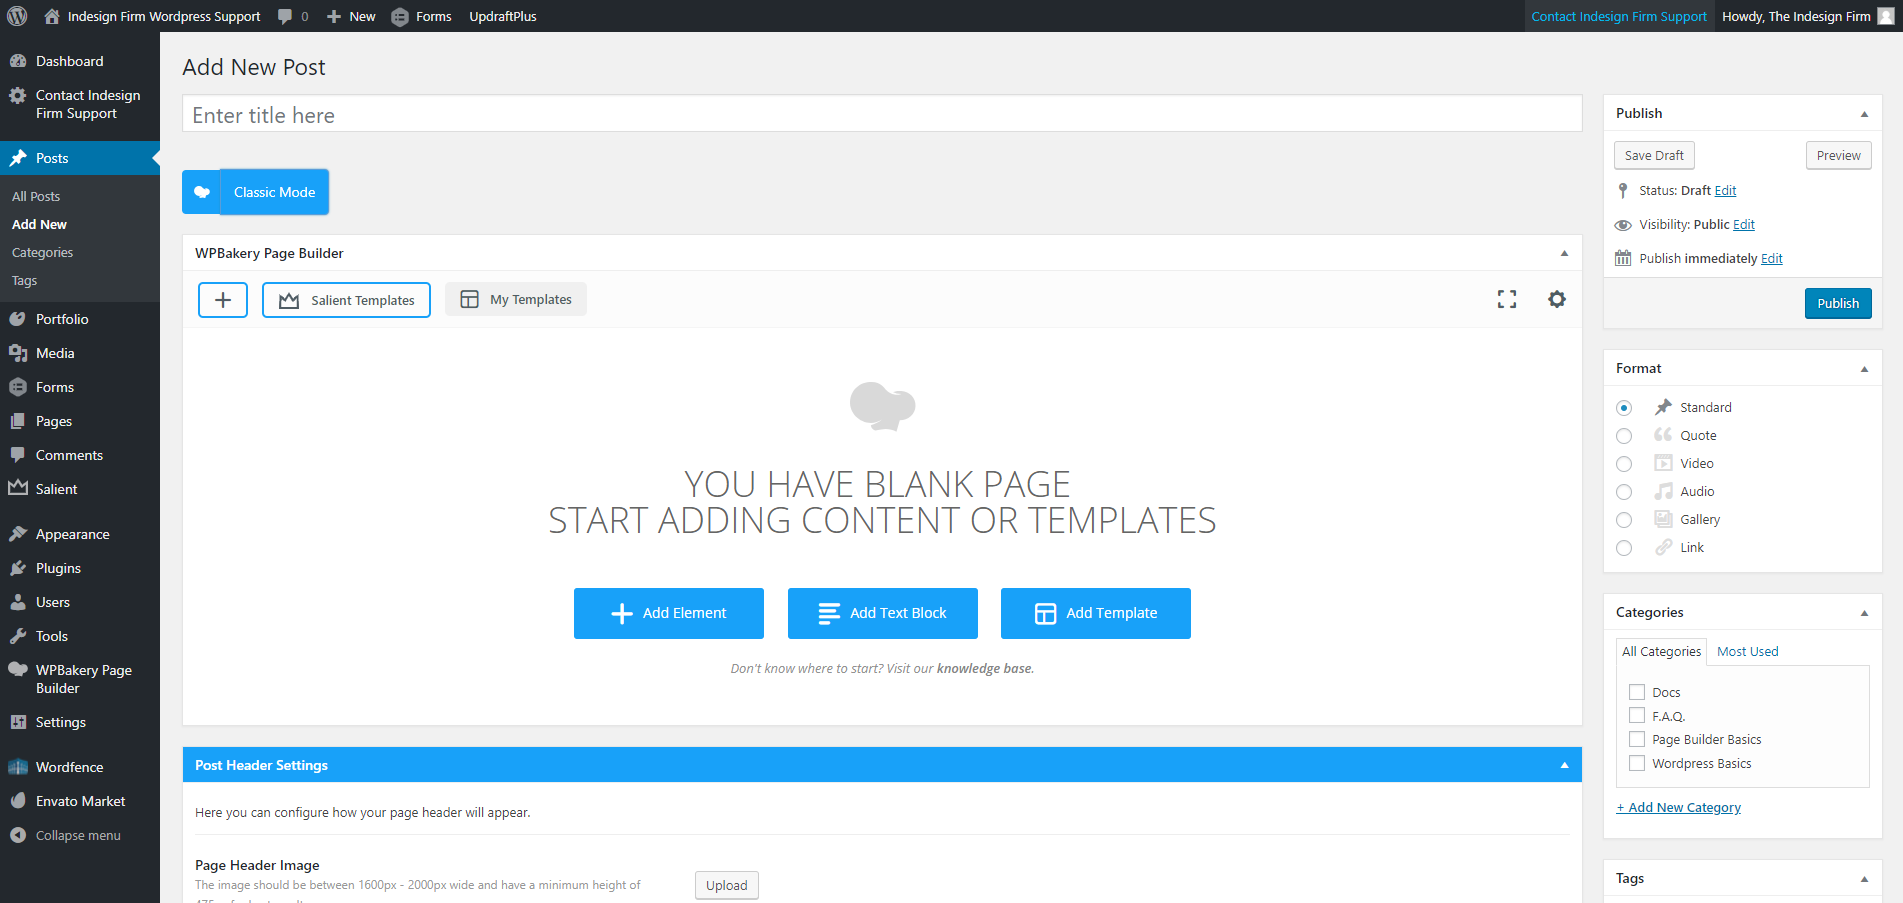
The new blog post page will look very similar to how new pages look, with a few minor differences. From here, you can edit the blog post similar to how you edit a page.
You can add rows, columns, elements, and a blog post title.
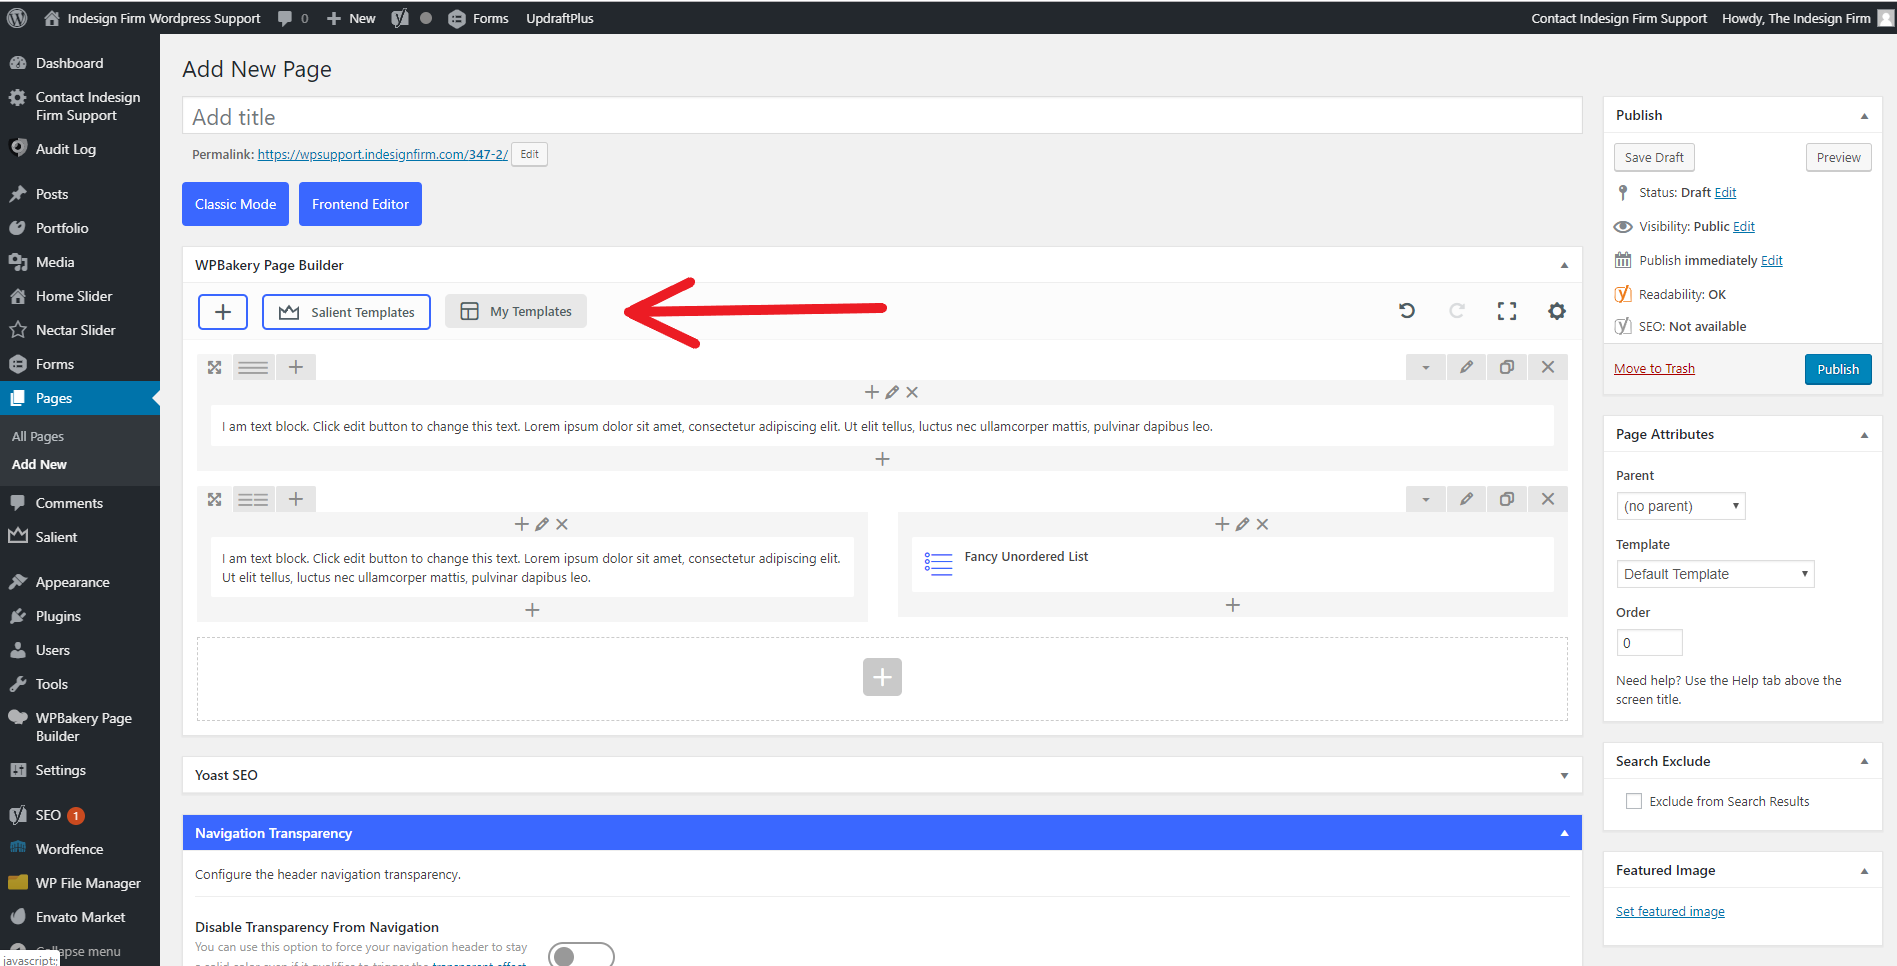
Custom Templates allow you to save the layout of a page, and use it elsewhere. To create a Custom Template, click on the “My Templates” button in the top left of the page editor.
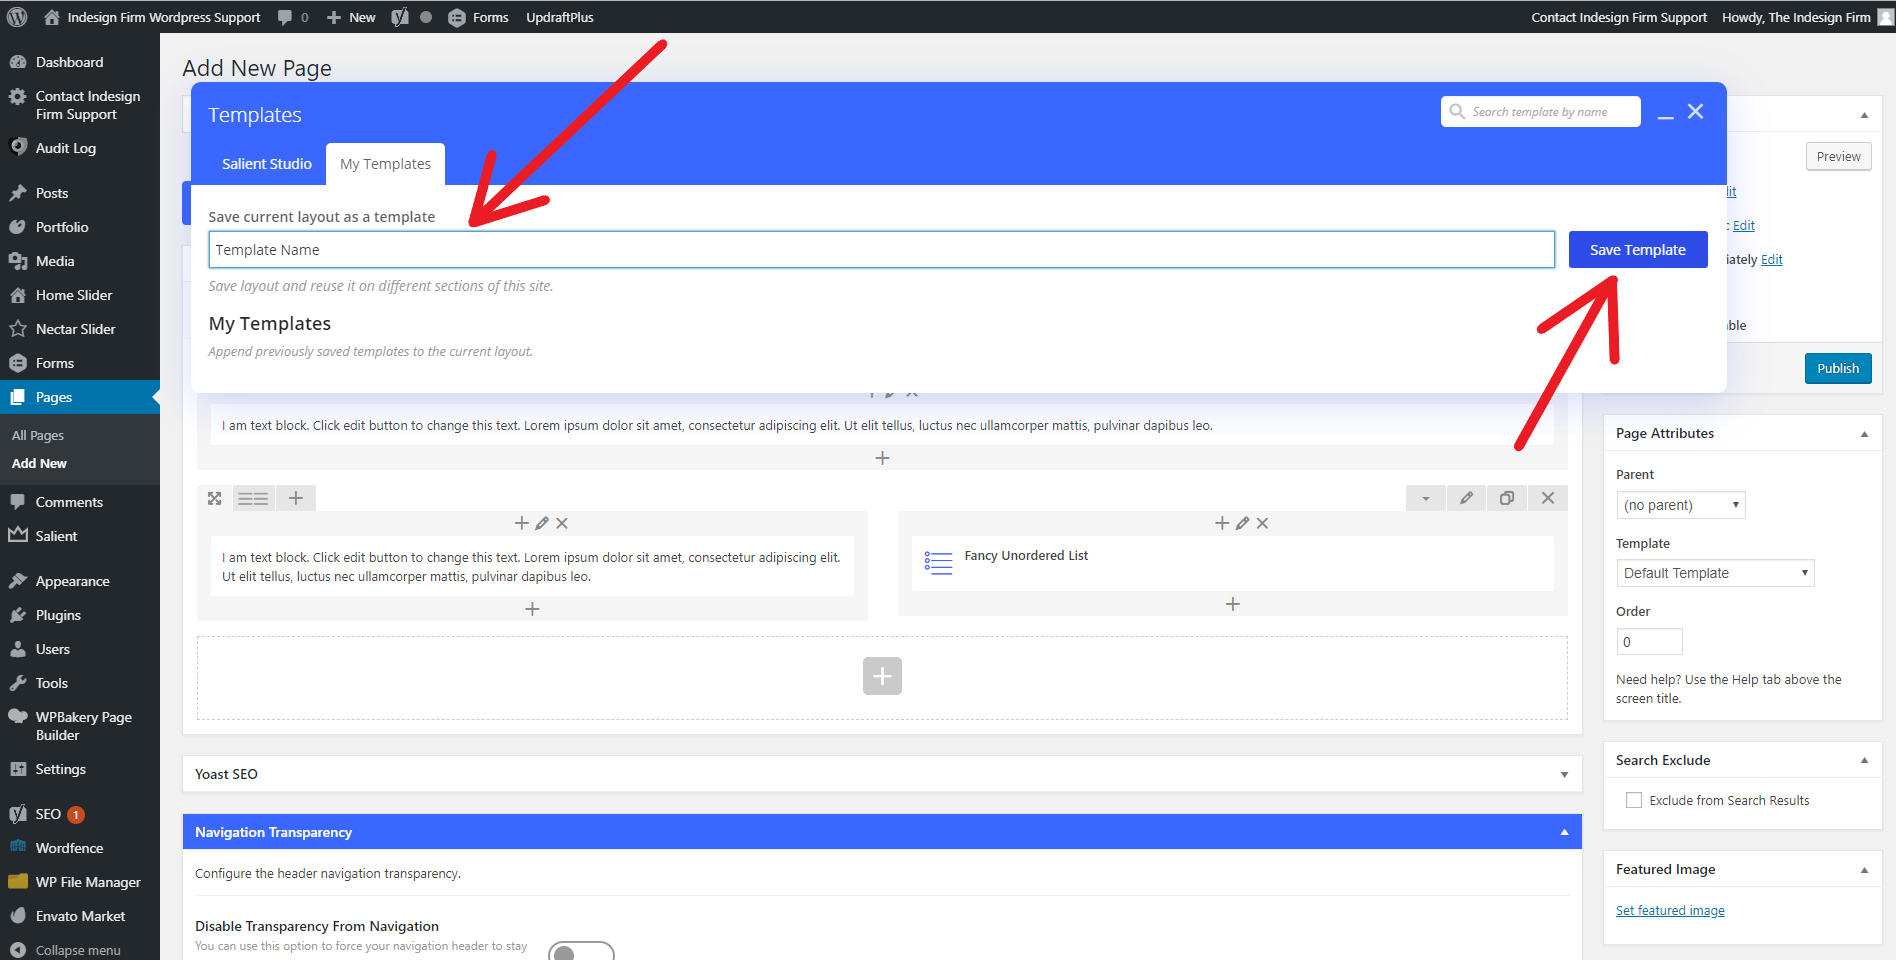
Enter a name for the template, and then press “Save Template”.
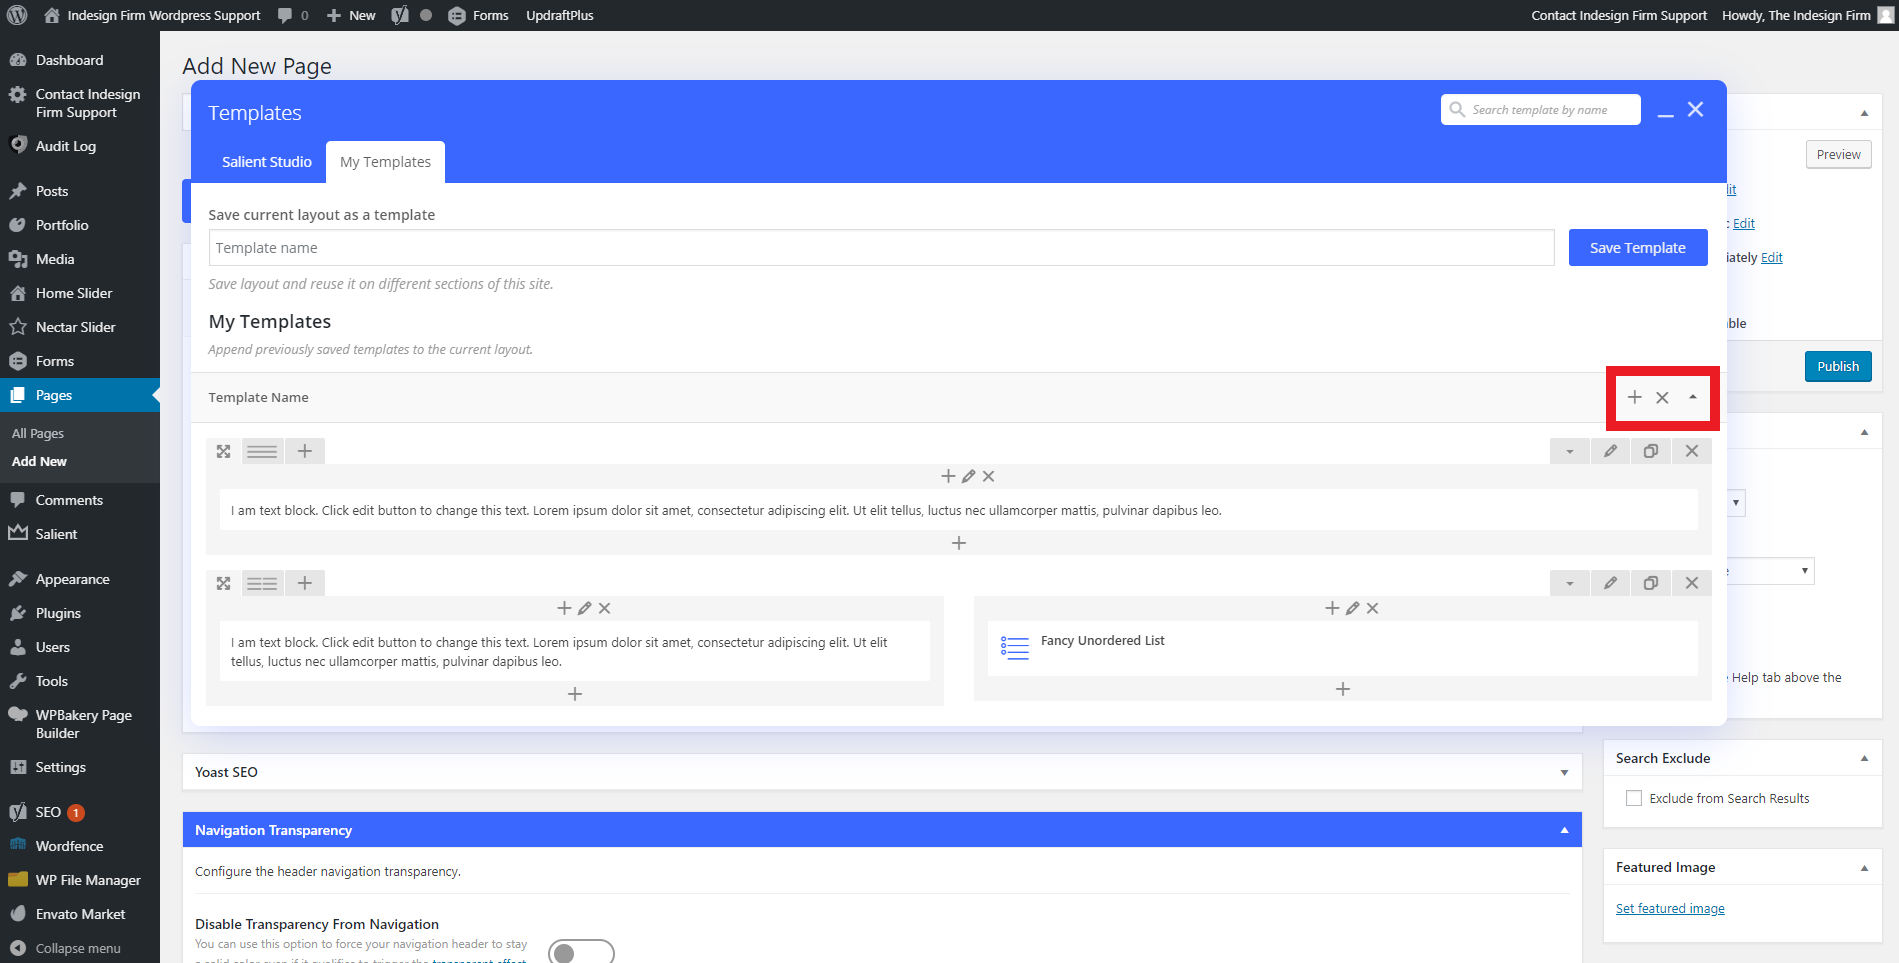
Saved templates will appear in the same menu, below where you saved the template. The plus button will add the template to the current WordPress page you are editing. The X button will delete the Custom Template. The arrow button either expands or contracts the template, so that you can view what the template looks like.
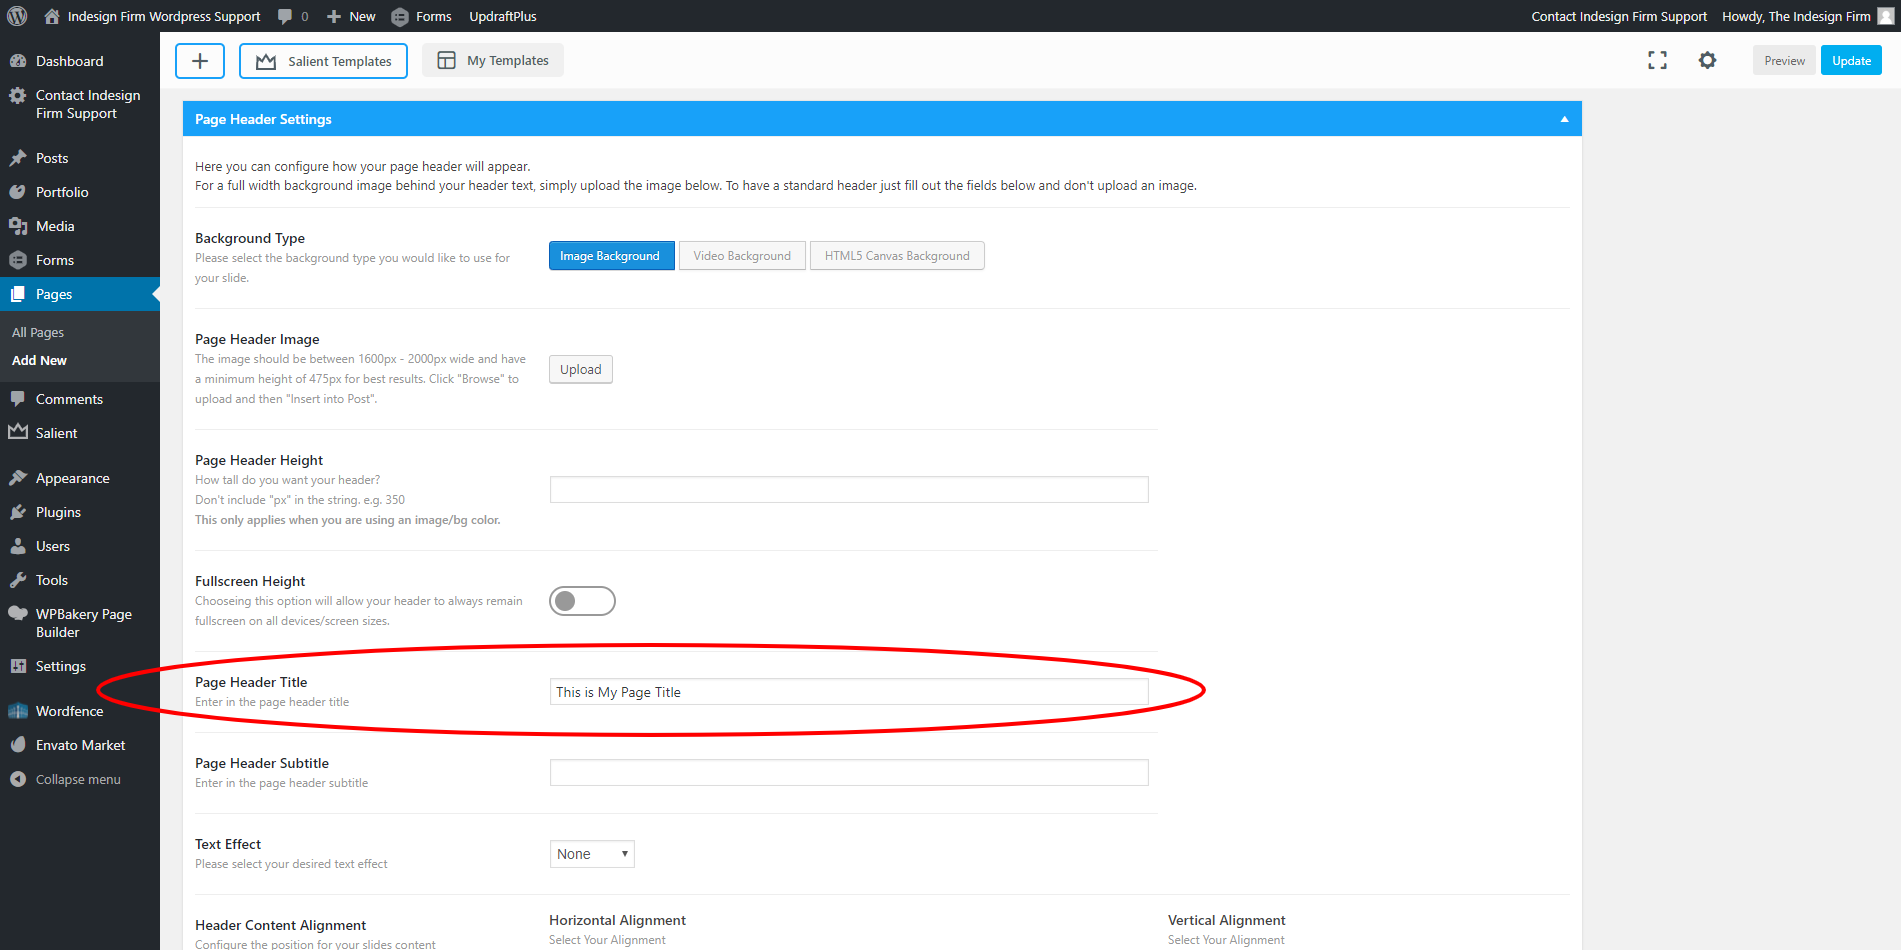
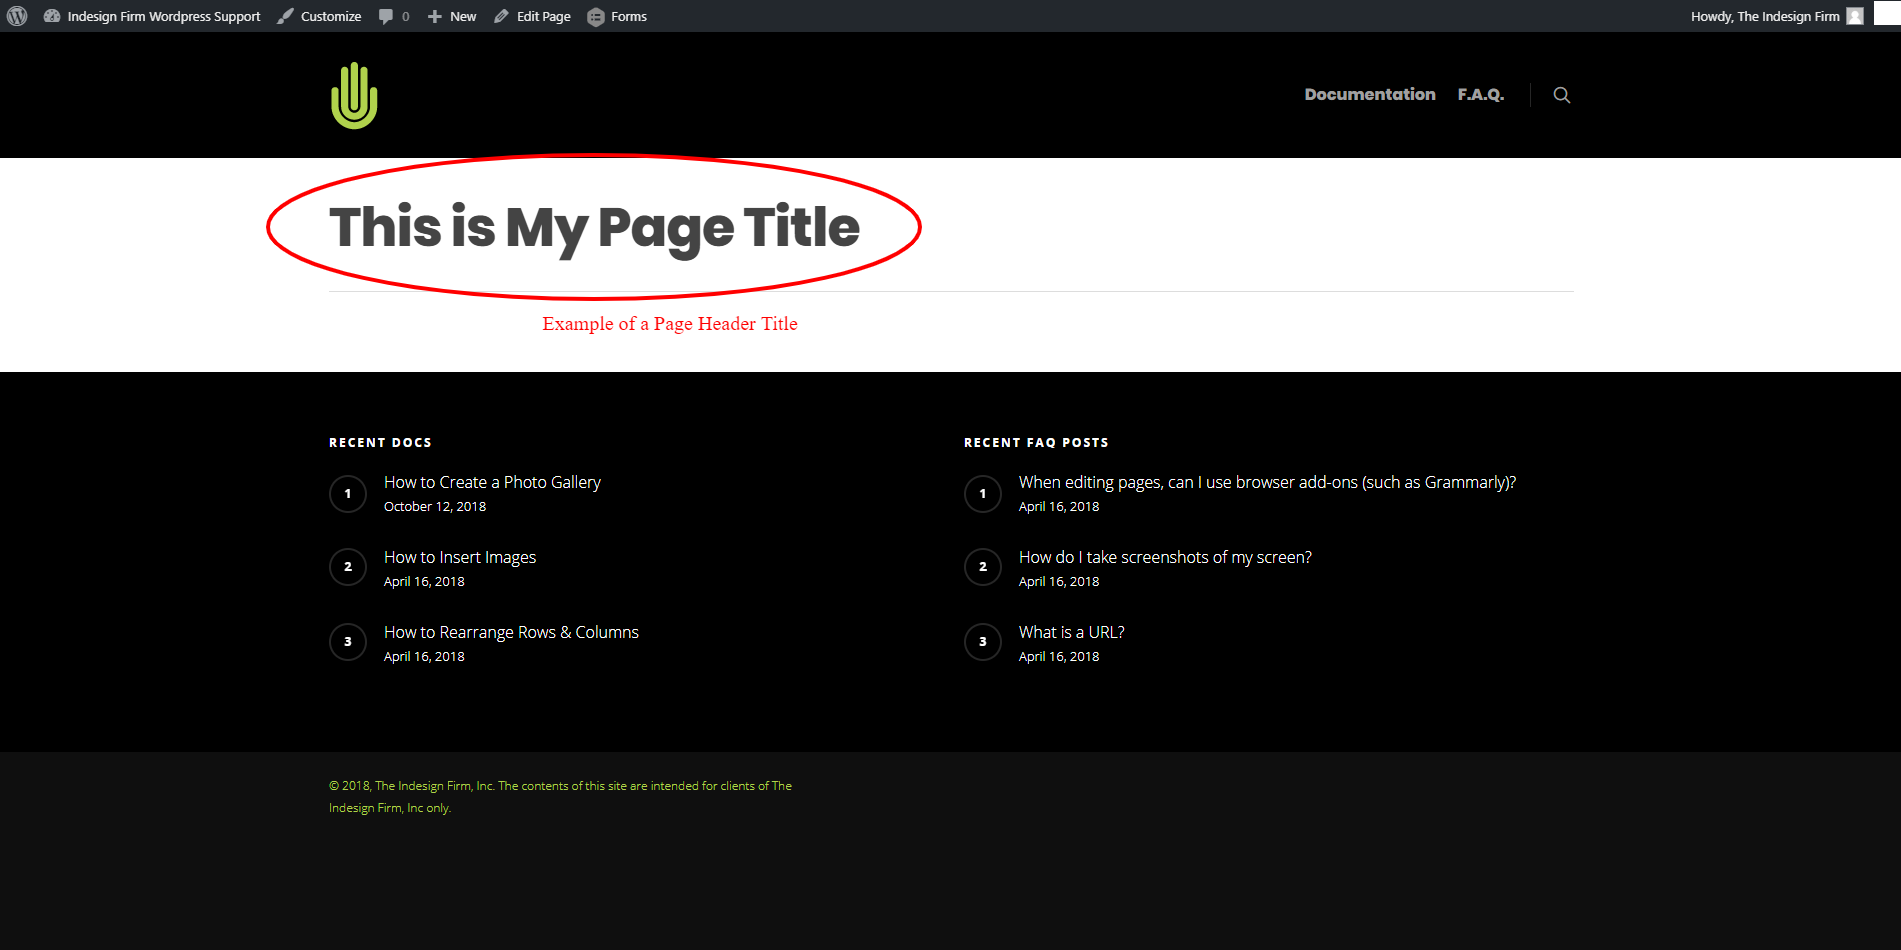
When editing a page, you can easily add a Page Header Title (as shown in the second image).
Scroll all the way down until you see the blue bar titled “Page Header Settings”. Within that section, you will see an input field labeled “Page Header Title”, which is where you will type the header you wish to appear at the top of the page.
You can also adjust other settings to customize the header to your liking. “Page Header Image” adds a background image to your page, for example.
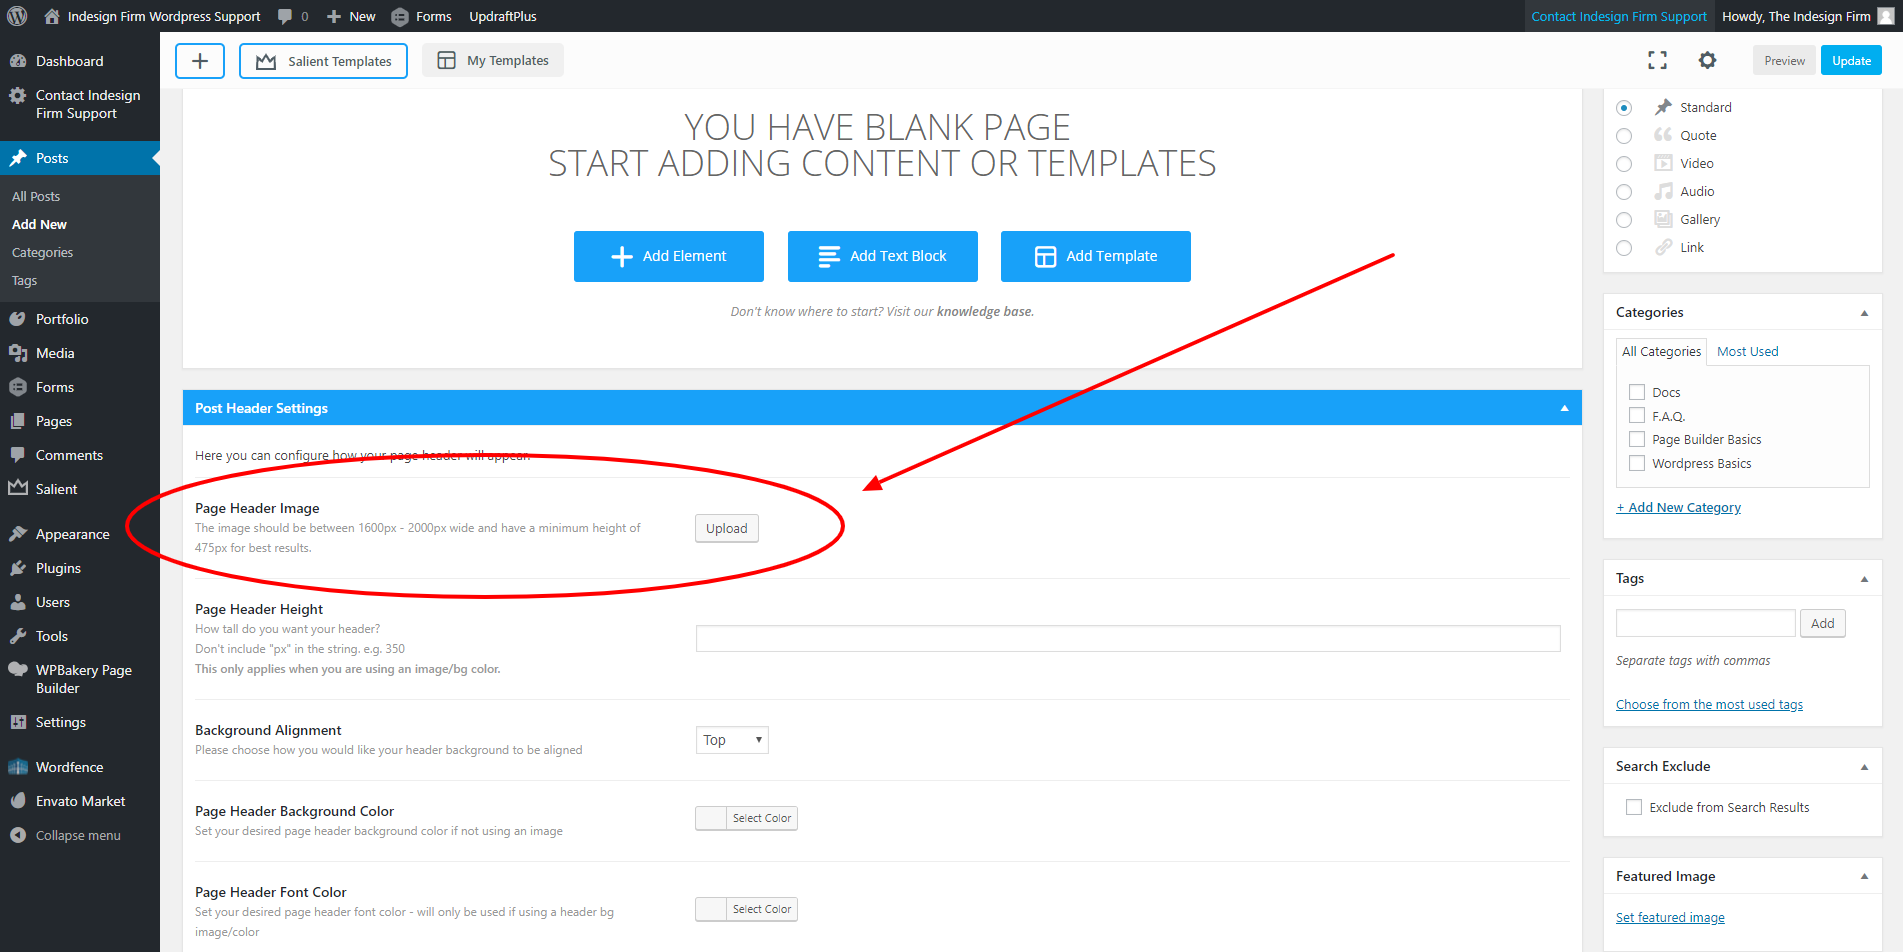
While editing a page, scroll down to “Page Header Settings” (this will be below all of your content), and click “Upload” next to “Page Header Image”. From there, select or upload the image you wish to make the Header Image. Adding a Header Image to a post is done in the exact same manner.
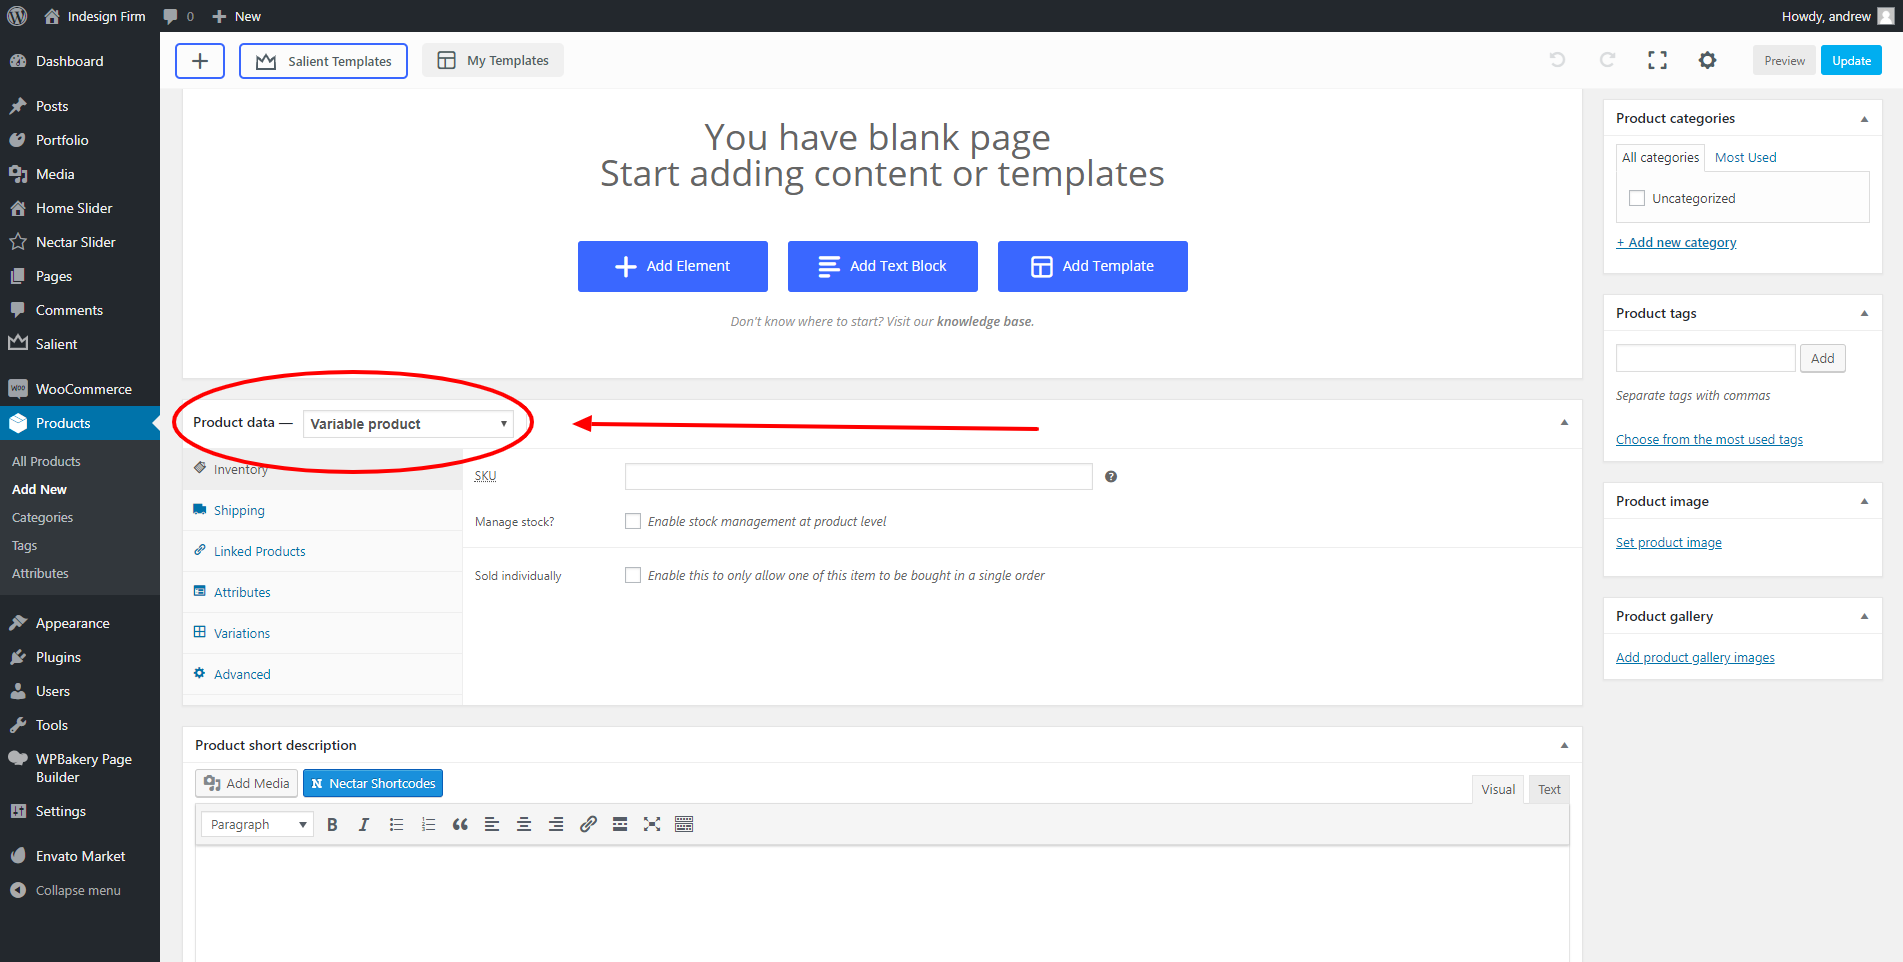
Navigate down to the “Product Data” section on the product page. Click the “Product Type” dropdown and select “Variable Product”
Click the “Attributes” tab in the Product Data section.
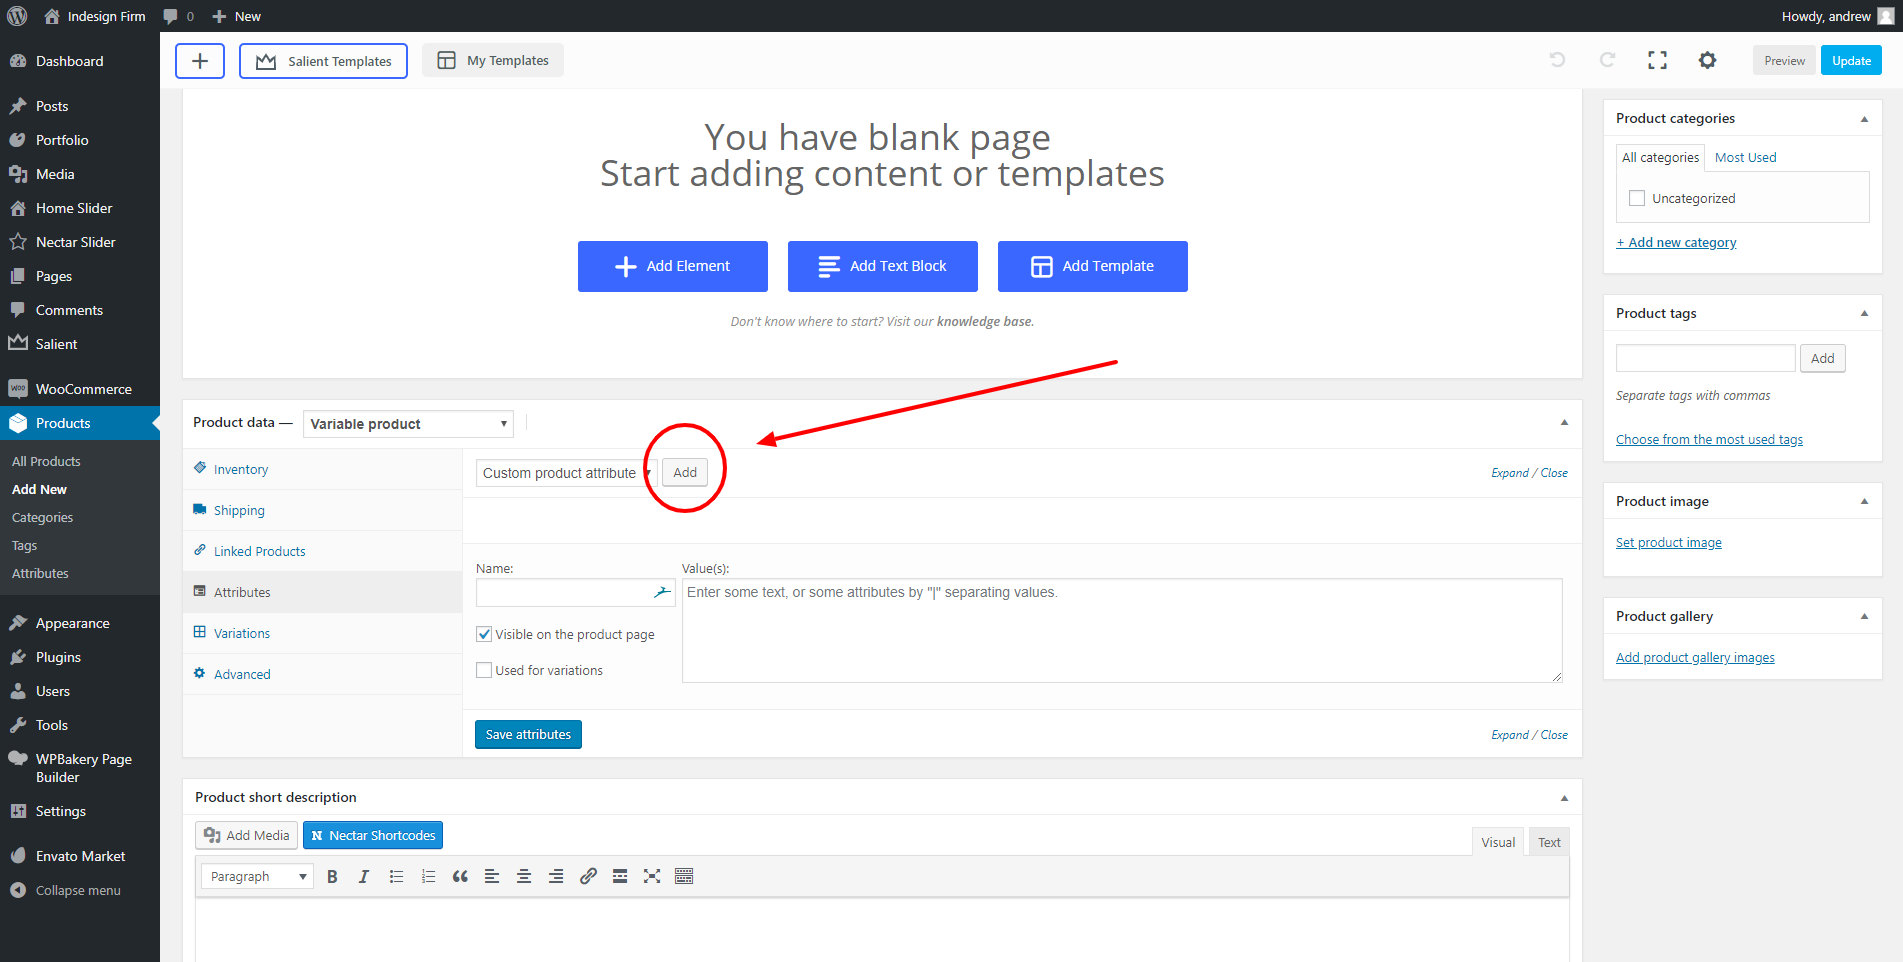
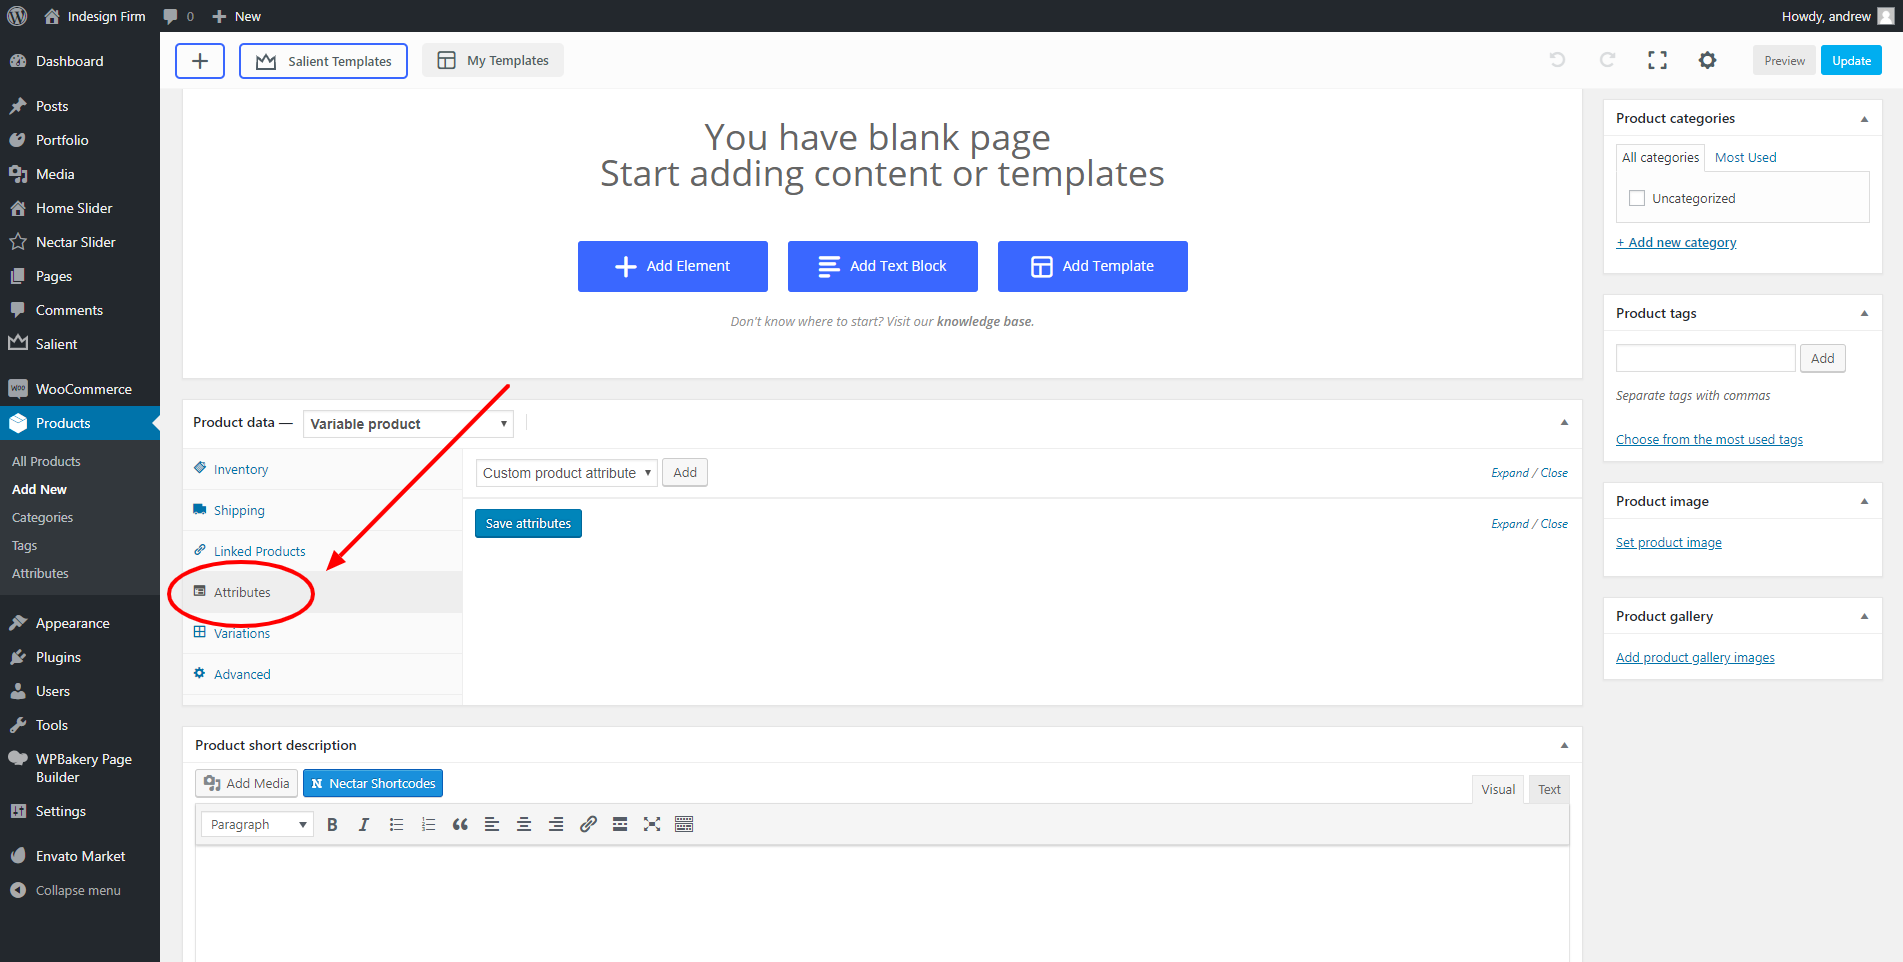
In the “Attributes” tab, click “Add” to create an attribute. Create as many attributes as needed for the specific product.
For example, if you were posting a T-Shirt that comes in multiple sizes and colors, you would add two attributes: Size & Color (as shown in the next image).
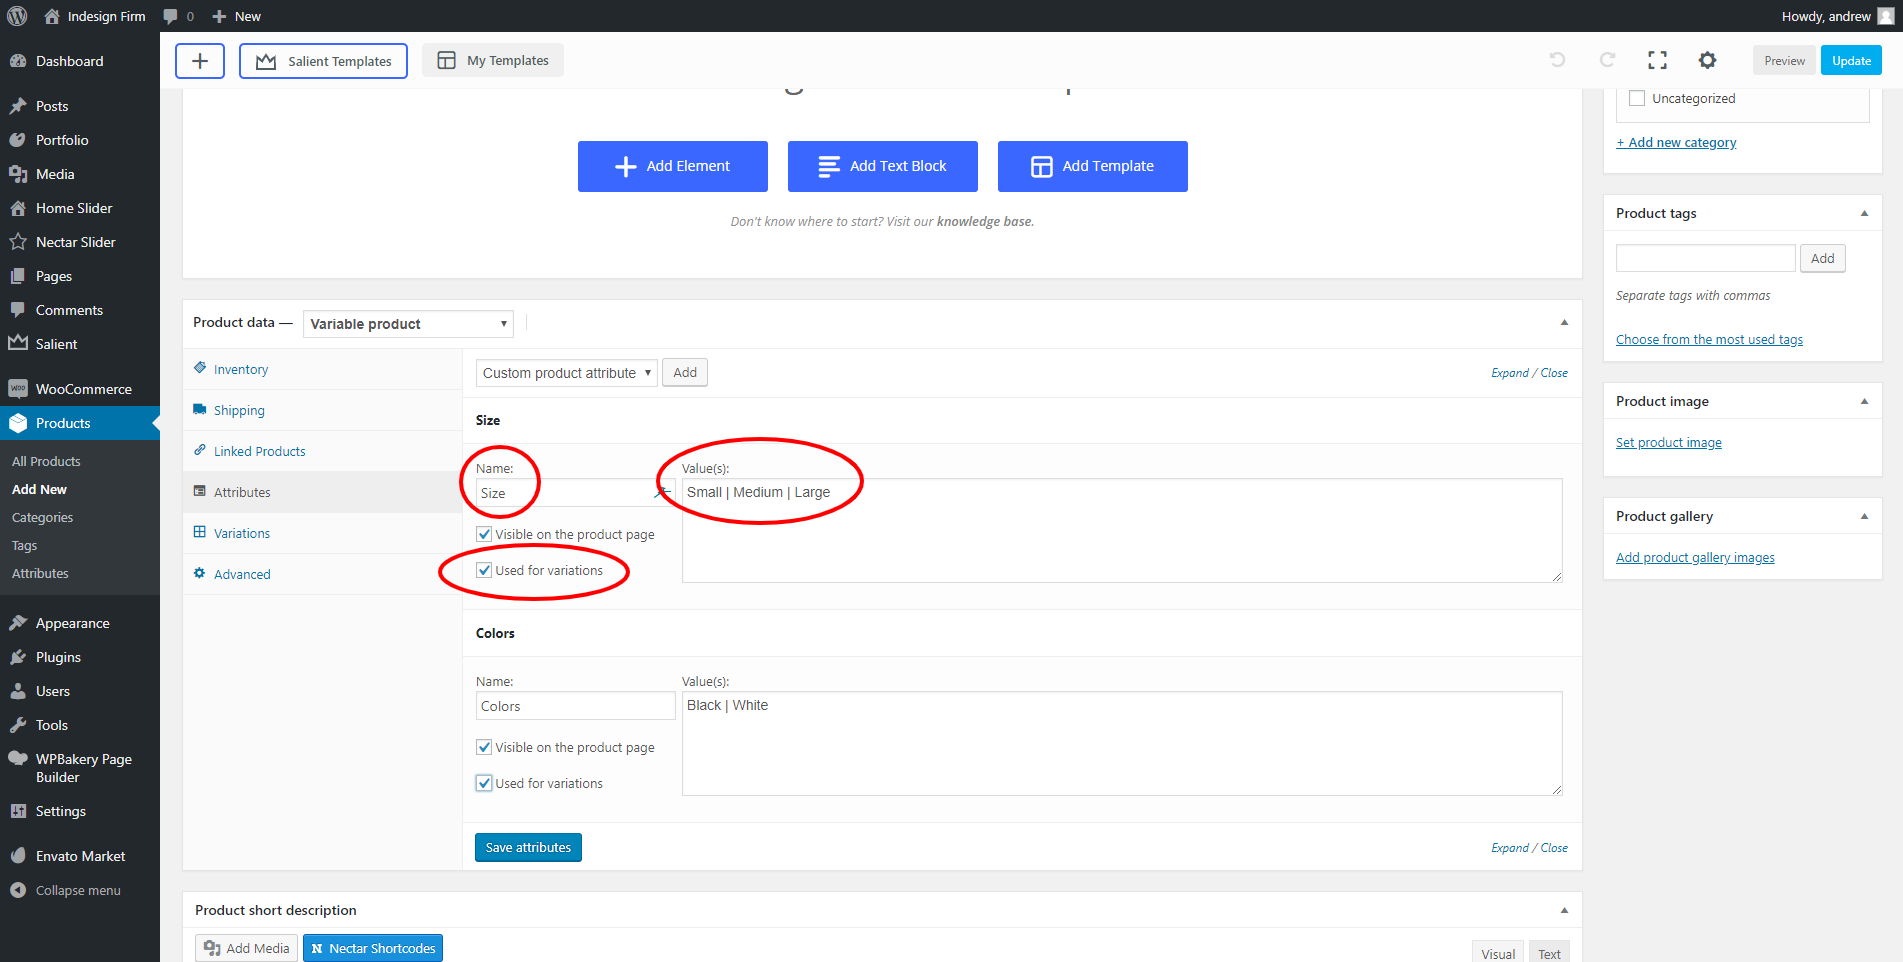
Fill in the “Name” field with the title of the attribute (i.e. Size), and enter each variation of that attribute. Then check the “Used for variations” checkbox.
As shown in the image, you would type each attribute variation, and separate each one with a “|” (pipe) — which can be found above the ENTER key on your keyboard.
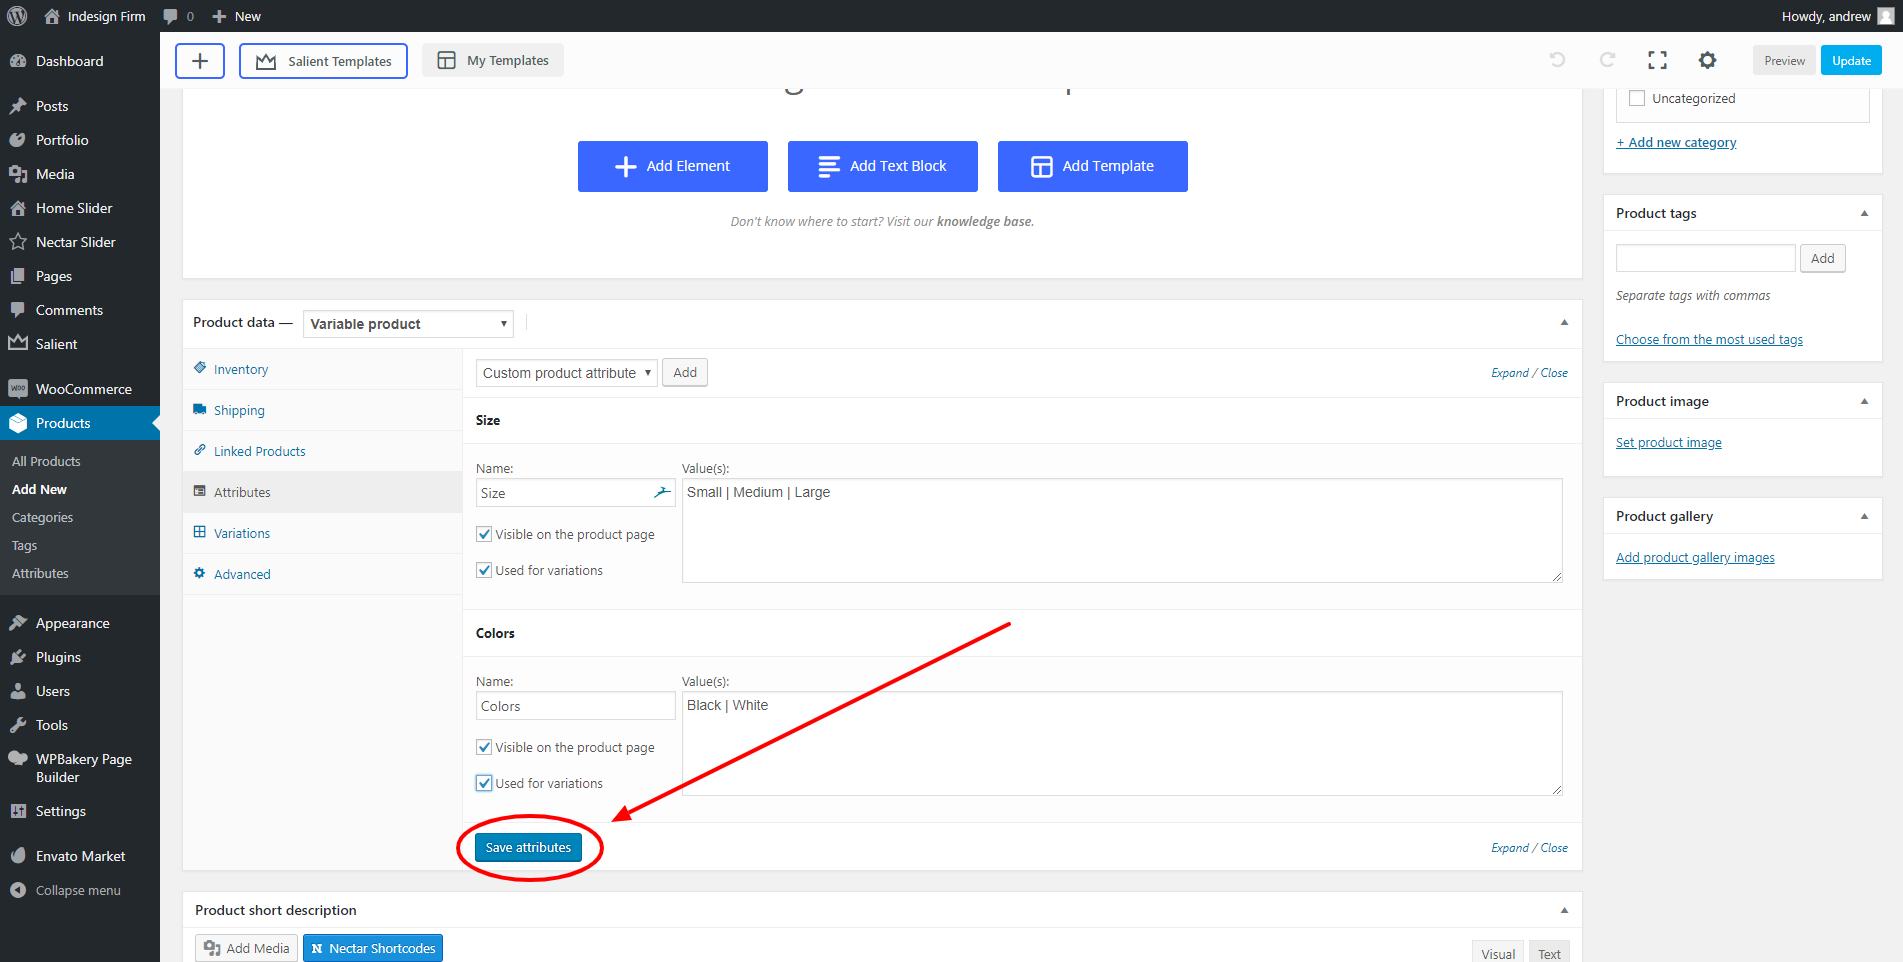
Once you have all necessary attributes created, click “Save attributes.”
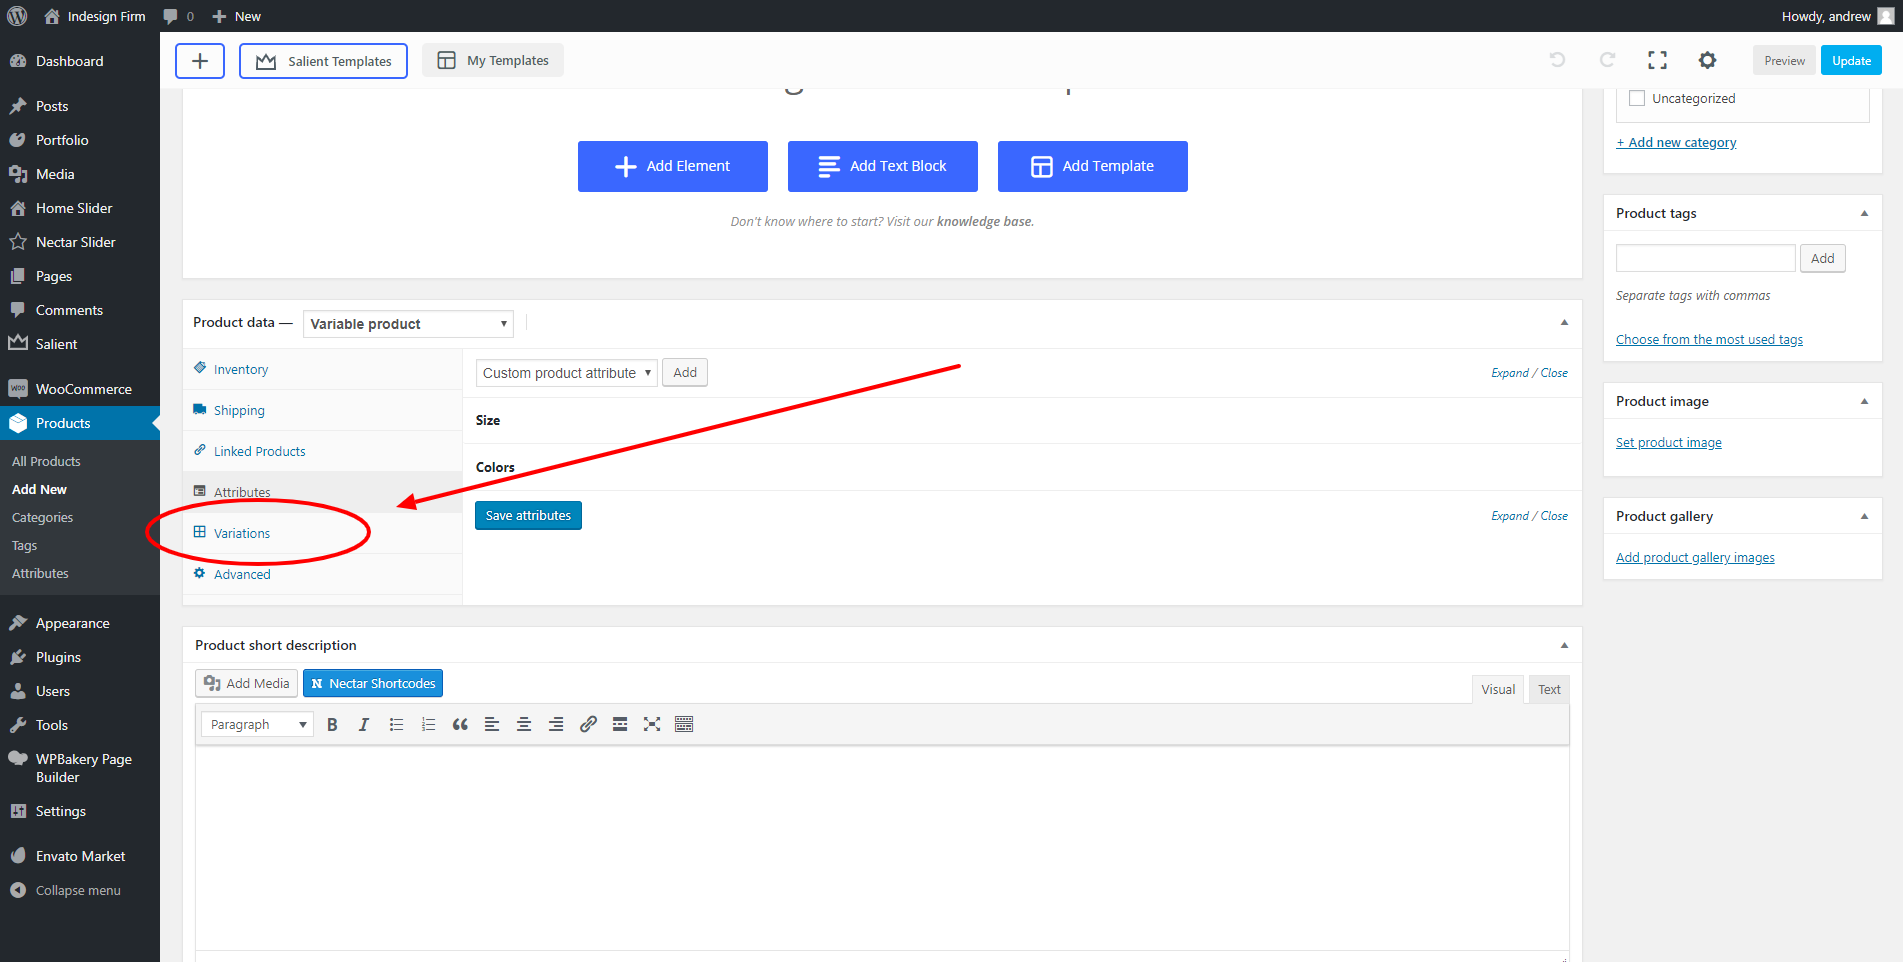
Click “Variations” in the “Product data” section.
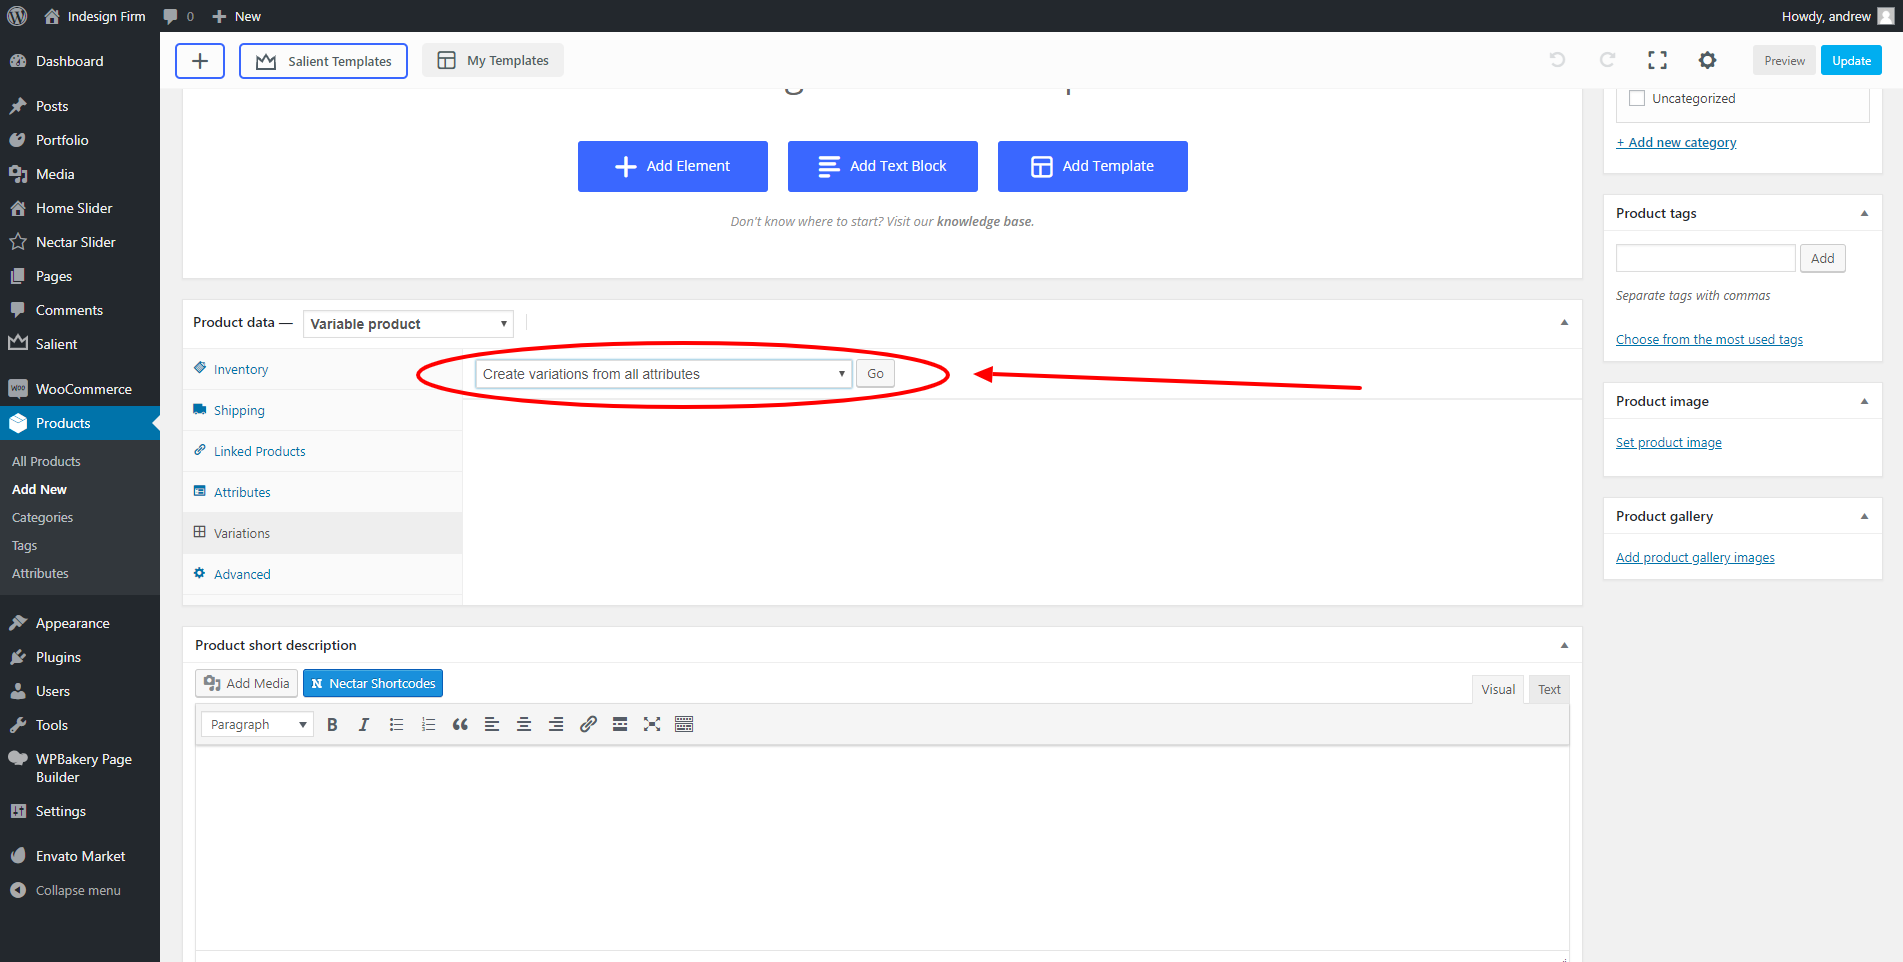
In the dropdown that appears on the “Variations” screen, select “Create variations from all attributes” and click “Go.” This will create all variations, using the attributes we specified.
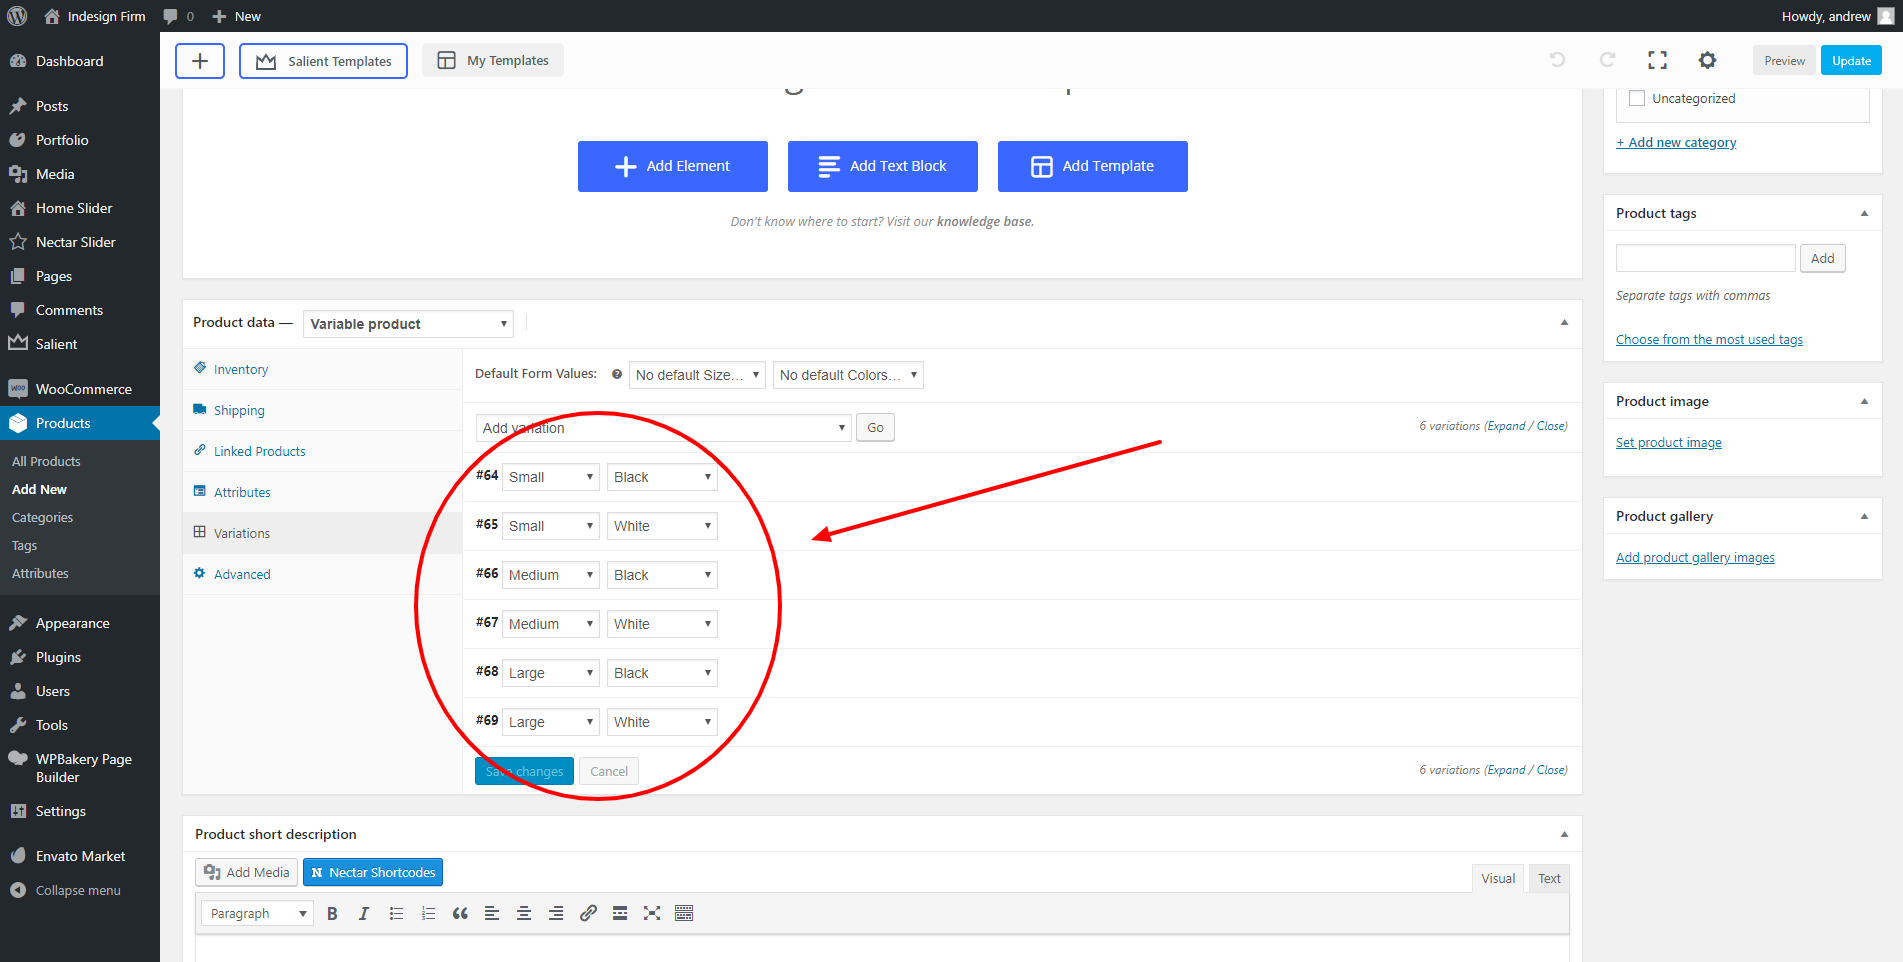
Depending on the amount of attributes your product has, you may see more or less variations than in the example shown. However, your screen should look similar to the example.
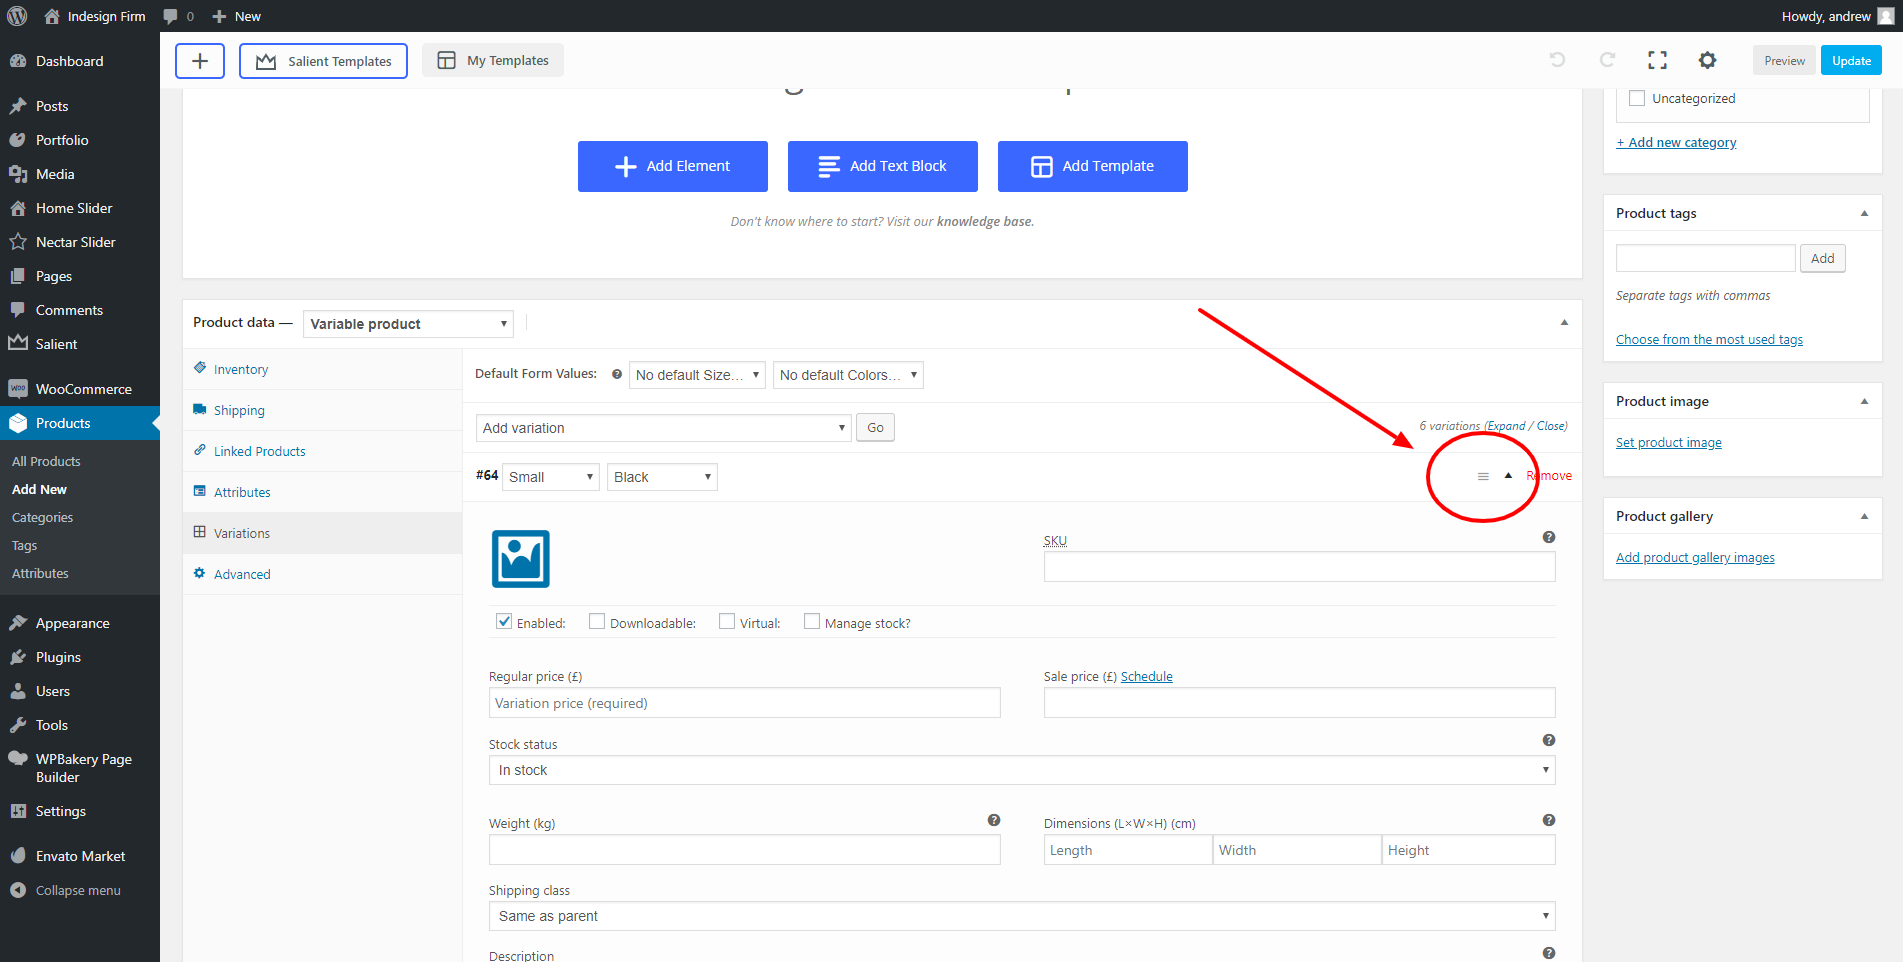
Then, hover over each variation and click the 3-bar button shown in the example image. This will expand the variation and allow you to edit various aspects of that variation.
From here, you can edit aspects such as: