WordPress Fundamentals
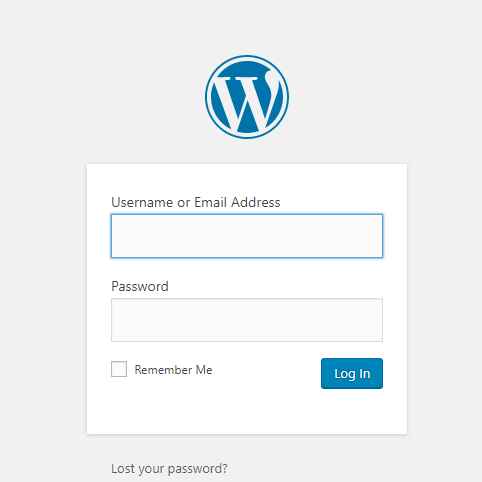
To Log In to your WordPress site, enter the website address into the search bar followed by “/wp-admin”. For example, “www.websitename.com/wp-admin”. This will open a screen similar to one shown in the picture to the left. Then just enter your username and password and you are good to go.
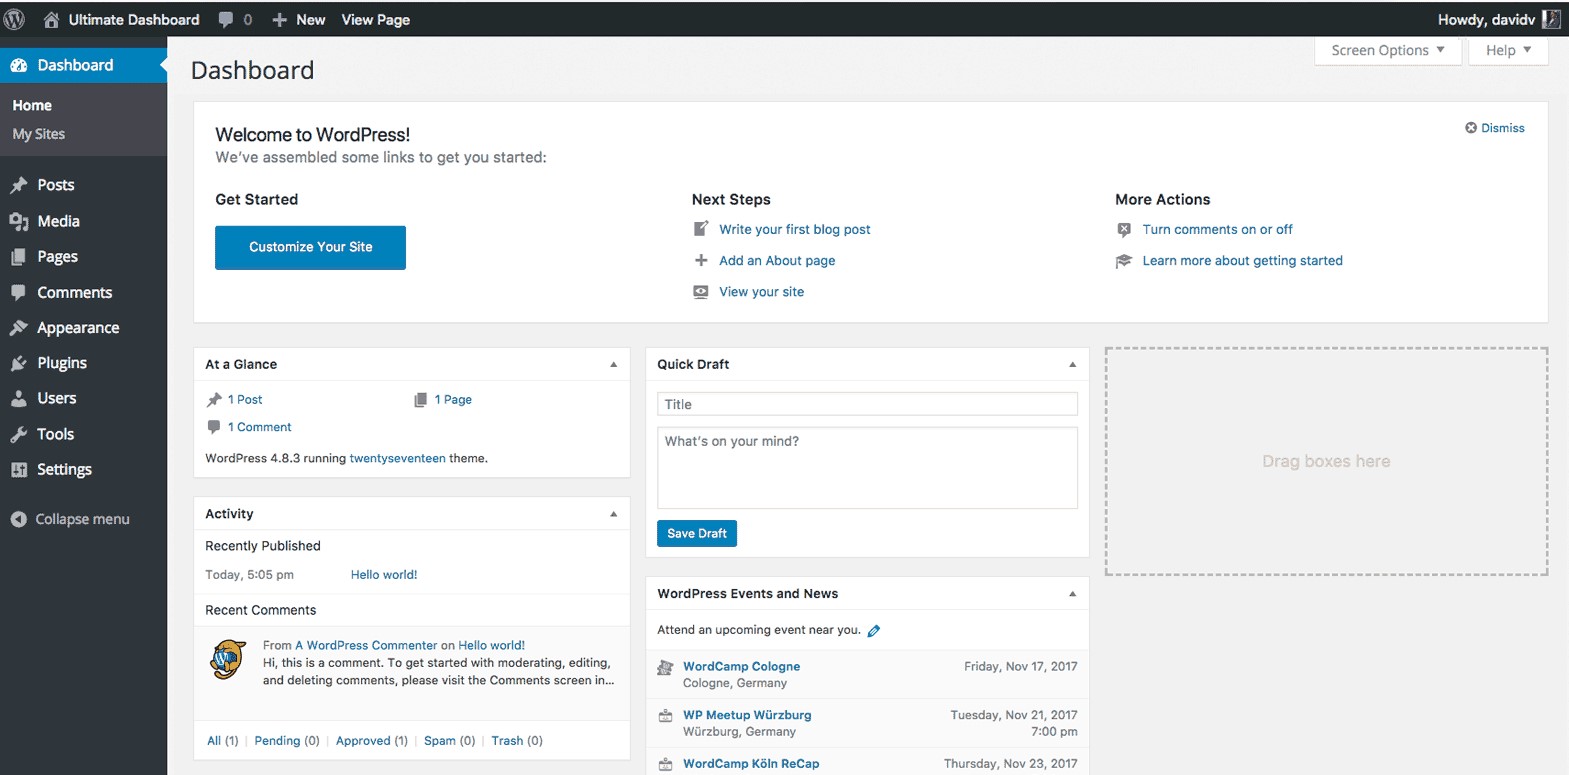
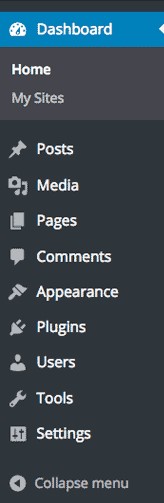
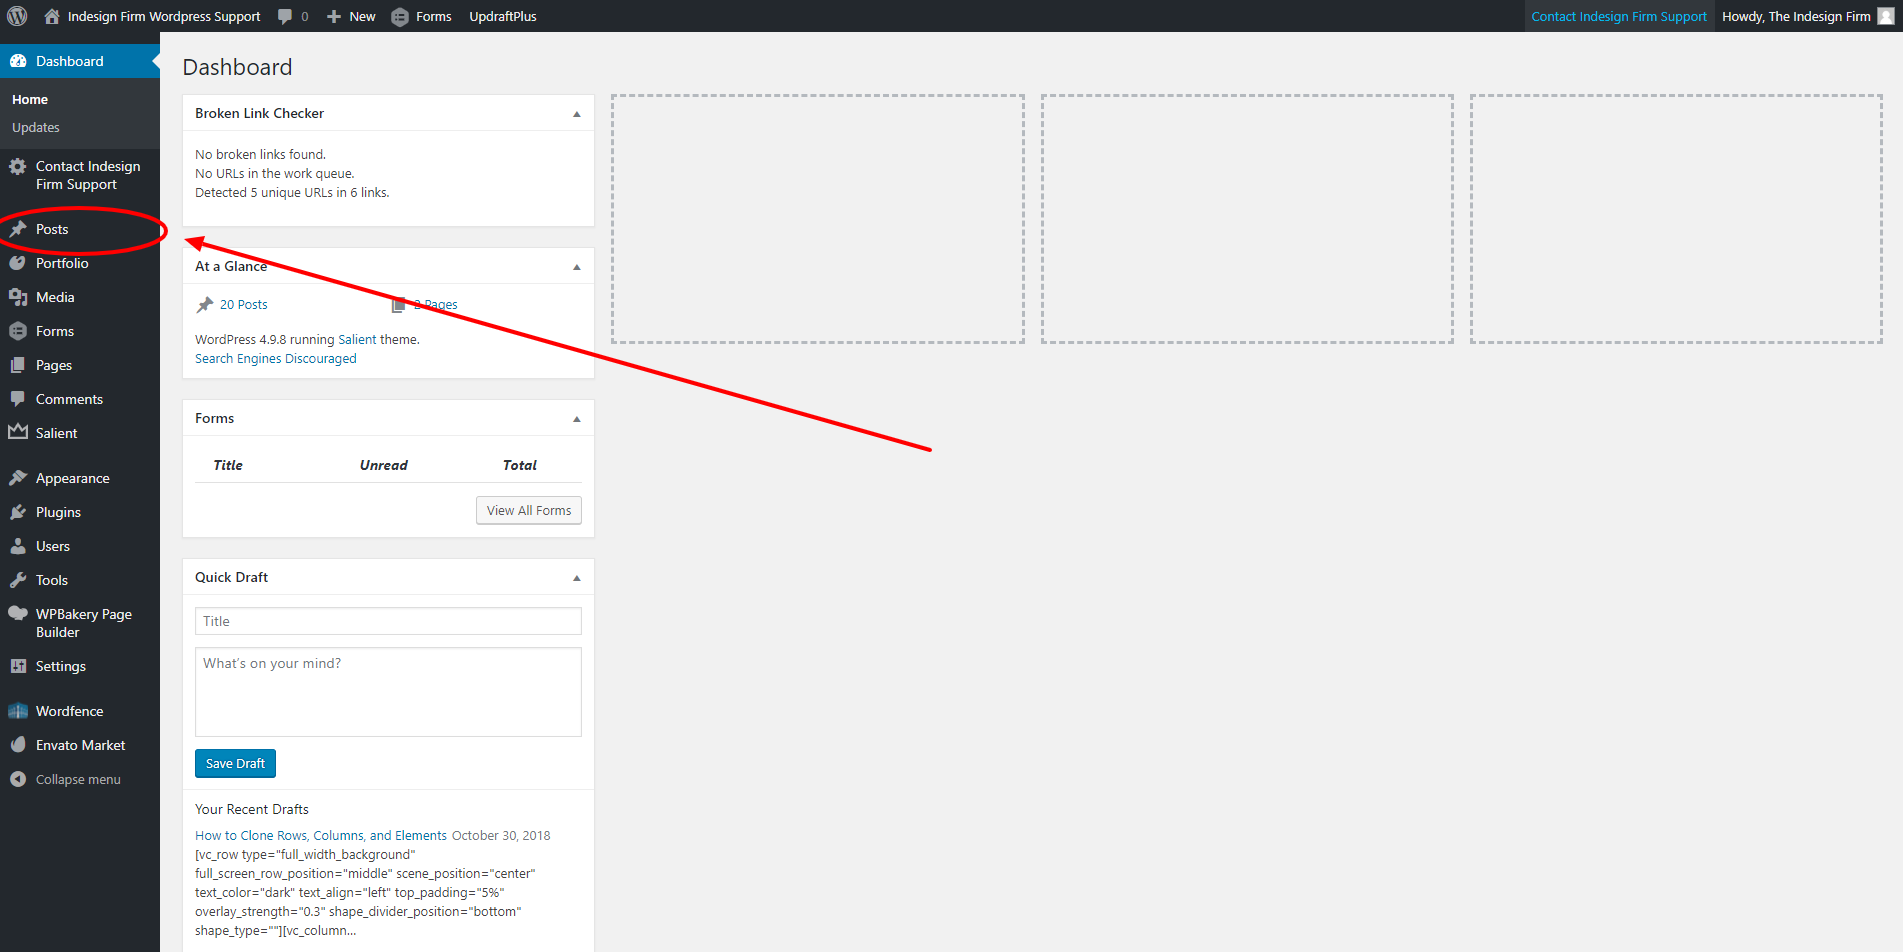
Once you are logged in to WordPress, you will be redirected to the WordPress dashboard. The main portion of the dashboard contains various information about the website. Your username is found in the top right, and your website name is found in the top left. Along the left edge is a toolbar that contains several items, each of which is described below.
Posts: This is where all of the blog posts on the website can be accessed and edited. Posts are similar to a normal Page, but with a few key differences.
Media: All the pictures, videos, documents, and other files are located here. This is also where you upload the files into the WordPress site.
Pages: Here you can add, delete, edit, and view each page of the website.
Comments: Anytime someone comments on a Post, it will show up here.
Appearance: The overall website theme options, navigational menus, and widgets are all located under Appearance.
Plugins: Plugins are downloadable additions to WordPress that expand the capabilities of WordPress. Manage and install plugins here.
Users: Add, delete, and manage the privileges of each user on your WordPress site. The profiles of each user can also be accessed here.
Tools: This tab contains various utilities with different functions. You can also export and import website data, check your website’s health, and manage personal data.
Settings: Settings consists of options that affect the entire website. Things such as the website name, which page is the home page, and others.
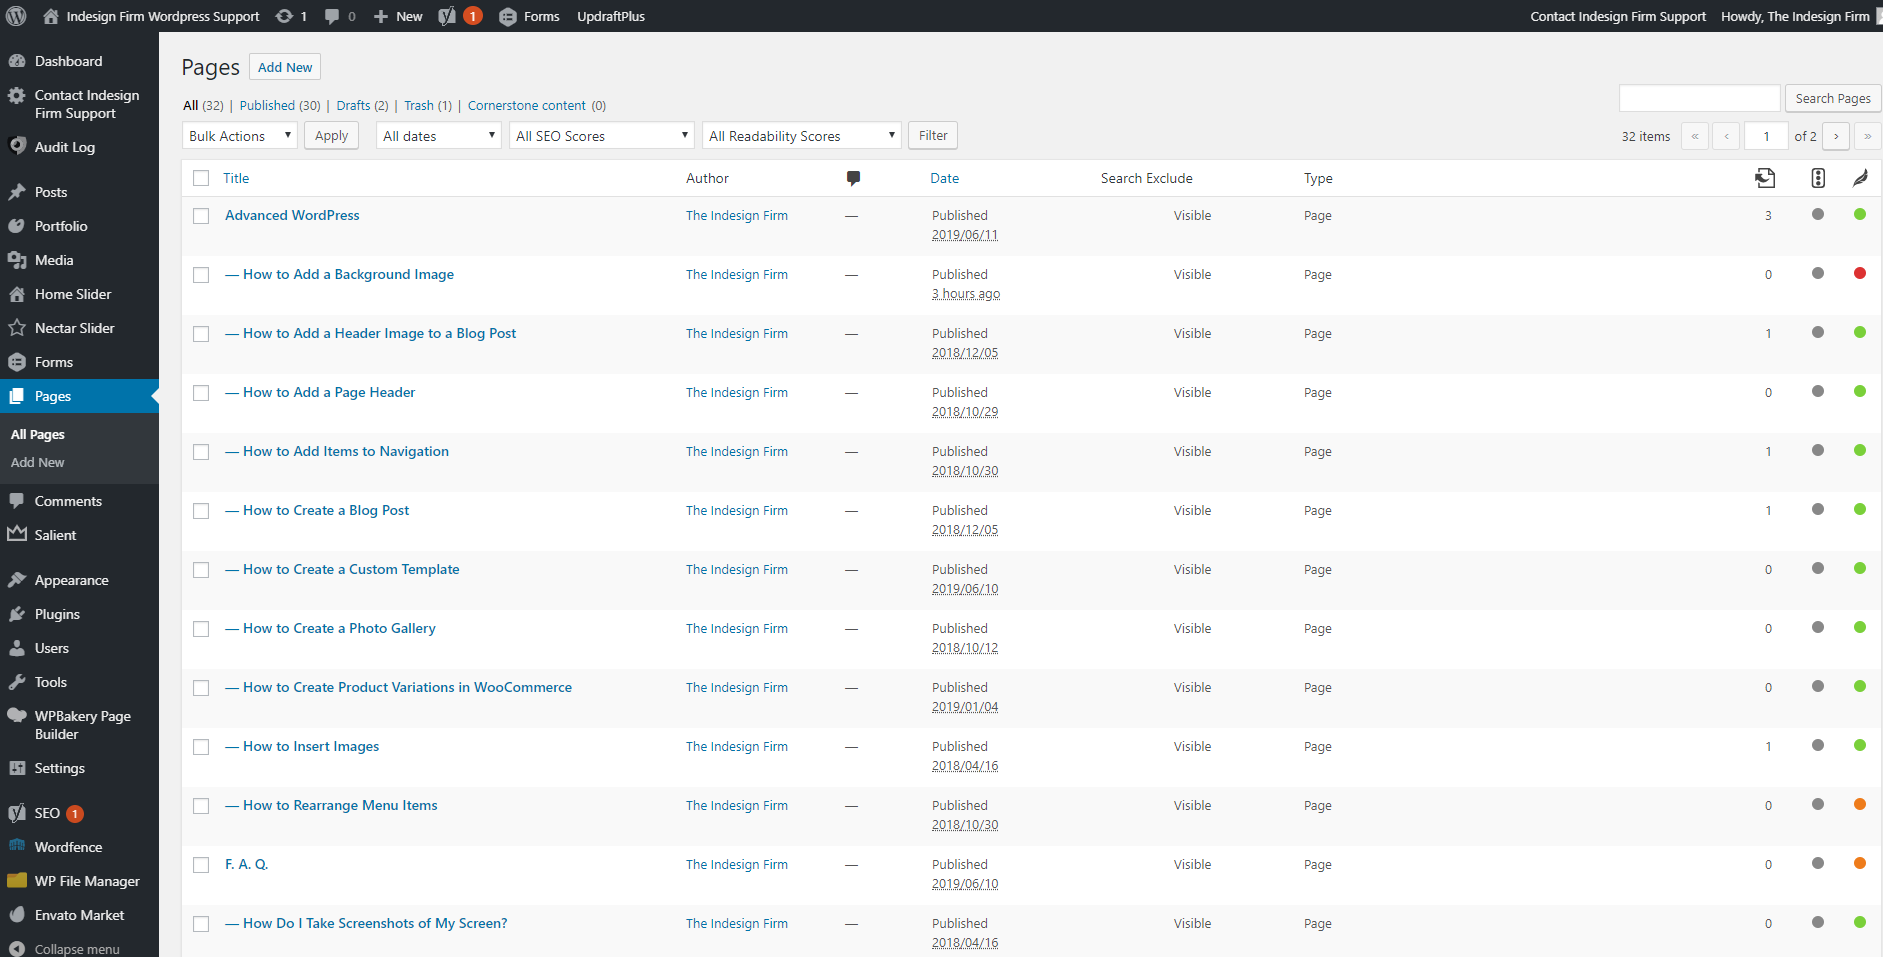
From the dashboard, click the “Pages” button in the left side navigation bar. This will bring you to the main Pages page. Here you can get an overview of your website’s current pages, create new pages, edit or delete existing pages, etc. Pages are one of the basic building blocks of a website. Press “Add New” to get to the main page editor screen. Pages display content that is static, or rarely changes. This differentiates them from Posts, which are changed frequently. In addition, Pages are sorted through a hierarchy (as compared to the categories and tags of a Post).
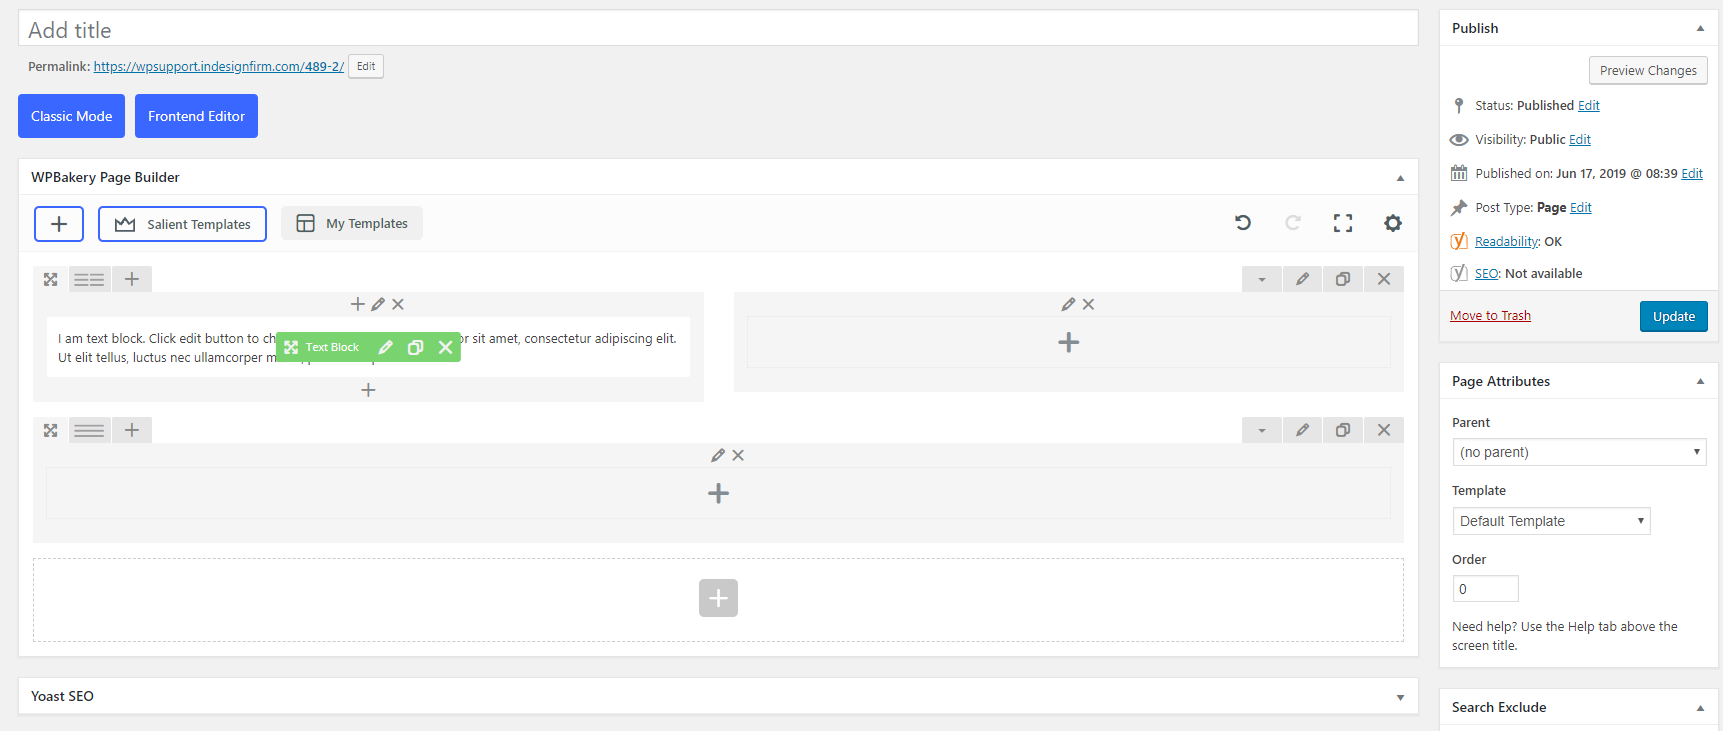
The Page Editor is based on 3 things: Rows, Columns, and Elements. Elements are contained within Columns, and Columns are held inside Rows. Elements include things such as images, text blocks, lists, etc. For more information on how Rows and Columns work, Click Here
From the dashboard, click the “Posts” button in the left side navigation bar. This will bring you to the main Posts page. Here you can get an overview of your website’s current posts, create new posts, edit or delete existing posts, etc. Posts are essentially a special form of a normal page. Posts are the heart of the Blog element, and are used for displaying news, updates, or other information that changes on a regular basis. Posts can be put into categories to sort them, and assigned tags to easily search them.
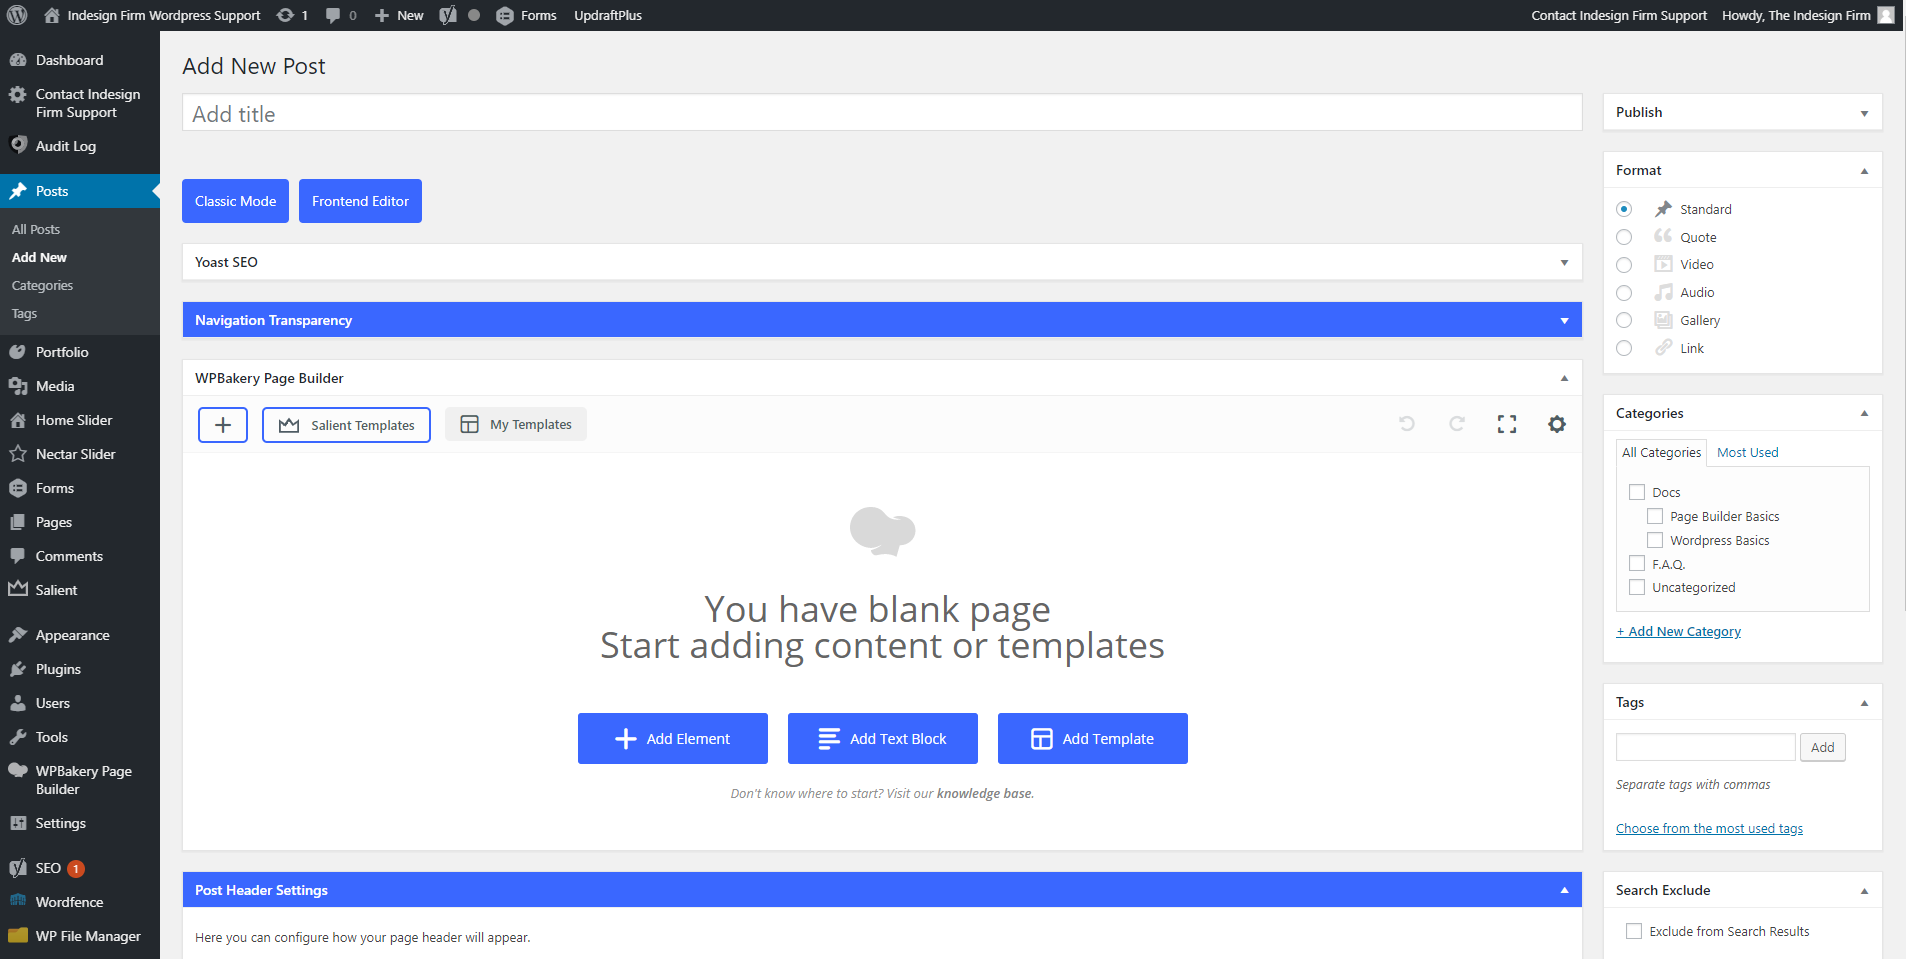
When you add a new post you will see a screen that looks almost identical to the regular WordPress page editor screen. The main difference lies in the toolbar on the right side. Instead of a Page Attributes block, there will be 3 blocks called Format, Categories, and Tags.
Format: Format changes the inherent layout of the post to suit either a quote, video, audio, picture gallery, or hyperlink.
Categories: The Categories block allows you to assign the post to one or more categories, and also to create categories.
Tags: Tags can be quickly assigned to a post in this block.
The post editor works the same as the page editor. For an explanation of the features of the page editor and how to use them, click here
From the dashboard, click the “Media” button in the left side navigation bar. This is the page where all your images, documents, and other files are stored on your site. You can also upload files on this page. Click on “Add New” at the top to open the upload menu.
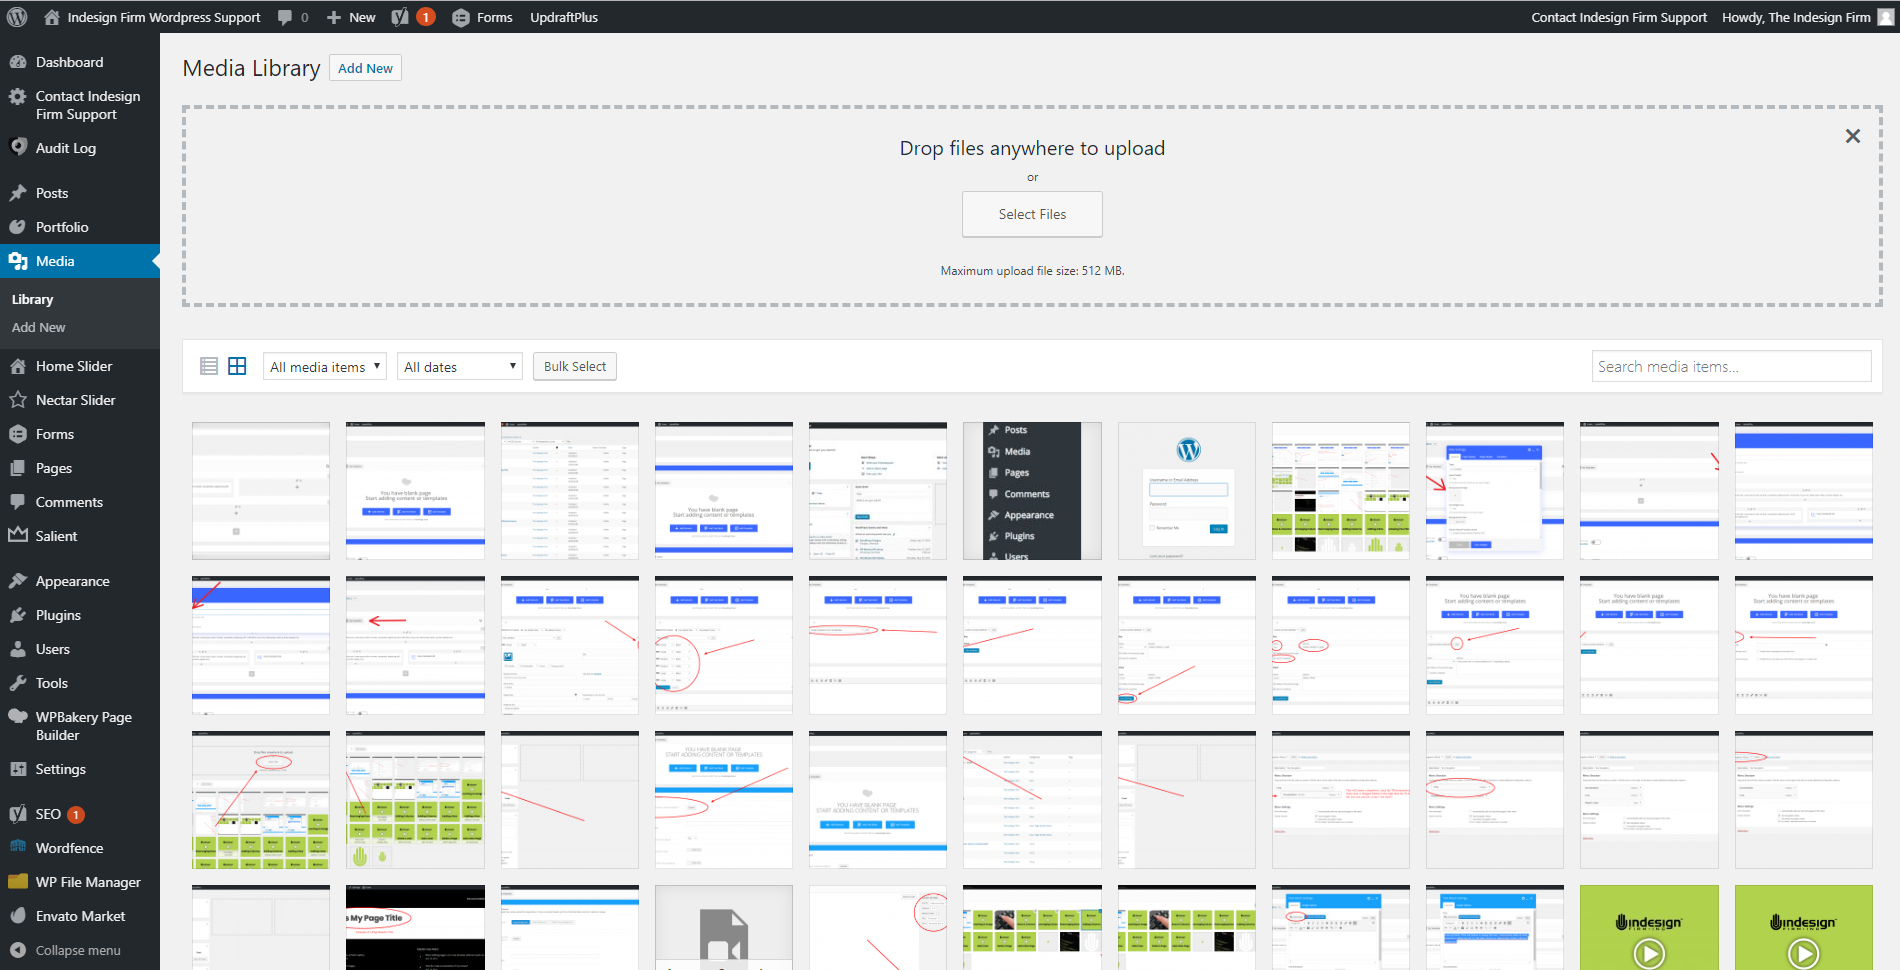
Once the upload menu has appeared, press “Select Files”, then choose the files you want to upload. Now these files can be accessed throughout the rest of the WordPress site.
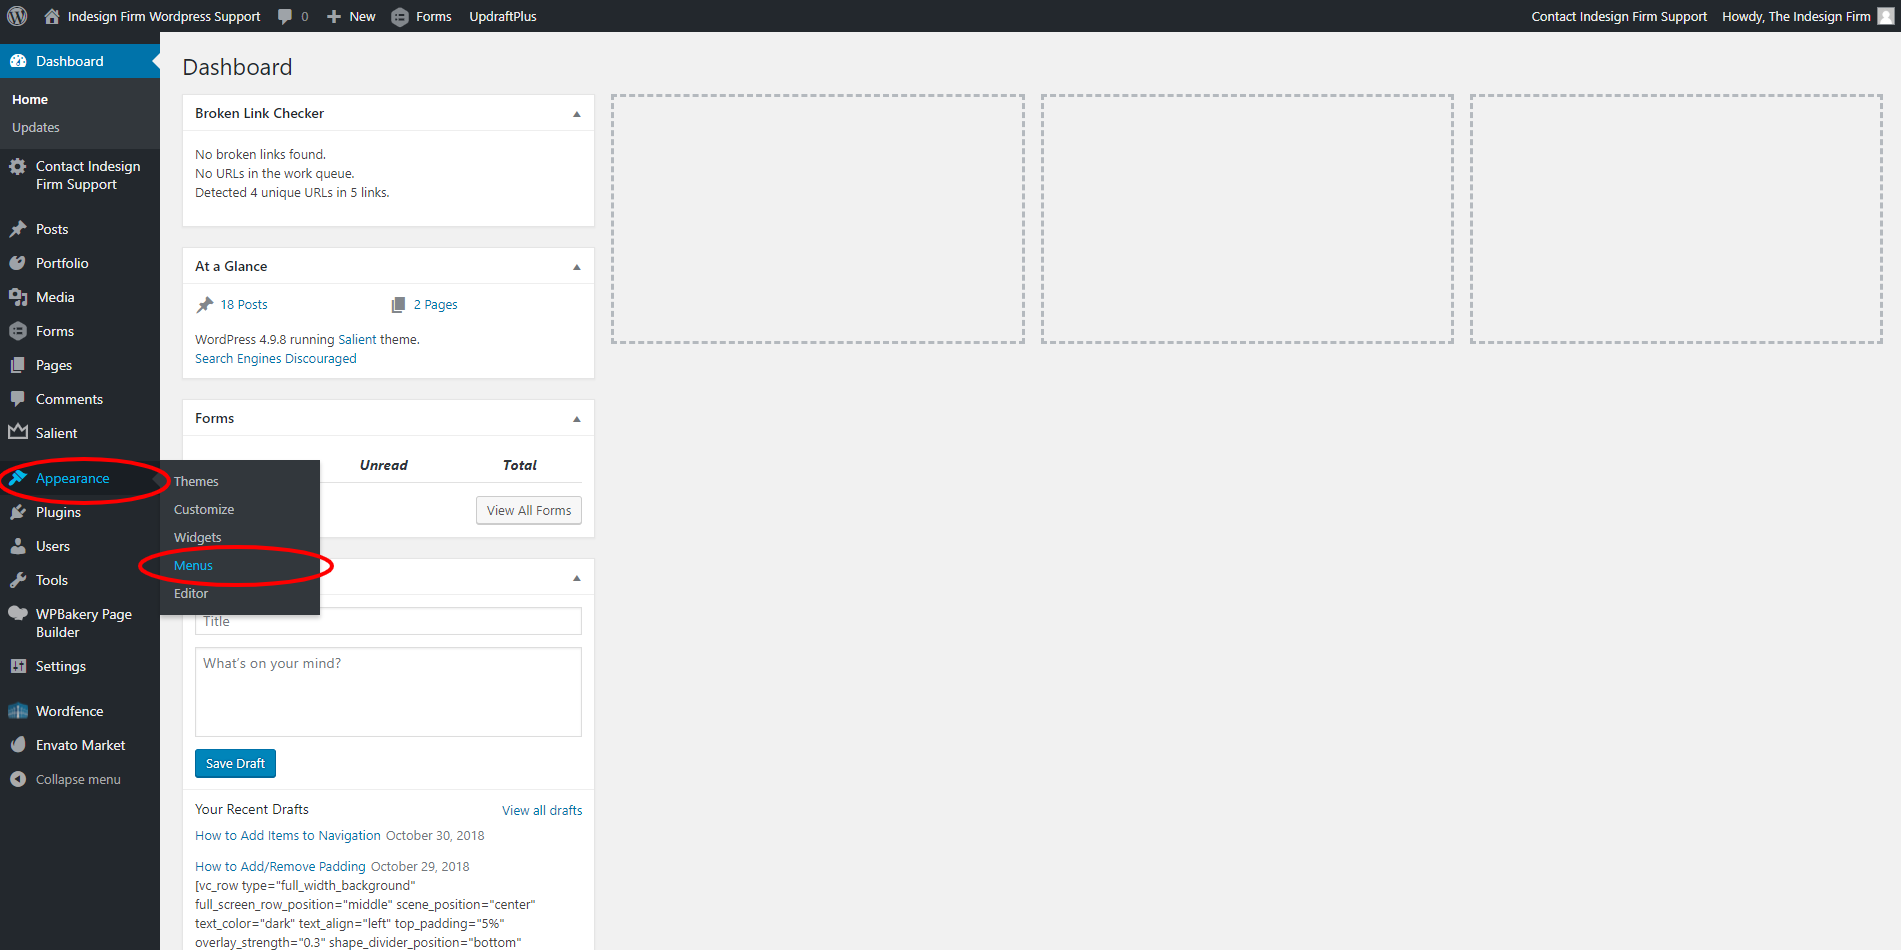
The Appearance tab is used almost exclusively for editing the navigational menus on the site. “Menus” is a sub-menu under Appearance where you can add, remove, or edit the items that show up in your navigation menus.
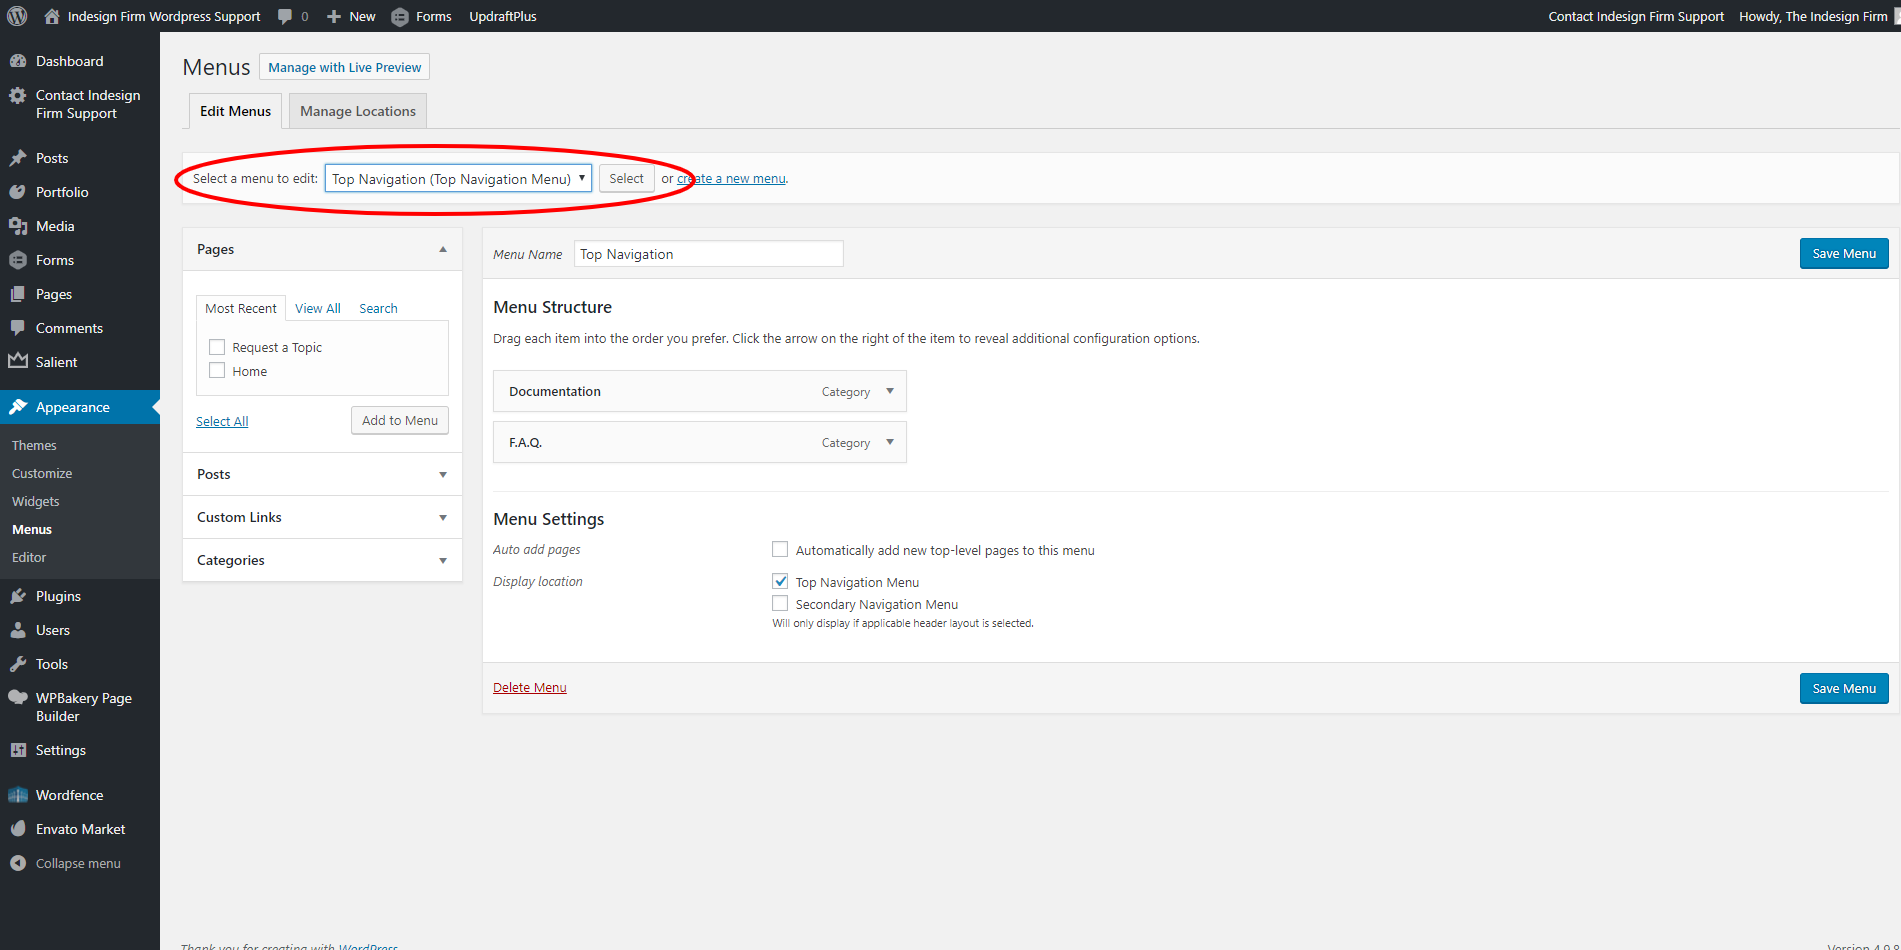
After navigating to the “Menus” page, ensure that you have the correct menu, that you wish to edit, selected.
If you want to edit the main navigation that is at the top of your website, select the dropdown option that is followed by “(Top Navigation Menu).” Shown in the example image.
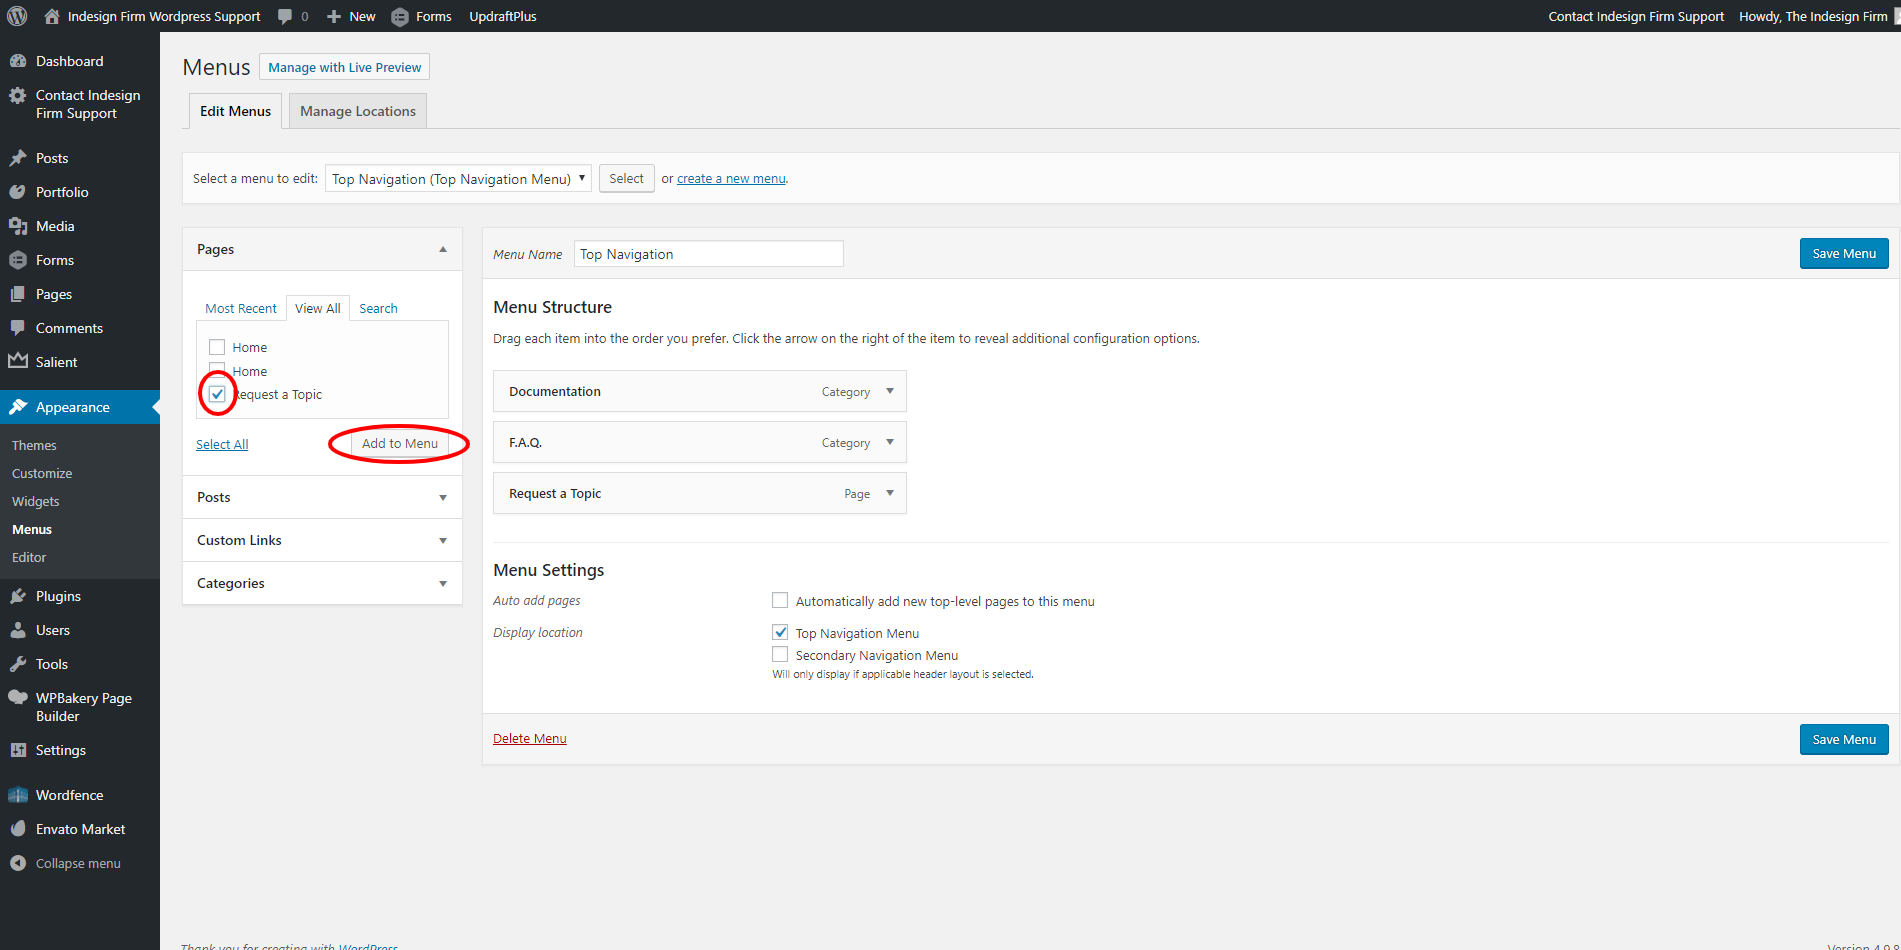
To add a page to your menu, click “View All” under “Pages,” and select the checkbox for all pages you wish to add to the menu. Then click the “Add to Menu” and arrange them in the order that you wish. Click the blue “Save Menu” button when you are finished.
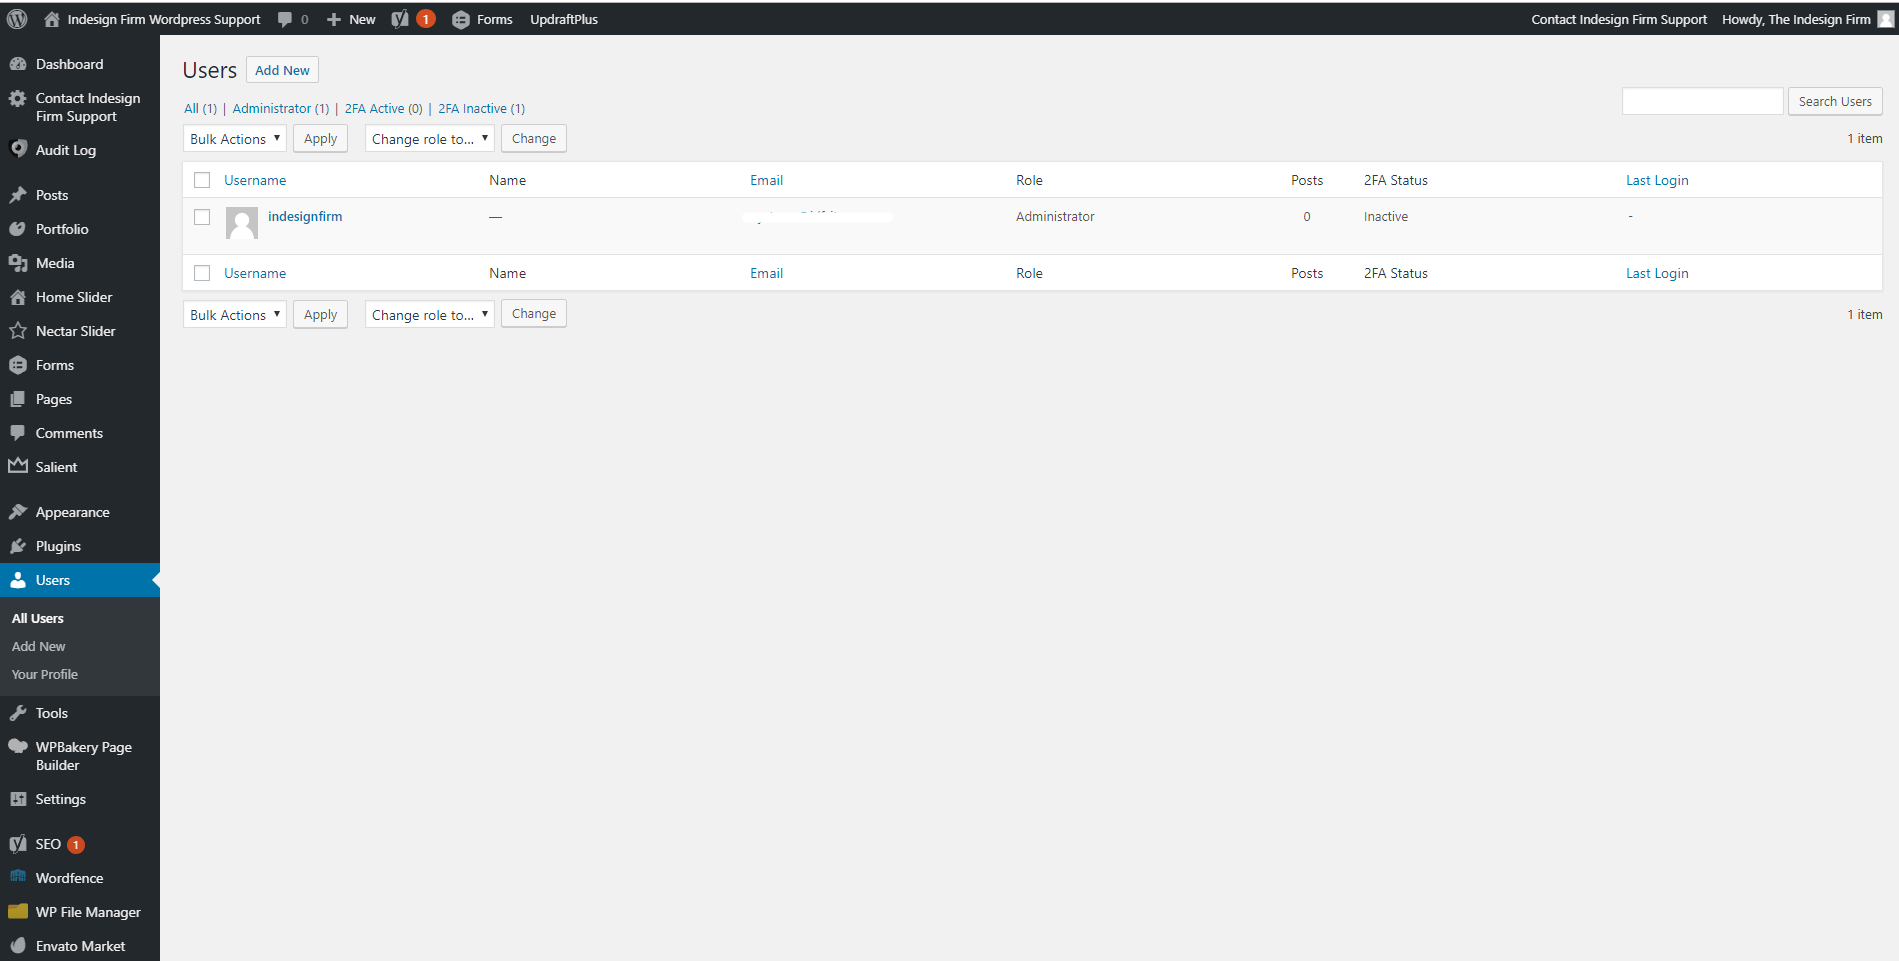
From the dashboard, click the “Users” button in the left side navigation bar. Here you can view a list of all the users on your site, the profiles of each user, and you can add, delete and manage the privileges of each user. User privileges range from “Subscriber” to “Administrator”, and determine what a user can and cannot do on the site. For more information on user privileges, Click Here
To add a new page, simply hover over the “Pages” tab on the left side of your WordPress Dashboard. Click “Add New,” and it will open a fresh page. Title your page and start designing!
To delete a page, click on the “Pages” tab on the left side of your WordPress Dashboard and this will open the list of pages on your website. Find the page you wish to delete, hover your mouse over it, and click the red text that reads “Trash.”
To preview changes you have made, simply click the “Preview” button in the top right of the page editor. If a preview is not already open, it will open a new tab for the preview. Once you have a preview tab, all you need to do is hit “Preview” to refresh the preview tab. There’s no need to close out the tab with every change.
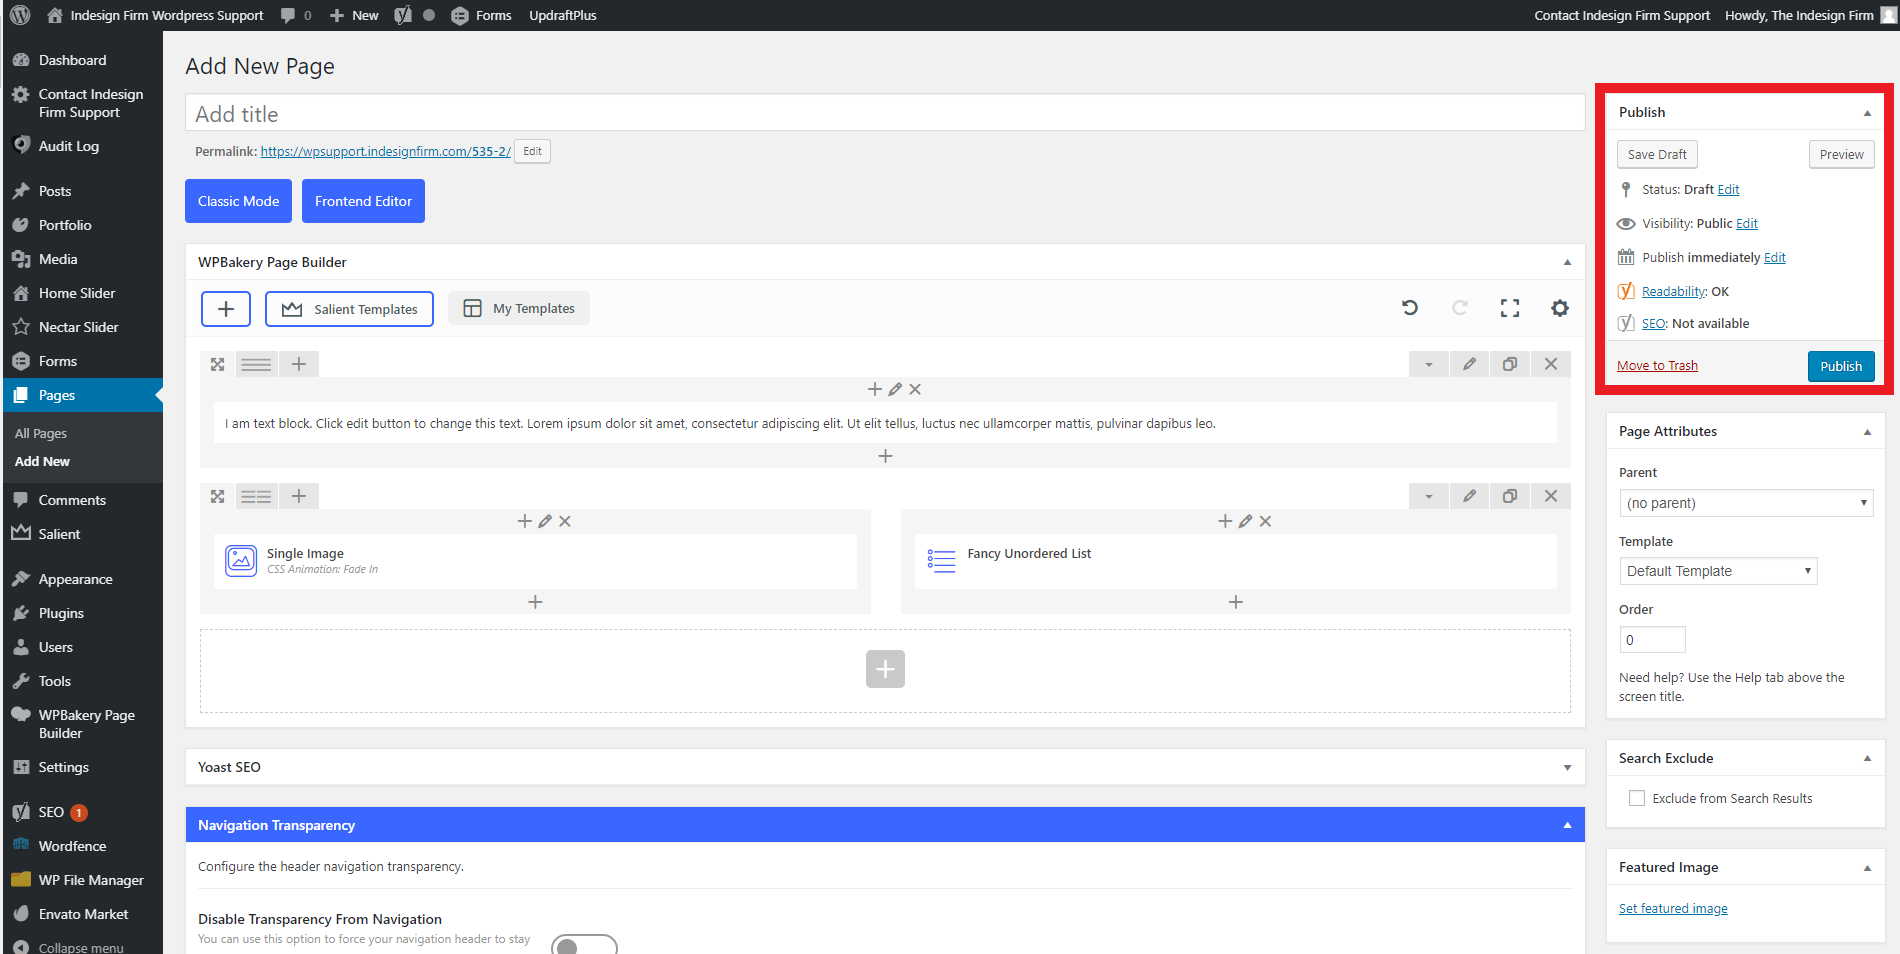
When you first create a new page, it starts as a Draft. A Page Draft is not visible to the public, and cannot be found on the live website. A Published Page is visible to the public and can be found on the live website. The “Publish” block on the right toolbar allows you to check whether a page is a Draft or if it has been Published. You can change between the two as well, by using the “Status” dropdown.
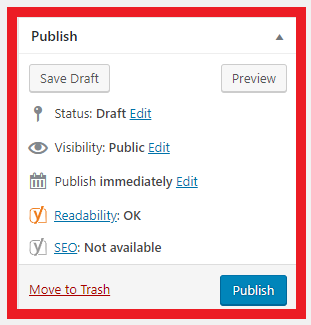
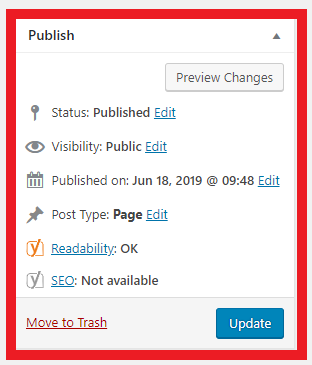
“Save Draft” saves your progress on the Draft without publishing it. “Publish” will turn the Page Draft into a Published Page. “Preview” allows you to view changes without publishing the edits to the live website. “Preview” works the same whether the page is a Draft or it is Published. Once the page has been Published, the blue “Publish” button will change into a blue “Update” button. “Update” will change the Published page to reflect any changes you have made to the page.
To add a user, hover over the “Users” tab on the left side of your WordPress Dashboard. Click “Add New,” and this will open a screen prompting you to input information, as well as select the type of user.
WARNING: ADMINISTRATORS WILL HAVE ACCESS TO EVERYTHING ON YOUR WEBSITE.
To delete a user, click the “Users” tab on the left side of your WordPress Dashboard. This will open a page listing all users on your website. Find and hover over the user you wish to remove and click the red text labeled “Trash.” A confirmation screen will appear; click “Confirm Deletion” if this is the user you do indeed want to delete.
In the Page Builder, understanding how rows and columns are used is crucial. Everything on your website is contained within at least 1 row and 1 column, and using these correctly is important to making sure your website looks good on all devices. When screens get smaller, the columns will collapse in order and stack on top of each other, rather than being side-by-side. Reference the example video for a visual demonstration of this. (1 row can hold up to 6 columns; rows can hold 1, 2, 3, 4, or 6 columns.)
To add a row, make sure you are in the Page Builder. Then, click the big “+” (plus) in the top left of the editor. Click the “Row” button, and this will add a row to your page.
In the Page Builder, you can have many different column configurations. In the video, we show you how to change to a 2 column row, 3 column row, and a 6 column row (you are not limited to only these sizes — play around with the Page Builder to see how many column configurations you can create).
Moving rows within the Page Builder is a quick way to rearrange your content. Simply click, hold, and drag on the 4-arrow icon on the top left of the row and drop it where you wish to place it.
Moving columns within the Page Builder is a quick way to rearrange your content. Simply click, hold, and drag on the grey area around the column, then drop it where you wish to place it.
You can only rearrange columns within the same row.